Your family’s 8mm tapes are more than just old recordings; they are a vital part of your legacy. They hold the voices, laughter, and everyday moments that tell your family’s story. But a legacy that’s locked away in a box can’t be shared or enjoyed. The act of converting your 8mm video tape to digital is about bringing that history back to life for a new generation. It’s about showing your kids what their grandparents were like in their younger years and sharing your own childhood with family and friends. This guide will show you how to protect that legacy, whether you choose the hands-on DIY route or the peace of mind of a professional service.
Key Takeaways
- Preserve your memories before they disappear: The physical tape holding your home movies is fragile and breaking down over time. Digitizing your 8mm collection is a necessary step to stop this natural decay and protect your family's most precious moments from fading away.
- Weigh convenience and quality against cost and control: Using a professional service guarantees high-quality results and saves you time, while the DIY approach gives you full control but requires a significant investment in time, equipment, and technical learning.
- Create a digital archive that lasts: Your work isn't done after the conversion. To truly protect your memories for future generations, create a simple backup system by keeping three copies of your files—two on different local devices and one in the cloud—to safeguard them.
Why You Should Digitize Your 8mm Tapes
If you’ve ever stumbled upon a box of old 8mm tapes in a closet or attic, you know that feeling of holding a time capsule in your hands. Those tapes contain priceless moments: birthday parties, family vacations, a baby’s first steps. But here’s the thing about time capsules—they weren’t built to last forever. The magnetic tape holding those memories is fragile and fading. Digitizing your 8mm tapes isn't just about converting them to a new format; it's about rescuing your family's history from being lost.
Beyond just preservation, bringing your home movies into the digital age makes them accessible again. You can finally watch them without hunting down a working camcorder, share them with a single click, and see them in a quality you might not have thought possible. It’s about turning dusty boxes into living memories you can enjoy and pass down. Those moments are too precious to remain unseen, and every day you wait, they risk fading away completely.
The Truth About Tape Degradation
Let's be honest: 8mm tapes were never meant to be a forever format. The magnetic tape that stores your video is incredibly delicate and breaks down over time. This process, known as tape degradation, happens even when tapes are stored carefully. The magnetic particles can flake off, the binder that holds them together can get sticky, and the tape itself can become brittle. Humidity, temperature changes, and dust all speed up this decay. Converting your tapes to a digital format is the only way to stop the clock and preserve your memories safely, ensuring they’re protected from deterioration and ready for future generations to enjoy.
The Perks of Going Digital
Once your home movies are digitized, a whole new world of possibilities opens up. First, you’ll notice a significant improvement in quality. A professional video transfer service uses high-end equipment designed to get the best possible picture and sound from your old tapes, often making them look and sound better than they have in years. Plus, think of the convenience. Instead of needing a specific, often obsolete, camcorder to watch a tape, your memories will be available on your computer, phone, or smart TV. You can easily edit clips, create highlight reels, and share your favorite moments with family and friends anywhere in the world.
Why You Shouldn't Wait to Convert Them
Those tapes tucked away in your basement are filled with moments that haven't been seen in 20 years or more. They capture the voices of loved ones, the funny outfits, and the everyday magic that made up your family’s story. Waiting to convert them is a gamble. With each passing year, the risk of the tape becoming unplayable increases. Digitizing them now means you can finally relive those memories and, more importantly, share them. Imagine showing your kids what their grandparents were like in their younger years or watching your own childhood birthday parties. These aren't just old videos; they are a vital part of your legacy.
Professional vs. DIY: Which Option Is Right for You?
Deciding how to digitize your family’s 8mm tapes is a big deal. These aren’t just old recordings; they’re irreplaceable moments. The main question is whether to tackle this as a do-it-yourself project or to hand your memories over to a professional service. Both paths have their merits, and the right choice really comes down to your budget, your technical comfort level, and how much time you have on your hands.
Think of it as the difference between cooking a special meal at home versus going to your favorite restaurant. One gives you full control and a sense of accomplishment, while the other guarantees a high-quality result without any of the work. Let’s break down the pros of each approach to help you figure out which one is the best fit for you and your precious home movies.
The Pros of Using a Professional Service
The biggest advantage of using a professional service is peace of mind. When you send your tapes to a company that specializes in digitization, you’re tapping into their expertise and high-end equipment. Professionals use commercial-grade machines designed to get the best possible picture and sound from your old tapes—gear that’s far more advanced than consumer-level converters.
Beyond quality, there’s the convenience factor. A professional video transfer service handles the entire process for you. You don’t have to buy any hardware, learn new software, or spend hours troubleshooting. Plus, if any of your tapes are damaged, wrinkled, or showing their age, many services offer repair and restoration options to salvage footage you might have thought was lost for good.
The Pros of Doing It Yourself
Taking the DIY route puts you in complete control of the project. If you’re tech-savvy and enjoy a hands-on process, converting tapes yourself can be a rewarding experience. You get to manage the entire workflow, from connecting the hardware to organizing the final digital files exactly how you want them. You can work on your own schedule, converting a tape or two whenever you have a free weekend.
This option can also be appealing if you have a very large collection of tapes and the time to commit. By purchasing a digital converter, you can process dozens of tapes for a single upfront hardware cost. It requires patience and a willingness to learn, but for the right person, the satisfaction of preserving your own family history is a huge plus.
Comparing the Costs
At first glance, the DIY approach might seem like the more budget-friendly option. You buy the equipment once and can convert as many tapes as you like. However, it’s important to consider the hidden costs. You’ll need to purchase a reliable converter, and potentially software, and you’re investing a significant amount of your own time. If a tape gets damaged in an old VCR, the cost of losing that memory is immeasurable.
Professional services have a clear per-tape cost. While this may seem higher initially, you’re paying for more than just a digital file. You’re paying for expert handling, superior technology, and a guaranteed result without any of the hassle. With a service like our film transfer, the pricing is transparent, so you know exactly what you’re getting for your investment.
Will You See a Difference in Quality?
In most cases, yes, you will see a noticeable difference in quality. Professional services use advanced technology built for one purpose: creating high-quality, stable digital files from analog sources. This often results in better color accuracy, less visual noise, and clearer audio than what you can achieve with a consumer-grade USB converter. The goal of a pro service is to maximize the potential of your original tapes.
Furthermore, professionals are equipped to handle the quirks of old media. They can often improve the quality of a degraded tape, something a DIY setup simply can’t do. A home converter will just copy a tape’s flaws, while a professional service can often correct them. Whether you're converting video or doing a photo transfer, an expert touch ensures your memories look their best.
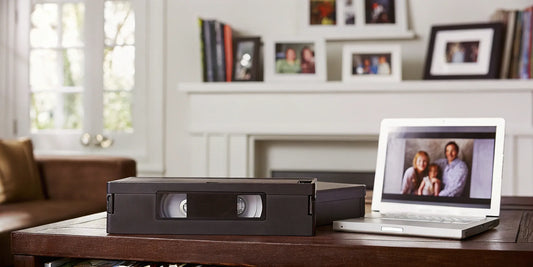
What to Expect from a Professional Conversion Service
Handing over a box of your family’s most precious memories can feel like a leap of faith. You’re not just sending off old tapes; you’re trusting someone with irreplaceable moments. The good news is that professional conversion services are built around this trust. They’ve designed a process that’s not only safe and reliable but also incredibly simple for you.
From the moment your tapes leave your hands, the goal is to preserve them with the highest quality possible. Professionals take care of the entire digitization process for you, from inspecting and cleaning your tapes to converting them into modern digital files. You don't have to worry about sourcing old equipment, troubleshooting technical glitches, or spending hours in front of a computer. Instead, you get to sit back and wait for your newly preserved memories to arrive, ready to be shared and enjoyed all over again. It’s a hands-off experience designed to give you peace of mind and fantastic results.
How the Pros Do It: A Step-by-Step Look
When you send your tapes to a professional service, they go through a careful, multi-step process. First, each tape is inspected by hand to check for any damage. Technicians then use specialized equipment to clean the tapes before conversion begins. This isn't the kind of gear you can find at a local electronics store. Professional services, like our video transfer at YesVideo, use high-end, specialized equipment designed to get the best possible picture and sound from your old tapes. This ensures a stable, high-quality capture that honors the original recording. The entire process is handled by trained experts who know exactly how to manage delicate, aging media.
How They Guarantee Quality
The main advantage of using a professional service is the final quality. Professionals are better equipped to maximize the potential of your tapes, often resulting in a clearer, more stable digital file that truly honors your memories. They can perform color correction to bring faded footage back to life and make adjustments to improve audio clarity. Many services also offer repair options for tapes that are snapped or damaged, salvaging footage you might have thought was lost forever. This attention to detail ensures that the digital version of your memories is the best it can possibly be, preserving them for future generations to enjoy.
Getting Your Digital Files Back
Once the conversion is complete, the service will carefully package your original tapes and send them back to you along with your new digital copies. You never have to worry about losing your originals. When you send your tapes to a service like YesVideo, we take care of the entire film transfer process for you, keeping you updated along the way. Most companies provide tracking for your order so you can see where your memories are at every step. The result is a seamless experience where your only job is to send your media in and wait for the finished product to arrive at your door.
Where Your Digital Memories Will Live
After your tapes are digitized, you’ll have several options for how you receive your new files. You can expect to receive your memories in digital formats like DVDs, USB thumb drives, or as a digital download from the cloud. Each format has its own benefits. DVDs are great for watching on a TV, USB drives make it easy to store and transfer files between computers, and a digital download gives you instant access to share your videos with family and friends online. This flexibility ensures you can enjoy and preserve your memories in a way that fits your life and your technology.
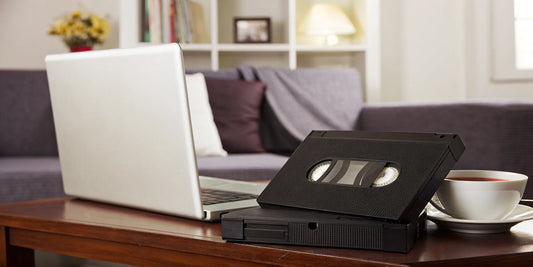
Your DIY Conversion Equipment Checklist
If you’re ready to take on the project of digitizing your 8mm tapes yourself, getting your equipment in order is the first step. Think of it like gathering your ingredients before you start cooking—having everything ready makes the whole process smoother. This checklist covers the essential hardware, software, and storage you’ll need to turn those analog tapes into digital files you can easily share and enjoy.
The Hardware You'll Need
First things first, you’ll need a way to play your tapes. This means finding a working 8mm, Hi8, or Digital8 camcorder that’s compatible with your tapes. This can be one of the biggest hurdles, as these cameras are no longer in production. Once you have a player, you'll need the right audio/video cables to connect it to your computer. You’ll also need a video capture adapter, which is a small device that converts the analog signal from your camcorder into a digital format your computer can understand. If you’re lucky enough to have a Digital8 camcorder, you might be able to connect it directly to your computer using a Firewire cable, which simplifies things a bit.
The Right Software for the Job
Once your hardware is connected, you’ll need software to capture the video as it plays. Your computer won’t just automatically record the footage; you need a program to tell it what to do. The good news is, you might already have what you need. For Mac users, programs like iMovie or QuickTime Player have built-in video capture features. If you’re on a Windows PC, you might need to find a dedicated video capture software like Sony Vegas Movie Studio or other available options. The key is to find a program that can recognize your video capture device and record the incoming video stream in real-time.
Where to Save Your Digital Videos
Digital video files, especially uncompressed ones, are big. Really big. Before you start recording, make sure you have a plan for where you’ll store everything. Your computer’s internal hard drive can fill up surprisingly fast, so I highly recommend getting a large external hard drive. How big? Think in terabytes. A good starting point is a 2-3 terabyte drive, but if you have a lot of tapes, an 8-terabyte drive isn’t overkill. This gives you plenty of room for your raw footage and edited final versions without slowing down your computer.
Common DIY Setup Mistakes to Avoid
Going the DIY route can be incredibly rewarding, but it’s easy to hit a few snags. One of the most common issues is simply finding a reliable, working 8mm camcorder. Since they’re old technology, many have failing belts or heads. Another thing to prepare for is the time commitment. This isn’t a quick weekend project; transferring just a few tapes can take many hours, or even days, because the process happens in real-time. You have to play each tape from start to finish to record it. Be patient with yourself and the technology, and don’t get discouraged if your first attempt isn’t perfect.
How to Convert Tapes Yourself: A Step-by-Step Guide
Alright, if you’ve decided to take the DIY route, let’s get you set up for success. Converting tapes yourself is a rewarding project, but it requires patience and the right tools. Think of it as a real-time journey back in time—a two-hour tape will take two hours to digitize. This guide will walk you through the process, from plugging in the first cable to saving your final video file.
Set Up and Test Your Gear
First things first, let's gather your equipment. You can’t just plug a tape into your laptop, so you’ll need a few key items to act as a bridge. You'll need a working 8mm camcorder that can play your tapes, video capture software for your computer (like QuickTime Player on a Mac or Pinnacle Studio on a PC), and the right audio/video cables to connect your camcorder to your computer. Before you hit record on that precious family vacation from 1998, do a full test run with a non-essential tape to make sure everything is communicating properly. This little bit of prep can save you a major headache later.
Tips for a Flawless Recording
Once your gear is tested and ready, the recording process is pretty straightforward. Start by connecting your camcorder to your computer using the correct cables. Pop the tape into the camcorder and rewind it to the very beginning. Next, open your video capture software on your computer. Here’s the crucial part: you’ll need to press play on the camcorder and the record button in your software at almost the same time. Since the transfer happens in real-time, find a quiet spot where your setup won't be disturbed. You’ll be monitoring the process as it happens, so grab a cup of coffee and enjoy the show.
How to Improve Your Video Quality
Let’s be honest: your home setup probably won’t match a professional studio. Services that offer video transfer use high-end, specialized equipment designed to get the best possible picture and sound from old tapes. However, you can still get great results at home. The key is to use the highest-quality gear you can access. A well-maintained camcorder with clean tape heads can make a world of difference. Before you start, gently clean the heads with a designated cleaning tape. This simple step can clear up a surprising amount of fuzziness and distortion, giving your memories the clarity they deserve.
Keep Your New Digital Files Organized
After all your hard work, the last thing you want is a messy folder of untitled video files. Video files are huge, so your first step is to plan where you’ll save them. I recommend getting a large external hard drive—think 2 or 3 terabytes at a minimum. When you save your videos, you’ll have to choose a file format. An .MP4 file is great for sharing and watching on different devices, while a .MOV file is often larger but can be a better choice if you plan on editing the footage later. Start a simple naming system from the get-go, like "Smith_Family_Reunion_1992.mp4," to keep everything organized and easy to find.
A Quick Guide to Video Quality and Formats
Once your tapes are converted, you’ll have a whole new set of files to manage. Getting a handle on a few key concepts about video quality and file formats will help you store, share, and enjoy your memories for years to come. You don’t need to be a video expert, but knowing the basics ensures your precious moments are preserved in the best way possible.
Think of it like organizing a photo album—a little planning upfront makes it much easier to find and share your favorite pictures later. The same goes for your new digital videos. From understanding resolution to creating a solid backup plan, these simple steps will protect your family’s legacy.
What to Know About Resolution
Resolution refers to the clarity and detail of your video. While you can’t turn a standard-definition home movie into a 4K blockbuster, converting your 8mm tapes to a digital format is a huge upgrade. Digital files capture the best possible quality from the original source, preventing the fuzzy picture and muffled audio that come with tape degradation. A quality video transfer process ensures that the resolution of your digital file is as crisp and clear as the tape allows, preserving the original look and feel without further loss of detail. This means you can watch your memories on modern screens without the distortion you’d get from an old VCR.
Choose the Right File Format
Not all digital files are created equal. The file format determines how your video is stored and what devices you can play it on. The most common and versatile format is MP4, which is compatible with nearly all computers, smartphones, and smart TVs. It offers a great balance of high quality and manageable file size, making it perfect for sharing with family or uploading to social media. Professional services use high-end, specialized equipment to create optimized files, so you don’t have to worry about navigating complex settings. They handle the technical side, delivering your memories in a user-friendly format that’s ready to watch and enjoy.
Plan for Long-Term Storage
One of the biggest perks of going digital is how easy it is to store your memories. Unlike bulky tapes that take up closet space and are vulnerable to heat, humidity, and magnetic fields, digital files can be stored compactly on a hard drive or in the cloud. Digitizing your tapes safeguards your precious memories from physical decay and makes them much easier to manage. When you receive your digital files, think about where they will live. A dedicated external hard drive is a great starting point, but you should also consider a cloud storage service for off-site protection. This ensures your videos are safe from accidents like a hard drive failure or a house fire.
Create a Foolproof Backup System
Having just one copy of your digital memories is risky. A simple yet effective strategy is to keep three copies of your files: two on different physical devices (like your computer and an external hard drive) and one off-site in the cloud. This creates a safety net for your irreplaceable videos. Many professional services, including YesVideo, offer cloud storage access with your order, giving you an immediate off-site backup. Plus, if your original tapes are damaged, some services offer repair and restoration options, ensuring even fragile media can be salvaged and preserved. This multi-layered approach gives you peace of mind, knowing your family’s history is secure.
How to Fix Common Conversion Problems
Even with the best intentions, the DIY conversion process can hit a few snags. From stubborn equipment to less-than-stellar video quality, these issues are common but can be incredibly frustrating when you’re dealing with precious memories. The good news is that most problems have a solution, whether it’s a simple tweak on your end or knowing when to call in the experts. Let’s walk through some of the most frequent challenges and how to handle them.
Solving Equipment Glitches
It’s the moment every DIY-er dreads: you’ve followed the instructions, but your computer just isn’t recognizing the VCR, or the capture software keeps crashing. Equipment glitches are a normal part of the process, especially when you’re connecting older analog devices to modern digital ones. First, try the basics: restart your computer, double-check all your cable connections, and make sure you have the latest drivers installed for your converter. If you’re still stuck after a few attempts, it might not be you—it could be the hardware. Rather than sinking more money into new equipment, this is often a good time to consider a professional video transfer service that uses specialized, reliable tools designed for this exact purpose.
What to Do About Poor-Quality Video
You’ve successfully converted a tape, but the final video is grainy, the colors are washed out, and the picture is fuzzy. Unfortunately, consumer-grade converters can only do so much, and they often can’t overcome the natural degradation of old tapes. While you can’t magically turn a 40-year-old home movie into a 4K masterpiece, professional services use high-end equipment that can capture the best possible picture and sound from your original tapes. Their gear is specifically calibrated to handle old media, often resulting in a clearer, more stable image than you could achieve at home. This can make a huge difference in how you and your family experience these memories.
Fixing Out-of-Sync Audio
There’s nothing more distracting than watching a video where the audio doesn’t match the picture. This is a frequent issue in DIY conversions, where the audio and video tracks are captured separately and don’t line up perfectly. Fixing it requires video editing software and a good amount of patience to manually nudge the audio track until it syncs with the video. If you’re not comfortable with video editing or can’t seem to get it right, don’t worry. Professional conversion services often include repair and restoration options, ensuring that the final digital file has perfectly aligned audio, so you can focus on the moment, not the technical flaws.
How to Manage Your Time (and Sanity)
Digitizing tapes isn’t a quick project. Each tape needs to be converted in real-time, meaning a two-hour tape takes two hours to capture—and that’s before you factor in setup, troubleshooting, and editing. If you have a large collection, the hours can add up fast. It’s important to be realistic about the time commitment. While the DIY route can be rewarding, it can also become a source of stress. If you find the project is taking longer than you expected or causing more frustration than joy, it’s okay to hand it off. Using a service for your film transfer or video conversion saves you time and lets you skip straight to the best part: enjoying and sharing your rediscovered memories.
Keep Your Digital Memories Safe for Years to Come
You’ve done the hard part and converted your tapes. High five! But the work isn’t quite over. Getting your memories into a digital format is the first crucial step, but now you need a plan to protect them. Digital files are much safer than fragile tapes, but they aren't invincible. A hard drive can fail, a laptop can get stolen, and accidents happen. This is where you go from simply saving old videos to creating a true family archive that will last for generations.
Think of it this way: you wouldn't leave your only copy of a precious family photo album sitting on the coffee table where it could get damaged. The same principle applies to your new digital files. Creating a thoughtful system for backing up, storing, and sharing these memories is just as important as the conversion process itself. It’s the final step in ensuring that the laughter from a childhood birthday party or the sweet moments from your parents' wedding are protected forever. A solid backup and sharing strategy ensures your family's history remains safe and accessible for everyone to enjoy, now and for years to come.
Why One Backup Isn't Enough
Relying on a single copy of your digital files is like putting all your eggs in one basket. A computer crash, a lost USB drive, or an accidental deletion could wipe out your precious memories in an instant. That’s why I always recommend the 3-2-1 rule: keep at least three copies of your files, on two different types of media (like your computer's hard drive and an external drive), with one copy stored off-site (like in the cloud). Converting your tapes to a digital format is the best way to protect them from physical decay, but creating multiple backups is how you’ll preserve those digital files for future generations.
Find the Right Cloud Storage
Cloud storage is your best friend for keeping that off-site backup. Services like Google Drive, Dropbox, and iCloud offer a secure and convenient place to store your digitized home movies. The best part? You can access them from any device, anywhere. This makes sharing with family a breeze and gives you peace of mind knowing your files are protected from local disasters like fire or flood. When you use a professional service, you often get a clearer, more stable digital file that’s perfect for uploading. YesVideo even offers its own secure cloud storage, making it simple to access and share your memories right after they’re digitized.
The Best Ways to Share with Family
Now for the fun part: sharing these rediscovered moments! Don’t just email a link and call it a day. Bring your memories to life by creating a shared family album in the cloud where everyone can add comments and their own photos. You could edit together a highlight reel of the best moments for a family member’s birthday or anniversary. Or, go old-school and host a family movie night to watch the digitized videos together. The goal is to make these memories part of your family's current story, sparking conversations and laughter. It’s so much easier than passing around a single, fragile tape.
Preserve Your Memories for Generations
To make sure these memories last, think like a family historian. Once your videos are digitized, take a little time to organize them. Create folders by year or event and give the files descriptive names—"Christmas 1992" is much more helpful than "MOV_0482." This context is priceless for future generations who won't know who's who. Consider creating a simple document that explains the stories behind the videos. By pairing high-quality digital media transfers with thoughtful organization, you’re not just saving files; you’re building a digital legacy that your family will cherish forever.
How to Make Your Final Decision
Choosing between a DIY project and a professional service can feel like a big decision. After all, these are your family’s memories on the line. The right path for you comes down to a few key factors: your budget, your technical comfort level, your available time, and your quality expectations. Let’s walk through each one so you can feel confident in your choice.
Consider Your Budget
At first glance, the DIY route might seem like the most budget-friendly option. But it’s important to look at the full picture. You’ll need to buy a converter, cables, and potentially software, which can add up quickly. If you only have a handful of tapes, the cost per tape could end up being higher than a professional service. Professional services have a clear per-tape cost, so you know exactly what you’re paying for. While the initial price might seem higher, you’re not just paying for the conversion. You’re investing in expert handling, high-end equipment, and the convenience of having someone else do all the heavy lifting. It’s about paying for a great result and total peace of mind.
Assess Your Tech Skills
Be honest with yourself here: how comfortable are you with technology? A DIY conversion involves more than just plugging in a few cables. You’ll need to install software, choose the right settings, troubleshoot any connection issues, and edit the final files. If you enjoy tinkering with gadgets and software, this might sound like a fun weekend project. However, if that description makes you want to run for the hills, a professional service is your best bet. Experts who handle film transfer every day know how to deal with fragile tapes and tricky formats. They also have the tools to repair and restore damaged media, ensuring even your most delicate memories can be salvaged and preserved properly.
How Much Time Can You Commit?
Digitizing tapes isn’t a quick process. The conversion happens in real-time, which means a two-hour tape will take at least two hours to capture on your computer. That doesn’t include the time it takes to set up your equipment, test everything, edit the video, and export the final file. If you have a box full of tapes, you could be looking at dozens of hours of work. Think about what your time is worth. Do you have the free weekends to dedicate to this project? Or would you rather spend that time making new memories? Using a professional service frees you from being tied to your computer, allowing you to simply send off your tapes and wait for the finished digital files to arrive.
Decide What "Good Enough" Means to You
What are your expectations for the final product? If you just want a watchable digital copy and aren’t too concerned about pristine quality, a DIY setup might be perfectly fine. It will get the job done, and you’ll have your videos in a digital format. But if you want the best possible version of your memories, a professional service is the way to go. They use high-end, specialized equipment designed to get the clearest picture and sound from your old tapes—gear that’s far more advanced than consumer-grade converters. Professionals can often clean up the video, stabilize shaky footage, and correct color, resulting in a digital file that looks even better than the original tape.
Related Articles
- How to Digitize 8mm Film: The Ultimate Guide – YesVideo
- How to Digitize 8mm Film: The Ultimate Guide – YesVideo
- How to Convert Hi8 Digital: A Step-by-Step Guide – YesVideo
- How to Digitize 8mm Film: Pro vs. DIY Guide – YesVideo
- Hi8 Tapes Conversion Guide – YesVideo
Frequently Asked Questions
What if my tapes are damaged or broken? Can they still be saved? This is a very common concern, especially with tapes that have been stored for decades. The great news is that many professional services can often repair minor issues like snapped tape or a cracked cassette shell. While a DIY setup can't handle these problems, experts have the tools and experience to salvage footage you might think is lost for good.
Will the digital videos actually look better than my original tapes? While you can't create high-definition video from a standard-definition source, a professional conversion will give you the best possible version of your original footage. Professional-grade equipment is designed to capture a clearer, more stable picture and richer sound than consumer-level converters. This process stops any further degradation and often makes the videos look sharper than they have in years.
What happens to my original tapes after you convert them? Your original tapes are irreplaceable, and any reputable service understands that. After the digitization process is complete, your original media is carefully packaged and returned to you along with your new digital copies. You never have to choose between the original and the new version; you get to keep both.
I don't have a working camcorder. Is a professional service my only option? Finding a functioning 8mm camcorder is one of the biggest challenges of a DIY project. If you don't have the original camera, using a professional service is definitely the simplest and most reliable path. It saves you from having to hunt for and purchase old equipment that might not even work properly, letting you skip straight to the final result.
Once my videos are digital, can I edit them or create my own highlight reels? Absolutely! This is one of the best parts of digitizing your memories. You'll receive standard video files, like MP4s, that you can easily import into basic video editing software on your computer. You can trim clips, combine moments from different tapes, add music, and create highlight reels for birthdays, anniversaries, or family movie nights.