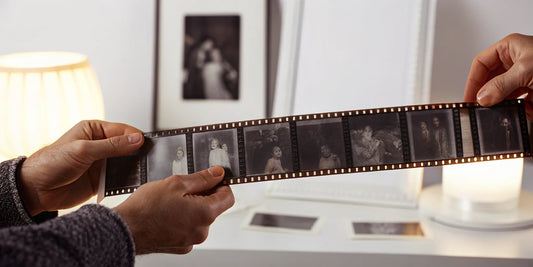
Tucked away in closets and attics are countless forgotten stories captured on strips of film. These 35mm negatives hold moments that deserve to be seen and shared, not left in the dark. But turning them into photos you can actually enjoy can feel like a complicated technical challenge. Where do you even begin? This guide is your starting point. We’ll break down the entire process, making it simple and straightforward for anyone to tackle. Whether you want to use a dedicated scanner or just your smartphone, we’ll show you how to scan 35mm negatives and finally bring those hidden family memories back into the light.
Key Takeaways
- Start with a Clean Negative for a Clearer Photo: Before you scan, gently clean your film with compressed air and always handle it by the edges. A little prep work prevents dust and fingerprints from becoming permanent parts of your digital image, saving you hours of editing.
- Decide if You're Investing Time or Money: Scanning at home gives you full control but requires a significant time commitment to learn and execute. For large collections or your most precious memories, a professional service delivers superior quality without the technical learning curve.
- Protect Your Digital Photos with a Backup System: Your preservation work isn't done after the scan. Create a master archive using a high-quality format like TIFF and keep at least two copies of your photos—one on an external hard drive and another in a cloud service—to safeguard them from being lost.
What Are 35mm Film Negatives?
If you’ve ever stumbled upon a box of old family photos, you’ve likely found strips of brownish-orange film tucked away in sleeves or canisters. These are 35mm negatives, the original format that captured so many of our most treasured moments before digital cameras became the norm. For decades, this was the go-to film for everything from birthday parties and family vacations to professional photography.
Think of these negatives as the master copies of your memories. Every printed photograph you have from that era started with one of these tiny frames. They hold all the original detail, color, and light from the moment the shutter clicked. But because they are physical objects, they are also vulnerable to the effects of time. Understanding what they are is the first step toward protecting the precious memories they contain for future generations to enjoy.
A Quick Intro to 35mm Negatives
At first glance, a film negative can look a bit strange. It’s essentially the opposite of a finished photograph. In a negative, the lightest parts of the scene appear dark, and the darkest parts appear light, almost like an X-ray of the moment. The colors are inverted, too, which is why you see that classic orange tint on color film strips. This is because the film is coated with light-sensitive chemicals that react to create an inverted image. When taken to a photo lab, light was projected through the negative onto photographic paper, reversing the tones and colors back to create the final print you know and love.
The Different Types of Film
While you might find different kinds of film in your collection, like color or black and white, they all share one common enemy: time. Over the years, the delicate chemicals that make up the image on a negative can begin to break down. Old negatives can become brittle, scratched, or warped. You might notice the colors have started to shift, giving your photos a strange tint, or that the images have faded significantly. This deterioration is a natural process, but it means your memories are slowly disappearing. Scanning your negatives turns them into high-quality digital files, effectively stopping the aging process and preserving the details before they are lost for good.
Why You Should Digitize Your Negatives
Turning your film negatives into digital photos is the single best way to ensure your family’s history lasts forever. A digital file won’t fade, tear, or get damaged by moisture. Once your memories are digitized, you can finally share those long-forgotten moments with the rest of your family. Imagine sending your siblings a hilarious childhood photo you rediscovered or showing your kids what their grandparents looked like on their wedding day. Using a photo transfer service lets you relive cherished memories and share them in emails, social media posts, or digital slideshows. It’s about bringing your family’s legacy into the present so it can be enjoyed for years to come.
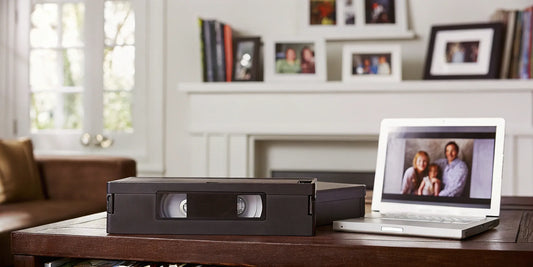
Your Toolkit for Scanning Negatives
Ready to bring those film negatives into the digital world? You have a few different paths you can take, depending on your budget, the quality you’re after, and how much time you want to spend. Think of it like choosing a recipe—some are quick and easy, while others require more specialized tools for a gourmet result. From dedicated scanners that are pros at this specific job to the smartphone in your pocket, there’s a method that will work for you. Let’s walk through the most common tools so you can find the perfect fit for your memory-saving project.
Dedicated Film Scanners
If you’re looking for the best possible quality, a dedicated film scanner is your go-to tool. These machines are built for one purpose: to scan film negatives with incredible detail and color accuracy. They really shine when working with 35mm film, producing sharp, vibrant images that capture the original moment perfectly. Models like the Plustek OpticFilm 8200i SE are often highlighted among the best film scanners because they deliver professional-grade results without a massive learning curve. While they represent a bigger investment upfront, the stunning quality is often worth it for those truly cherished family photos.
Flatbed Scanners with Adapters
You might already have a flatbed scanner at home for documents, and with the right accessory, it can pull double duty. Many flatbed scanners are compatible with film adapters or have a transparency unit built-in, allowing you to scan negatives. The Epson V600 is a fan favorite, and you'll often see it recommended in discussions about scanning film negatives at home because it strikes a great balance between quality, versatility, and price. While a flatbed might not capture the same level of fine detail as a dedicated film scanner, it’s a fantastic and flexible option for digitizing various film sizes alongside your old photos and papers.
Using a Digital Camera to Scan
Here’s a creative approach for the photographers out there: use your digital camera. This method, often called DSLR or mirrorless scanning, can produce excellent, high-resolution results. The setup involves mounting your camera above a backlit negative and using a macro lens to capture a detailed photo of the film frame. It gives you a ton of control over the process, from focus to exposure. If you already own a good digital camera, this can be a very cost-effective way to get high-quality scans, especially for black and white film. It takes a bit of tinkering to get right, but the final images can be truly impressive.
Quick Scans with Your Smartphone
When you just want to see what’s on an old roll of film without any fuss, your smartphone is the perfect tool. There are several ways to convert film negatives to digital, and using an app is one of the easiest. Apps like Filmory help you take a picture of a negative and instantly convert it into a positive image. The quality won’t compete with a proper scanner, but it’s incredibly fast for previewing shots or sharing them on social media. For better results, try a simple DIY setup with a smooth, bright backlight (like a tablet screen). You might be surprised to find this method can produce clearer images than some low-end scanners.
How to Prep Your Negatives for Scanning
Before you even think about turning on a scanner, taking a few minutes to prepare your negatives can make a world of difference in your final images. Think of it this way: the scanner can only capture what it sees, so a clean, well-handled negative will produce a much clearer and more vibrant digital photo. These tiny film strips hold some of your most precious memories, from birthday parties to family vacations, and treating them with care is the first step in preserving them for years to come.
Getting your negatives ready isn't complicated, but it does require a gentle touch and a bit of patience. We’ll walk through the essential steps for cleaning your film, storing it correctly, and sidestepping a few common mistakes that can trip people up. A little prep work now will save you a ton of time editing out dust spots and fingerprints later.
Safely Clean and Handle Your Film
The number one rule of handling negatives is to touch them as little as possible. Always hold them by the edges to avoid getting fingerprints on the image area. The oils from your skin can permanently damage the film’s emulsion, leaving marks that are nearly impossible to remove. To be safe, I recommend wearing a pair of lint-free cotton or nitrile gloves.
For cleaning, start with the gentlest method. A can of compressed air is perfect for blowing away loose dust and lint. Hold the can upright and use short bursts from a safe distance to avoid leaving any residue. If you see more stubborn smudges, you can use a soft, anti-static microfiber cloth, wiping very gently from the center outwards. If this process feels a bit too delicate, you can always leave it to the experts who handle photo transfer every day.
Tips for Proper Storage
How you store your negatives has a huge impact on their lifespan. Over time, film can fade, curl, and degrade, especially when exposed to light, heat, and humidity. The best way to protect your originals is to keep them in a cool, dark, and dry environment with stable humidity levels—closets in the main part of your house are often a better choice than attics or basements.
For an extra layer of protection, place your negatives in archival-safe sleeves. Look for sleeves made from materials like polyethylene or polypropylene, as they are chemically stable and won’t damage your film over time. Storing them properly ensures the original copies of your memories are safe, even after you’ve created digital backups. This is why professional film transfer is such a great option for creating a permanent digital archive.
Common Handling Mistakes to Avoid
A few common slip-ups can easily compromise the quality of your scans. Dust is by far the biggest culprit; it shows up as distracting white specks on your final images. Remember to clean not only your negatives but also the glass surface of your scanner before you begin. A quick wipe with a microfiber cloth can prevent a lot of frustration.
Another issue to watch for is something called "Newton's Rings." These look like strange, rainbow-colored, wavy patterns on your scan. They happen when the shiny side of the film makes direct contact with the scanner glass, causing light interference. Many dedicated film holders are designed to prevent this by slightly elevating the negative, but if you see these rings appear, try repositioning the film strip to fix it.
How to Choose the Right Scanner Settings
Once your negatives are clean and ready, it’s time to dive into the scanner software. The settings you choose here will make all the difference in your final images. Think of it as developing the film all over again, but this time, you have complete digital control. Getting these settings right from the start saves you a ton of editing time later. While it takes some attention to detail, it’s worth the effort. Of course, if you’d rather skip the technical steps, a professional film transfer service handles all of this for you, ensuring your memories are preserved with the best possible quality. But if you're ready to take the wheel, let's get your settings dialed in.
Select the Best Resolution
Resolution determines the level of detail in your scanned image and is measured in DPI (dots per inch). For most situations, like sharing photos online or making standard 4x6 prints, a resolution of 1200 dpi is a great starting point. It captures enough detail for a sharp, clear image without creating massive file sizes. If you ever plan on printing a photo in a much larger format, like a wall poster, you might consider a higher resolution. But for archiving and everyday use, 1200 dpi strikes the perfect balance between quality and practicality, giving you a beautiful digital copy of your memories.
A Quick Guide to Color Correction
Film negatives have an orange tint that needs to be inverted and corrected to reveal the true colors of the original scene. Your scanner's software will have a "negative" mode that handles the basic inversion, but you'll still want to fine-tune the colors. Before you even start scanning, it’s a good idea to calibrate your monitor to ensure what you see on screen is accurate. In the scanning software, look for tools like histograms or color balance sliders. Making small adjustments here can help you achieve a natural look and save you from heavy editing later on.
Pick the Right File Format
You’ll usually have two main file formats to choose from: TIFF and JPEG. Think of TIFF as your digital negative; it’s an uncompressed, high-quality format that saves all the image data your scanner captures. This is the best choice for archival purposes and if you plan to do any serious photo editing. The downside is that the files are very large. JPEG, on the other hand, is a compressed format that results in a much smaller file size. This makes it perfect for emailing, posting on social media, or just saving space. For best results, scan as a TIFF to create a master copy, then save a JPEG version for sharing.
Use Dust and Scratch Removal Tools
Many modern film scanners come with a fantastic feature that uses infrared light to detect and remove dust and scratches from the film's surface. This tool, often called Digital ICE or a similar name, can be a huge time-saver. Old negatives almost always have tiny specks of dust or minor scratches, and this technology can digitally erase many of them without softening the actual image. While it’s not a magic wand for major damage, it does an incredible job of cleaning up minor imperfections, leaving you with a much cleaner scan and far less manual retouching to do in photo editing software.
Pro Tips for a Better Scan
Once you have your setup ready, it’s time to focus on the details that make a good scan great. Getting the best possible quality from your negatives involves a little bit of art and a little bit of science. These tips will help you handle some of the most common challenges so you can create digital images that truly honor your original photos.
How to Scan Different Film Types
Not all film is created equal, and the type you’re scanning will affect your process. You’ll find that scanning black and white film is often more straightforward. Your main focus will be on capturing the full range of tones, from the deepest blacks to the brightest whites, and getting the contrast just right.
Color film, on the other hand, requires a bit more finesse. Color negatives have a distinct orange tint, which is a color mask that needs to be inverted and corrected during the scanning process. This step can be tricky, and it often takes a few adjustments to get the colors looking natural. Don’t be discouraged if your first attempts look a little off—patience is key to restoring those true-to-life hues.
Achieve Accurate, True-to-Life Color
Getting the color right is one of the biggest hurdles in scanning negatives. To capture colors accurately, especially with a digital camera setup, it helps to use a broad-spectrum white light with a high color rendering index (CRI). This ensures the light source itself isn’t tinting your image.
For the most accurate results, it’s also a good idea to calibrate your monitor. This process ensures that the colors you see on your screen are a true representation of the digital file. It might sound technical, but it’s a crucial step if you plan on printing your scanned photos. When your monitor, scanner, and printer are all on the same page, you can trust that what you see is what you’ll get.
Ensure Your Scans Are Sharp and Focused
A blurry scan can be heartbreaking, so let’s make sure your images are as sharp as possible. If you’re using a digital camera, mount it on a sturdy tripod and use a remote shutter or your camera’s self-timer to avoid any camera shake when you take the picture.
It’s also important to remove any filters from your camera lens. While filters are great for creative photography, they can reduce sharpness and cause unwanted reflections during scanning. The same goes for placing any extra glass over or under your negatives. The goal is to have the clearest possible path between your camera’s sensor and the film itself.
How to Avoid Newton's Rings
Have you ever noticed strange, rainbow-like patterns on your scans? Those are called Newton's Rings, and they happen when your film makes direct contact with the scanner glass. This light interference can be frustrating, but it’s usually preventable.
The best way to avoid them is to use a proper film holder, which slightly elevates the negative so it doesn’t lie flat against the glass. Keeping your scanner glass and negatives perfectly clean and dust-free also helps. If you’re still struggling, this is one of those tedious issues that a professional film transfer service can handle for you, ensuring every frame is captured perfectly without any distracting artifacts.
DIY Scanning vs. Professional Services
Deciding whether to scan your 35mm negatives yourself or hand them over to a professional service comes down to a few key factors: your budget, how much time you have, and the quality you’re aiming for. Both paths can get you to the finish line, but the journey looks quite different. Let’s break down what you can expect from each option so you can make the best choice for your precious memories.
Comparing the Costs
At first glance, the DIY route might seem like the budget-friendly choice. You buy a scanner once and can scan as many negatives as you want. A decent dedicated film scanner can run you a few hundred dollars, while a flatbed scanner with a film adapter is a bit less. However, the real cost of DIY scanning is your time. You’re not just paying for the equipment; you’re investing hours into learning the process, scanning each frame, and editing the results.
Professional services have a per-image or per-roll cost, which can seem higher upfront. But when you consider that you don't have to buy any equipment and that the service is saving you dozens of hours, the value becomes clear. If you have a huge collection of negatives, a professional service is often the more practical and even cost-effective solution.
What to Expect for Quality
This is where professional services really shine. Companies that specialize in digitization use high-end, professional-grade scanners that are far more powerful than consumer models. This equipment captures a wider range of color and detail, resulting in sharper, more vibrant digital images. Professionals are also trained to handle delicate and aging film, which can be brittle or have color shifts that are tricky to correct with home equipment.
With DIY scanning, the quality of your final images depends entirely on your scanner, your software, and your skill. You can get good results with a dedicated film scanner and some patience, but it’s tough to match the clarity and color accuracy of a professional photo transfer. If your negatives capture once-in-a-lifetime moments, trusting an expert to get the best possible quality is often worth it.
How Much Time Will It Take?
Don’t underestimate the time commitment of scanning your own negatives. Once you get the hang of it, you can expect to spend about 30 minutes scanning a single 24-exposure roll of 35mm film. That doesn’t include the time for setup, cleaning the negatives, or post-scan editing and organizing. If you have a shoebox filled with a few dozen rolls, you’re looking at a multi-day project.
Choosing a professional service transforms this time-intensive task into a simple errand. Your job is to gather your negatives, pack them up, and send them off. The service handles the entire technical process, delivering finished digital files that are ready to be enjoyed and shared. If you value your free time, this convenience is a major advantage.
When to Call in the Professionals
So, when does it make sense to skip the DIY project and call in the experts? A professional service is likely your best bet if you find yourself in one of these situations:
- You have a large collection: If you’re looking at hundreds or even thousands of negatives, the time and effort required for DIY scanning can be overwhelming.
- You want the highest quality: For irreplaceable memories like weddings, births, and milestone family events, you want the best possible digital copy. Professionals have the tools and expertise to deliver superior results.
- Your film is old or fragile: If your negatives are decades old, they may require careful handling and specialized color correction that’s best left to a trained technician.
- You just don’t have the time: Let’s be honest, life is busy. If learning a new technical skill and spending hours in front of a scanner doesn’t sound appealing, a professional film transfer is the perfect solution.
How to Store Your Digital Photos
You’ve done the hard work of scanning your negatives, and now you have a beautiful collection of digital images. This is a huge accomplishment! But the journey to preserve your memories isn't quite over. The next, and arguably most important, step is creating a safe and organized home for these digital files. Without a solid storage plan, your newly digitized photos are just as vulnerable as the originals. A good system ensures your photos are protected from hard drive crashes or accidental deletion, and it makes finding that one specific photo of your childhood birthday party a breeze. Taking a little time now to set up a storage system will give you peace of mind and make it easy to relive and share your memories for years to come.
Organize Your Scanned Images
If your desktop looks like a digital junk drawer, don't worry. Creating an organized system for your photos is easier than it sounds. The simplest and most effective method is to batch organize your photos into folders by date. Start by creating a main folder called "Family Photos," and inside that, create folders for each year. Within each year, you can make subfolders for specific months or events, like "1995-08 - Beach Trip." This chronological structure immediately gives your collection a logical flow. For extra credit, you can add metadata to your files, like names and locations, which makes them searchable within your photo software.
Back Up Your Digital Memories
Imagine the heartbreak of a computer crash wiping out your entire photo collection. To prevent this, it’s essential to have multiple copies of your files in different places. A great rule of thumb is to have at least two backups: one physical and one in the cloud. A physical backup on an external hard drive protects you if something happens to your computer. A cloud service like Google Photos, Dropbox, or iCloud protects you if something happens to your house, like a fire or flood. This comprehensive backup strategy creates redundancy, ensuring that no single event can erase your precious memories.
Preserve Your Digital Quality for Years
When you scan your negatives, the file format you choose matters for long-term quality. For your master archive, save your images as TIFF or PNG files. These are "lossless" formats, which means they preserve all the original image data without any compression. Think of a TIFF file as your new digital negative—it’s the highest quality version you have. You can then save copies as JPEGs for easy sharing via email or social media. It's also a good idea to periodically check on your digital library. Every few years, make sure your external hard drive is still working and consider migrating your files to newer storage technology to keep them safe and accessible.
How to Fix Common Scanning Problems
It can be a real letdown when you spend time scanning your precious memories, only to find the results are blurry, discolored, or just plain disappointing. Don’t worry—most common scanning issues are fixable. It often comes down to a simple adjustment in your setup or software. Before you get too frustrated, try working through these common problems. And remember, if the DIY route becomes more of a headache than a hobby, professional film transfer services are always there to get the job done perfectly for you.
Correcting Unwanted Color Casts
Ever notice a strange blue, orange, or green tint taking over your scanned photo? That’s a color cast, and it’s one of the most frequent issues when digitizing color negatives. Your first step should be to check your monitor’s calibration. If your screen isn't displaying colors accurately, you can’t trust what you see while you’re editing. What looks perfect on your screen might look completely different when printed or viewed on another device. Taking a few minutes to calibrate your monitor ensures that you have a reliable baseline for color. This simple step helps you make edits with confidence, knowing that the colors you choose are the colors everyone else will see.
What to Do When Scans Are Blurry
A soft or blurry scan can make a cherished memory feel out of reach. Often, the culprit is an extra layer of glass between the film and your scanner or camera lens. If you’re using a digital camera for scanning, make sure you remove any filters, like a UV or polarizing filter, from your lens. These extra optical elements can interfere with sharpness. Similarly, if you’re using a flatbed scanner, avoid placing another piece of glass on top of your negatives to hold them flat. The scanner is designed to focus precisely on its glass surface, and adding another layer can throw that focus off, resulting in a blurry image. Always use a proper film holder to keep your negatives flat and in the correct position.
Solving Common Software Glitches
Scanning software can feel intimidating, but spending a little time getting to know its features can solve a lot of problems before they start. The software that comes with your scanner, like EPSON Scan, is usually quite capable and designed to work seamlessly with your hardware. Explore the settings beyond the "auto" mode to get more control over your results. If you find the included software clunky or you’re looking for a more streamlined workflow, consider a dedicated program. An application like FilmLab is designed specifically to simplify the process of converting negatives into beautiful, high-quality digital photos, handling much of the complex work for you.
Tips for Improving Poor Image Quality
If your scans just look a bit "off"—maybe the colors are muddy or the contrast is flat—a couple of small tweaks can make a big difference. One of the best things you can do is use a mask or a film holder. This device holds the negative in place and blocks out all the extraneous light from the scanner bed around your film strip. By ensuring the scanner is only reading the light coming through the negative, you’ll get a much cleaner scan with more accurate colors and richer contrast. It’s a simple trick that helps your scanner capture the best possible data from your film, giving you a much better starting point for any final edits.
Related Articles
- 5 Best Ways to Convert Negatives to Digital – YesVideo
- Negative Photos Preservation Guide – YesVideo
Frequently Asked Questions
I'm feeling a little overwhelmed. What's the single most important thing I should do before I start scanning? Take a deep breath and focus on preparation. The most critical step you can take is to make sure your negatives are clean before they ever touch the scanner. A quick blast of compressed air to remove dust and a gentle wipe with a microfiber cloth can save you hours of tedious digital cleanup later. Always remember to handle the film strips by their edges to avoid fingerprints. A clean start makes the entire process so much smoother.
You mentioned scanning at 1200 dpi. Is there any reason to scan at a higher resolution? For most people, 1200 dpi is the perfect balance. It creates a high-quality file that’s great for sharing online, viewing on screens, and making standard-sized prints, all without taking up a massive amount of storage space. You would only really need to scan at a higher resolution, like 2400 dpi or more, if you plan on making a very large, poster-sized print or want the ability to crop in on a tiny detail in the photo without losing clarity.
Why are my color negatives orange, and will my scans look like that? That orange tint is completely normal! It’s a color mask that was built into the film to help photo labs produce more accurate colors when making prints. Your scanner software is designed to handle this. When you select the "negative film" setting, the software will automatically invert the image and remove that orange base, revealing the true, vibrant colors of your original photo. So no, your final digital images won't look orange at all.
I have hundreds of negatives. Is it really worth my time to scan them all myself? That really depends on what you value more: your time or the hands-on experience. Scanning a small, curated collection can be a really rewarding weekend project. However, if you're looking at a shoebox filled with dozens of rolls, the time commitment can quickly become overwhelming. If the thought of spending countless hours cleaning, scanning, and editing feels daunting, or if the photos are of truly irreplaceable moments, a professional service is an excellent choice. It guarantees high-quality results and gives you back your free time.
Once I have my digital files, is it safe to get rid of the original negatives? Please don't! Think of your physical negatives as the ultimate master copy of your memories. While your new digital files are perfect for sharing and everyday enjoyment, the film itself is the original source. Technology changes, but that physical negative will always hold the highest possible level of detail. After scanning, you should store your originals in archival-safe sleeves in a cool, dry place. They are your final, tangible backup.