Those tapes in your closet are more than just plastic and magnetic ribbon; they're your family’s story, captured in real-time. The problem is, that story is slowly fading. Every year that passes, the video quality on those tapes degrades a little more, and finding a working VCR becomes a bigger challenge. This is why learning how to convert VHS to MP4 is so important. It’s an act of preservation that stops the decay and brings your most cherished moments into the present. In this guide, I’ll walk you through the options for saving your home movies, ensuring they can be shared and enjoyed by your family for years to come.
Key Takeaways
- Act Now to Save Your Tapes: VHS tapes degrade over time, so the sooner you convert them, the better the quality you'll preserve. Digitizing your home movies is the best way to protect those irreplaceable family moments from being lost forever.
- Choose Your Path: DIY or Professional: The DIY method is a great project if you have the time and technical comfort, but a professional service is the most reliable choice for high-quality results, convenience, and the safe handling of fragile tapes.
- Protect and Share Your Digital Collection: Once your videos are digitized, create a solid backup plan using both a physical drive and cloud storage. A little organization and simple editing will make your memories easy to find and share with family for years to come.
Why You Should Convert VHS Tapes to Digital
If you have a box of old home movies tucked away in a closet or attic, you’re holding onto priceless family memories. Those tapes capture everything from baby’s first steps to holiday gatherings and goofy school plays. But here’s the thing about VHS tapes: they weren’t built to last forever. The magnetic tape inside them degrades over time, putting those irreplaceable moments at risk. Converting your VHS tapes to a digital format like MP4 is the best way to preserve your family’s history for generations to come. It’s not just about saving them from being lost; it’s about making them easy to watch, share, and enjoy all over again.
Keep Your Family Memories Safe
Think of a VHS tape like a photograph left out in the sun. Over the years, the magnetic tape that stores your video and audio begins to break down. This decay can cause fuzzy pictures, distorted sound, and color loss. Tapes can also fall victim to heat, humidity, and dust, which speeds up their deterioration. Every time you play an old tape, it wears down a little more. By choosing a video transfer service, you create a permanent, high-quality digital copy of your memories. This digital file won’t fade or degrade, ensuring that your family’s stories are protected from the physical limitations of outdated technology.
The Perks of Going Digital
Once your home movies are in a digital format, a whole new world of possibilities opens up. You can finally say goodbye to that clunky VCR. Digital files can be watched on your computer, smart TV, tablet, or phone. Imagine easily sharing a clip from your childhood birthday party on social media or sending a link to a family wedding video to relatives across the country. You can organize your videos into playlists, edit them into highlight reels, and back them up to the cloud for extra security. Going digital makes your memories more accessible and shareable than ever before, bringing them back into your life in a modern, convenient way.
Is It Time to Convert Your Tapes?
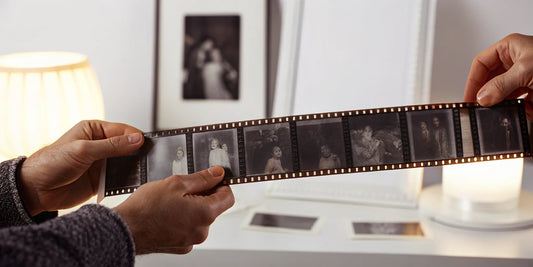
Most VHS tapes have a lifespan of around 20 years before they start to show significant signs of degradation. If your tapes are from the 80s or 90s, the time to act is now. The longer you wait, the higher the risk of losing those memories forever to decay or damage. The same is true for other old media, which is why many people also look into film transfer for their 8mm or 16mm reels. Converting them isn't just about preventing loss; it's about giving yourself peace of mind. Knowing your most cherished moments are safely preserved in a durable digital format lets you relax and focus on what really matters: enjoying and sharing them with the people you love.
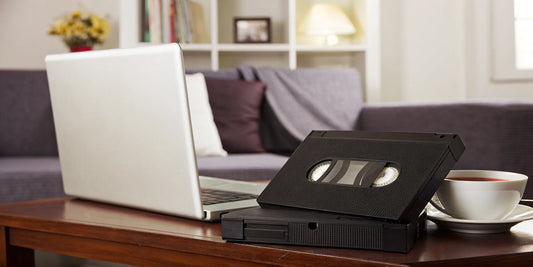
Using a Professional VHS to MP4 Service
If the idea of hooking up old VCRs and fiddling with software sounds like a headache, a professional conversion service is your best bet. Handing over your precious memories can feel like a big step, but choosing the right service takes the technical guesswork out of the equation. It’s the most straightforward path to high-quality digital files, ensuring your tapes are handled by experts with professional-grade equipment. This option is perfect if you value convenience, security, and top-notch results without the time commitment of a DIY project.
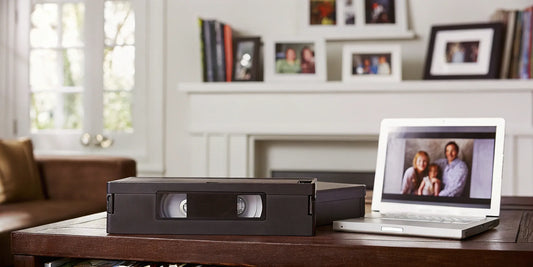
How YesVideo Converts Your Tapes
When you send your tapes to YesVideo, you’re placing them in experienced hands. We’ve designed a secure, worry-free process to preserve your memories with the care they deserve. Once your order arrives at our US-based facility, our team of technicians carefully inspects and digitizes every tape by hand. We use professional-grade equipment to capture the best possible quality from your old VHS tapes. Throughout the process, you can track your order online for complete peace of mind. When we’re finished, you’ll receive your original tapes back, along with beautiful digital copies of your memories, ready to be shared and enjoyed on modern devices. Our video transfer service is built on trust and a love for preserving family histories.
What Other Services Offer
You’ll find a few different companies that can digitize your home movies, and it’s smart to know what your options are. Some services focus heavily on returning your memories on physical media, like DVDs or USB drives. This can be a good fit if you’re looking for a simple physical backup. Other companies might offer different pricing structures or specialize in specific types of media. The key is to find a service that aligns with your goals. Are you looking for easy-to-share digital files, cloud storage, or a simple DVD? Doing a little research helps you make a choice you feel confident about for your irreplaceable memories.
How Much Do Conversion Services Cost?
The cost of converting your VHS tapes can vary quite a bit from one service to another. Pricing is typically based on the number of tapes you have, though some companies might charge by the hour of footage. Keep an eye out for any additional fees for things like digital downloads, cloud storage, or getting your memories on a USB drive. While it’s tempting to go with the cheapest option, remember that price often reflects the quality of the equipment used and the care taken with your tapes. You’re not just paying for a file; you’re investing in the expertise and security needed to safely preserve your family’s legacy.
What to Look for in Quality and Security
Finding a trustworthy company that treats your tapes with care is the most important part of this process. It gives you peace of mind and a beautiful digital collection to show for it. Look for a service that handles all conversions in-house, so your memories aren’t being shipped off to third-party processors. At YesVideo, we do everything by hand in the USA. A good service will also offer step-by-step tracking and clear communication. Check customer reviews to see what others have said about their experience. A transparent and secure process is non-negotiable when you’re dealing with one-of-a-kind memories.
How Long Does It Take?
Patience is key when digitizing home movies. Because the process involves careful, hands-on work, it’s not an overnight service. Turnaround time can range from a few weeks to a couple of months, depending on the company, the size of your order, and how busy they are. While waiting can be tough, a longer processing time often means your tapes are getting the individual attention they need for a high-quality transfer. A reputable service will be upfront about their timeline and keep you updated on your order’s progress. That focus on a secure and thorough process ensures you get your original tapes and new digital memories back safely.
The DIY Method: What You'll Need
Going the DIY route to convert your VHS tapes is a totally achievable project, and honestly, it can be a really rewarding trip down memory lane. It just takes a bit of patience and the right gear. Think of it like setting up a mini-production studio right in your living room. Before you start dusting off those old tapes, let’s walk through exactly what you’ll need to gather. Getting your setup right from the start will make the whole process smoother and ensure your precious memories look their best in their new digital format.
Essential Hardware for a DIY Setup
First things first, you'll need a working VCR. This is the heart of your operation, so it’s crucial that it’s in good shape. If you have your old one stored away, give it a test run to make sure it still plays tapes smoothly without eating them. If you need to find one, check out local thrift stores or online marketplaces, but try to get one you can test first. Besides the VCR, you’ll need a computer (either a Mac or PC) with enough free hard drive space to store your new video files. A good rule of thumb is to have at least a few gigabytes of free space for every hour of video you plan to digitize.
The Right Cables to Connect Everything
Now, let's get everything talking to each other. You'll need a way to connect your VCR to your computer, and that happens in two steps. First, you’ll connect the VCR to a video capture device using RCA cables—those are the familiar red, white, and yellow plugs. The yellow is for video, while the red and white handle the left and right audio channels. Second, the video capture device will plug directly into your computer, usually through a USB port. If you’re converting from an old camcorder, double-check its output ports. Some use a single S-Video cable for higher quality video, which your capture device might also support. Getting the connections right is key to a clean transfer.
Choosing a Video Capture Device
The video capture device is the magic wand in this whole process. It’s a small piece of hardware that acts as a bridge, converting the analog signal from your VHS tape into a digital format your computer can understand. There are many options out there, but some of the most popular and reliable ones include the Elgato Video Capture, Diamond VC500, and ClearClick. When you’re shopping for one, the most important thing to check is its compatibility with your computer’s operating system, whether you’re using Windows or macOS. Most devices come with the basic software you need to get started, making them a great all-in-one solution for your project.
Free Software to Get the Job Done
You don’t necessarily have to spend money on software to digitize your tapes. If you're comfortable with a more hands-on approach, free programs can work wonderfully. One of the most powerful and popular options is OBS Studio, which is an open-source program used by streamers and video creators everywhere. You can set up your video capture device as a source within OBS and simply hit 'record' to save the playback as a video file on your computer. It offers a ton of control over the final output, though it might take a little time to get familiar with all the settings. It’s a fantastic, budget-friendly way to get high-quality results.
When to Pay for Premium Software
While free software is great, sometimes paying for a premium program can save you a lot of time and frustration. Paid software, like Movavi Video Editor or Wondershare UniConverter, is often designed with a more user-friendly interface specifically for tasks like video capture. These programs usually guide you through the setup process step-by-step, making it much easier to get started. They also tend to bundle in helpful features, like simple editing tools that let you trim away the static at the beginning and end of your tapes. If you value a streamlined experience and want access to customer support, investing in paid software might be the right move for you.
Software Features That Matter
Whether you go with a free or paid option, there are a few key software features you should look for to make your project a success. First, ensure it can capture video from an external source—that’s your video capture device. Next, check the output options. You’ll want the ability to save your files as MP4s, as it’s a universal format that works on almost any device. It’s also helpful if the software allows you to choose other formats like AVI or MOV. Finally, look for basic editing functions. Being able to trim clips, make simple color corrections, or adjust the audio levels within the same program will save you a lot of hassle later on.
Your Step-by-Step Guide to DIY Conversion
Ready to roll up your sleeves and digitize those tapes yourself? Taking the DIY route can be a rewarding project. With the right tools and a bit of patience, you can turn those analog memories into digital files you can easily share and enjoy. Let’s walk through the process step-by-step.
Set Up Your Conversion Station
First things first, you’ll need to create a dedicated space for your project. Find a stable surface near your computer where you can set up your VCR. The core of your setup will be a VCR, your computer, and a video capture device that acts as a bridge between the two. You’ll connect the VCR to the capture device with RCA cables (the red, white, and yellow ones), and then plug the capture device into your computer’s USB port. It’s a simple chain that gets your analog video signal into a digital format your computer can understand. Think of it as building a little time machine on your desk.
Prep Your Tapes for Transfer
Before you hit record, take a moment to inspect your tapes. If they look dusty, gently clean the exterior. Check for any visible damage to the tape itself, like crinkles or tears. It’s also a good idea to rewind each tape to the beginning and do a quick test run in the VCR to make sure it plays properly. If a tape is showing signs of mold or seems especially fragile, it’s best to stop and let a professional handle it. A damaged tape can easily get chewed up by a VCR, and you don’t want to risk losing those precious moments. For delicate jobs, a professional video transfer service has the right equipment to safely handle fragile media.
Start the Recording Process
This is where the magic happens. Once everything is connected, open your video capture software. In the settings, you’ll need to select your capture device as the video and audio source. Cue up your VHS tape to where you want to begin recording. Now, for the most important part: press play on your VCR and, at the same time, click the record button in your software. The conversion happens in real-time, which means a two-hour tape will take two hours to digitize. You’ll need to monitor the process to stop the recording when the tape ends. It’s a perfect excuse to rediscover what’s on those tapes as they play.
Organize Your New Digital Files
Once the recording is finished, you’ll have a raw digital video file on your computer. This file might include some unwanted bits at the beginning or end, like static or a blue screen. You can use a free video editing tool to trim these parts off and clean up your video. Software like Handbrake is also great for compressing the file into the final MP4 format, making it easier to store and share. I highly recommend creating a simple naming system for your files right away, like "FamilyVacation_July1998.mp4" or "Kids_FirstSteps_1995.mp4." This little bit of organization will make it so much easier to find your favorite memories later.
How to Fix Common Problems
Don’t be discouraged if you hit a snag—it’s a normal part of any DIY tech project. One common issue is having video but no sound. Often, this can be fixed by ensuring your audio cables are securely connected from the VCR to the capture device. You might also see an error message in your software, like "Failed to initialize device." If that happens, try restarting the program, selecting a different video resolution in the settings, or reinstalling the driver for your capture device. Troubleshooting can take time, and if you find yourself getting frustrated, remember that there are services like YesVideo that handle all the technical work for you.
How to Improve and Store Your Digital Videos
Once you’ve converted your VHS tapes, the journey isn’t quite over. The raw digital files are a fantastic start, but a few extra steps can turn them into polished, shareable memories that are safely stored for years to come. Think of this as the final touch that honors the effort you've put in. Taking the time to enhance your videos and create a solid storage plan ensures your family's history is preserved exactly as you remember it—or maybe even a little better.
This part of the process is all about maximizing the quality of your new digital files and protecting them from being lost. From simple editing tricks to smart backup strategies, these final steps will make all the difference in how you enjoy and share your digitized home movies. Let’s walk through how to give your memories the care they deserve.
Find the Best Recording Settings
Before you even press record in your capture software, take a moment to check the settings. The choices you make here will directly impact the quality of your final MP4 file. While you can’t add quality that wasn’t on the original tape, you can certainly preserve as much of it as possible. Look for options related to resolution, frame rate, and compression. Aim for a resolution that matches the source—standard definition is usually fine for VHS. Choosing the right settings from the start saves you from having to re-do the entire transfer, so a few minutes of prep here is well worth it.
Tips for Better Audio Quality
There’s nothing more frustrating than finishing a transfer only to find there’s no sound. This is usually a simple connection issue. Double-check that your RCA cables (the red and white ones) are securely plugged into both the VCR and your capture device. In your recording software, you should see an audio meter that bounces when sound is playing. If it’s flat, check your computer’s sound settings to make sure it’s recognizing the capture device as an audio source. A quick sound check before you start the full recording can save you a major headache later.
Simple Ways to Enhance Video
Your raw digital file will be an exact copy of the VHS tape, complete with any blank sections or shaky camera work. Using a simple video editor, you can easily trim these unwanted parts. Many programs allow you to cut out the static at the beginning and end of a tape or combine several shorter clips into one cohesive movie. You can also add simple titles or dates to give context to the footage. This basic editing can transform a long, unedited recording into a highlight reel that’s perfect for sharing with family and much more enjoyable to watch.
Where to Store Your Digital Memories
Now that you have your precious digital files, you need a safe place to keep them. Don’t leave them sitting on your computer’s desktop! The best approach is to have multiple copies in different locations. Start by saving a copy to an external hard drive. Then, upload another copy to a cloud storage service like Google Drive or Dropbox. This ensures that if one copy is lost or damaged, you always have a backup. For families with digital files scattered across old DVDs and memory cards, a Digital Media Transfer service can help consolidate everything into one secure place.
A Simple Backup Plan
Think of your backup plan as digital insurance for your memories. A good rule of thumb is the 3-2-1 method: keep at least three total copies of your files, on two different types of media (like your computer and an external hard drive), with at least one copy stored off-site (like in the cloud). This might sound like a lot, but it’s the most reliable way to protect your videos from hard drive failure, accidents, or theft. Setting this up right after you finish your video transfer gives you peace of mind knowing your family’s legacy is secure.
DIY vs. Professional Service: Which Is Right for You?
Deciding between converting your VHS tapes yourself and using a professional service comes down to three things: your budget, your free time, and your comfort level with technology. Both paths can get you to the finish line, but the journey looks quite different. If you’re a hands-on person who enjoys a project, DIY might be calling your name. But if you’d rather have an expert handle your precious memories with care and precision, a professional service is likely the better fit. Let’s break down the key differences to help you decide which route is right for you and your family’s tapes.
A Look at the Costs
At first glance, the DIY approach might seem like the cheaper option, but the costs can add up. You’ll need to buy equipment, including a working VCR, a video capture device, and the right cables. While you can find free software, premium versions often deliver better results. This initial investment can be worthwhile if you have a huge collection of tapes, but for just a few, it might not be cost-effective.
Professional services charge on a per-tape basis. While this may seem more expensive upfront, it includes the use of high-end equipment and expert handling, saving you from buying your own gear. A professional video transfer is an investment in quality and convenience, with no surprise costs or technical headaches.
The Time Commitment
The biggest hidden cost of the DIY method is your time. Converting tapes is a real-time job—a two-hour tape takes two hours to record onto your computer, and that doesn’t include setup, troubleshooting, or editing. If you have a box full of tapes, you could be looking at a project that takes up several weekends. You’ll need to be present to start and stop the recording for each tape.
Using a professional service is the "set it and forget it" option. Your main time commitment is gathering your tapes and sending them in. Most services complete orders within a few weeks, and you get a ready-to-watch digital collection in return. It’s the perfect choice if you value your time and want the process handled for you.
What to Expect for Quality
When you convert tapes yourself, the quality of your digital files depends entirely on your equipment and the condition of your tapes. An old VCR can damage fragile tapes, and a cheap capture device can result in a fuzzy or distorted video. There’s a learning curve to getting the settings just right for the best possible picture and sound.
Professional services use broadcast-quality equipment that is maintained and calibrated for the best results. Technicians know how to handle old, brittle tapes and can often get a better-quality transfer than you could at home. At YesVideo, every tape is processed by hand by a team of experts, ensuring your memories are preserved with the care they deserve. This professional touch often leads to a much clearer and more stable digital copy.
When to Call in the Pros
If the thought of tracking down a VCR and wrestling with cables and software sounds overwhelming, that’s a good sign it’s time to call in the pros. If your tapes are very old, have been stored in less-than-ideal conditions, or show signs of mold or damage, an expert is best equipped to handle them safely. A professional service is also the most practical option when you have a large collection and simply don’t have the hours to dedicate to a DIY project.
Ultimately, choosing a professional service gives you peace of mind. You’re not just converting a video; you’re preserving irreplaceable moments. Finding a trustworthy company ensures your memories are treated with respect and returned to you as a beautiful digital collection you can easily share for years to come.
Tools to Organize and Share Your Memories
Once your VHS tapes are converted into shiny new MP4 files, the real fun begins. This is your chance to take that dusty box of tapes and transform it into a living, breathing library of your family’s history. It’s about more than just saving files on a computer; it’s about making those memories easy to find, enjoy, and share with everyone you love. Think of it as curating your family’s personal museum, where every clip tells a story.
With the right tools, you can turn raw footage into treasured keepsakes. Imagine trimming out the shaky parts of a birthday video to create a perfect highlight reel, or combining clips from a dozen different tapes into a single video for a family reunion. Getting your memories digitized is the first step, but organizing and sharing them is how you bring them back to life. Whether you’re creating a digital media transfer to pass down to your kids or just want to send a funny clip to your siblings, these tools will help you get it done.
Cloud Storage Services
The first rule of digital preservation is to always have a backup. Your newly digitized memories are irreplaceable, so keeping them in just one spot is a risky game. Cloud storage services are a fantastic way to keep your video files safe. Platforms like Google Drive or Dropbox store your files securely online, so even if your computer crashes or an external hard drive fails, your memories are protected. It also makes them accessible from any device, anywhere. For ultimate peace of mind, try to keep at least two copies of your files: one on a physical drive at home and one in the cloud.
Easy Video Editing Software
You don’t need to be a professional filmmaker to give your home movies a little polish. Modern video editing software is incredibly user-friendly and can help you make simple tweaks that make a huge difference. You can easily trim the first few seconds of a clip where you were just figuring out the camera, combine the best moments from a family vacation into one short video, or add simple text to label a date or an event. Programs like iMovie on Mac or Microsoft Clipchamp on Windows are perfect for beginners and let you focus on the fun parts of editing without a steep learning curve.
Apps for Organizing Your Collection
A little organization goes a long way in making your digital video library easy to navigate. Start by creating a simple folder system on your computer, perhaps organizing files by year and then by event (e.g., "1994" > "Christmas at Grandma's"). Giving each file a descriptive name is also a game-changer. For a more visual approach, you can use photo and video management apps like Google Photos, which can help you sort clips and even recognize faces. The goal is to create a beautiful digital collection that’s as easy to flip through as a classic family photo album.
Platforms for Sharing with Family
The joy of digitizing your memories truly comes alive when you share them. Instead of mailing a DVD, you can now send a link that your entire family can watch instantly. Uploading your videos to a platform like YouTube and setting them to "unlisted" allows you to share them privately with anyone you choose. You can also create shared albums on Google Photos or Apple Photos, where family members can not only view the videos but also add their own photos and comments. It’s a wonderful way to relive moments together, no matter how far apart you are.
Related Articles
- Best VHS Video to Digital Converters: Top Picks
- VHS Tape to Digital: The Ultimate 2024 Guide
- Change VHS to Digital: The Ultimate 2024 Guide
- Convert VHS to Digital: The Ultimate 2024 Guide
- Convert VHS to Digital: The Ultimate 2024 Guide
Frequently Asked Questions
My tapes are really old and have been in the attic for years. Are they even salvageable? This is a very common concern, and the answer is usually yes! Magnetic tape is surprisingly resilient, but it's true that heat, humidity, and time can cause damage. If you see any visible mold or the tape itself looks crinkled, it's best not to risk playing it in a VCR. A professional service has the specialized equipment and expertise to safely handle fragile tapes and often salvage footage you might think is lost for good.
What format will my videos be in, and will I be able to watch them in the future? Your videos will be converted to MP4 files, which is the universal standard for digital video. Think of it as the video equivalent of a JPEG for photos. It’s compatible with virtually every modern device—computers, smart TVs, phones, and tablets—and is easy to share online. Because it's such a widely adopted format, you can be confident that your memories will remain accessible for many years to come.
Is it really worth paying for a professional service when I can just buy the equipment myself? It really comes down to what you value more: your time or a hands-on project. The DIY route can be rewarding, but the cost of a good VCR and capture device can add up, and the process is very time-consuming. A professional service is an investment in quality and convenience. You get the benefit of broadcast-grade equipment and expert technicians, which almost always results in a better-quality digital file without you having to spend your weekends troubleshooting.
What happens to my original VHS tapes after I send them in? A reputable company will always return your original tapes along with your new digital copies. Your tapes are irreplaceable, and a trustworthy service understands that. Look for a company that offers order tracking and keeps the entire process in-house, so you know exactly where your memories are at all times. You should never have to choose between your originals and your new digital files.
Besides VHS, I have other old media like film reels and photo albums. Can I get everything digitized at once? Absolutely. Many families have a mix of media formats that tell their story. Services like YesVideo are equipped to handle not just VHS tapes but also film reels, camcorder tapes, photo prints, and even entire photo albums. Consolidating everything in one order is a simple and efficient way to create a complete digital archive of your family’s history, ensuring no memory gets left behind.