If you found a cracked piece of your grandmother’s china, you wouldn’t try to glue it back together with whatever’s in the junk drawer. A broken cassette tape holding precious family memories deserves that same level of care. These tapes are audio heirlooms, capturing moments you can never get back. When the casing is cracked or the tape is snapped, the recording itself is at risk. A risky DIY fix could ruin it forever. This is a job for professional cassette tape repair. Finding a local specialist ensures your irreplaceable memories get the expert attention they deserve.
Key Takeaways
- Resist the DIY Urge: While fixing a tangled tape with a pencil seems easy, one wrong move can permanently destroy your recording. Professionals have the right tools and a steady hand to safely mend your cassettes, giving your memories a second chance.
- Do Your Homework on Repair Services: Entrusting your tapes to someone requires confidence. Look for a service with a history of positive customer reviews, a professional website, and clear, upfront communication about their process and pricing.
- Repair for Preservation, Not Just Playback: The ultimate goal is to save the memories, not just the tape. A successful repair makes your cassette stable enough for high-quality digitization, which is the only way to truly protect your recordings from future degradation and make them shareable.
Why You Should Leave Cassette Tape Repair to the Pros
Finding a box of old cassette tapes can feel like striking gold. They might hold recordings of your kids' first words, a mixtape from a college friend, or your garage band’s demo. But what happens when a tape is tangled, cracked, or just won’t play? While it’s tempting to try a quick fix with a pencil and some tape, you risk losing those memories forever. Handing your tapes over to a professional is the best way to ensure they’re safely restored and ready for listening. A pro has the right tools and a steady hand to fix the problem without causing more damage, giving your precious audio a second chance.
What's Wrong With My Cassette Tape?
After decades in storage, a lot can go wrong with a cassette. The most common issue is the dreaded "tape salad," where the thin magnetic tape gets tangled and pulled from its shell. The plastic casing itself can become brittle and crack, or the internal pressure pad—a tiny piece essential for playback—can fall off. Over time, the tape itself can degrade, shedding its magnetic oxide coating or becoming sticky. This not only affects the sound quality but can also damage your cassette player. These issues require more than a simple rewind; they need a delicate touch to avoid creasing or snapping the tape, which would permanently ruin the audio.
Common Causes of Tape Damage
Cassettes are surprisingly complex little packages, and after years tucked away in a closet or attic, several things can go wrong. The most infamous problem is "tape salad," where the delicate magnetic ribbon gets chewed up and tangled, spilling out of the shell. But the issues can be less obvious. The plastic casing can become brittle with age and crack, exposing the tape to dust and damage. Inside, a tiny foam square called a pressure pad, which is essential for clear playback, can dry out and fall off. Even the tape itself isn't immune to time. It can begin to shed its magnetic coating or develop "sticky-shed syndrome," where the binder breaks down, leaving a gummy residue that can ruin both the recording and your player.
Is Your Cassette Player the Problem?
Before you blame the cassette, it’s worth considering if your player is the real troublemaker. If your deck repeatedly "eats" tapes, the issue is likely dirty playback heads or failing internal belts. Continuing to use a faulty player is a surefire way to damage your entire collection. Another sneaky problem is a broken auto-stop feature. On a functioning player, this mechanism stops the motor when the tape reaches the end. If it’s broken, the player will keep trying to turn the spool, putting immense strain on the tape until it snaps or is pulled completely off its hub. This is why professional digitization services are so important; we use meticulously maintained equipment to ensure your tapes are handled safely during the transfer process.
Why Expert Handling Protects Your Tapes
A professional technician knows exactly how to handle these delicate situations. They have specialized tools to safely open the cassette shell, untangle and smooth out the tape, and even transplant it into a new shell if the original is broken. More importantly, they can diagnose the root cause of the problem. Sometimes the issue isn't the tape but the player itself, which might need cleaning or new belts. An expert can identify this and prevent your other tapes from being damaged. Entrusting your memories to a pro ensures the repair is done right, so you can finally preserve those recordings by converting them to a digital format for safekeeping.
A Look Inside: Key Cassette Components
To understand why a professional touch is so important, it helps to know what’s actually going on inside that plastic shell. A cassette isn’t just a spool of tape; it’s a miniature machine with several delicate parts that must work in harmony for clear playback. When one piece fails, the whole system can fall apart, putting your audio at risk. Here are the key players inside every cassette and why they require careful handling.
- Slip Sheets: Tucked between the tape and the shell are two thin plastic sheets. These act as a liner, reducing friction so the tape can glide smoothly from one spool to the other. They have a lubricated side that faces the tape, and if they get wrinkled or damaged, the tape can snag and tangle.
- Pressure Pad: This is the tiny foam or felt pad mounted on a small metal spring that you can see in the center opening of the cassette. Its job is to gently press the magnetic tape against the playback head of your cassette player. If this pad falls off—a very common problem with old tapes—the sound will be muffled, distant, or completely gone.
- Rollers: In the corners of the cassette, you’ll find two small rollers that help guide the tape along its path. Over time, the tiny pins they spin on can lose lubrication, causing them to squeak or stick. This can cause the tape to move unevenly, resulting in distorted audio.
- The Tape Itself: The most critical component is, of course, the magnetic tape. This thin ribbon of plastic is coated with magnetic particles that hold the audio recording. With age, this coating can begin to flake off or become sticky from humidity, a condition known as "sticky-shed syndrome." Playing a damaged tape can not only ruin the recording but also gum up and damage your cassette player. Understanding how these parts work together makes it clear that a successful repair requires more than just a bit of tape and a steady hand.
How to Find a Cassette Repair Service You Can Trust
Finding the right person to handle your precious cassette tapes can feel like a big decision. After all, these aren't just plastic shells; they hold irreplaceable sounds and memories, from a child's first words to a mixtape from a loved one. The good news is that there are skilled professionals who specialize in bringing old audio back to life. The key is knowing what to look for so you can hand over your tapes with confidence. When a cassette is damaged, it’s not just the tape that’s at risk, but the memories stored on it. That’s why choosing a repair service isn’t something to rush.
You need a partner who understands the sentimental value of your collection and has the technical expertise to handle fragile media. In this section, we'll walk through how to find a reliable service, whether it's a local shop down the street or a specialist you find online. We'll cover the pros and cons of each, what to look for in a quality service, and how to verify their reliability before you commit. By the end, you'll have a clear roadmap for finding an expert who can safely mend your tapes, preparing them for the next step in their preservation journey: digitization.
Local vs. Online Cassette Repair: Which Should You Choose?
Your first decision is whether to go local or use an online service. A local repair shop offers the benefit of face-to-face interaction. You can explain the issue in person, ask questions directly, and avoid the potential anxiety that comes with shipping your one-of-a-kind tapes. However, finding a qualified vintage audio expert in your area isn't always possible. If you can't find a local option, many excellent online services are available. You can simply ship your broken vintage audio equipment to them, and they’ll fix it and send it back. This opens up a much wider pool of specialists, ensuring you find someone with the right skills for your specific needs.
Your Checklist for Choosing a Repair Service
Once you have a few potential services in mind, it’s time to do a little homework. Start by looking for social proof. You’ll want to find a business with a history of happy customers, so take the time to look for online reviews and testimonials on independent sites. A reputable service will have a clear and professional website that outlines its process, the types of repairs it handles, and how it cares for your media. Pay attention to their communication style, too. Are they responsive and willing to answer your questions? A trustworthy service will be happy to provide details and make you feel comfortable with the process from the start.
How to Vet a Repair Service for Quality
A reliable repair service will be upfront about what it can and can't fix. Look for a clear list of services that addresses common problems like tangled or broken tape, cracked casings, or tapes with no sound. Transparency in pricing is another huge indicator of quality. While costs can vary, a trustworthy business should be able to give you a general idea of their rates. For example, some services note that repair prices start as low as $13 and go up depending on the complexity of the fix. This kind of clarity helps you make an informed decision and shows that the company operates professionally and with integrity.
What Happens When You Send Your Tapes for Repair?
Handing over your precious memories for repair can feel a bit nerve-wracking, but knowing what to expect makes the entire process much smoother. Most professional repair services have a straightforward system designed to fix your tapes and get them back to you safely. From identifying the problem to understanding the timeline, here’s a breakdown of what a typical repair experience looks like.
Common Fixes: From Snapped Tapes to Damaged Shells
First, it helps to know what can actually be fixed. Cassette tapes are surprisingly resilient, and experts can handle a wide range of issues. The most common problems include snapped or tangled tape, a cracked or broken plastic shell, and worn-out internal parts like felt pressure pads that degrade over time. Some services offer a standard tune-up that replaces aging components to prevent future problems. Whether your tape was chewed up by an old player or simply fell apart from age, there’s a good chance a specialist can restore it to working condition, making it ready for playback and digitization.
How Pros Repair Your Cassettes: Step-by-Step
The journey to getting your cassette fixed is usually quite simple. It starts with you contacting the service, often through their website or by email, to describe the issue. They’ll then instruct you on how to package and ship your tapes to their workshop. Once your cassettes arrive, technicians get to work on the repairs. After the fix is complete, they’ll carefully package your tapes and ship them back to you, usually with a tracking number so you can follow their journey home. Once your tape is repaired, it's the perfect time to preserve its contents forever with a video transfer service.
How Long Will It Take? Turnaround & Shipping Explained
Patience is a virtue, but luckily, you won’t need much of it. Most cassette repair jobs are completed within one to two weeks from the time the service receives your tapes. Of course, this can vary depending on the complexity of the repair and how busy the shop is. For shipping, you’ll typically be responsible for the cost of sending the tapes both ways. Using a service like USPS Media Mail is often the most affordable choice for shipping media within the US. Be sure to package your tapes securely in a sturdy box with padding to prevent any further damage during transit.
How Much Does Cassette Repair Cost?
When you’re holding a damaged cassette tape, especially one filled with irreplaceable memories like a baby’s first words or a grandparent’s stories, the question of repair cost is front and center. You want to save the recording, but you also need to know if it’s a sound investment. Thankfully, professional cassette repair is often more affordable than people assume, and understanding the costs can help you make the best decision for your precious audio.
The price for fixing a cassette isn’t one-size-fits-all. It varies based on the type of damage, the kind of cassette, and the specific services required to get it playing again. Most repair shops are transparent about their pricing, allowing you to get a clear quote upfront. This helps you weigh the cost of the repair against the sentimental value of what’s on the tape. Think of it as the first critical step in preserving those sounds for good. Once repaired, your tape will be in the perfect condition for a high-quality digital transfer, ensuring those memories are safe and shareable for years to come.
Breaking Down the Cost of Cassette Repair
Generally, you can expect professional cassette repair to cost anywhere from $13 to $30 per tape. The exact price depends on the complexity of the repair and the provider you choose. For less severe issues, the cost can be quite minimal. For instance, some services offer a standard tune-up for as little as $5 per tape, which typically includes replacing the internal felt pad and any old splicing tape to ensure smooth playback. If your tape plays too slowly or seizes up, it might just need relubrication, a specialized service that can run about $10. These basic services are often all that’s needed to get a stubborn tape working perfectly again.
Why Do Some Repairs Cost More Than Others?
The final bill for your cassette repair is directly linked to the nature of the damage. A simple case of a tangled or loose tape will naturally cost less than a more significant problem. The most common factors that increase the price are physical damage to the cassette’s housing. If the shell is cracked or completely broken, the technician will need to carefully move the tape into a new shell, which is a delicate and time-consuming process. The type of cassette can also play a role; sealed-shell cassettes are trickier to open and will cost more to repair than standard cassettes held together with screws. Many services can fix a wide range of issues, from missing parts to broken tape, and will adjust the price based on the labor involved.
Understanding DIY Cassette Repair Methods
While we generally recommend leaving repairs to the pros, we also know that some of you have a can-do spirit and want to understand what’s involved. If you’re feeling brave and want to attempt a fix yourself, it’s important to know that this isn’t like fixing a wobbly chair. Cassette tapes are incredibly delicate, and a DIY repair requires a surgeon’s steady hand, a lot of patience, and the right set of tools. One wrong move could mean the difference between saving a recording and losing it forever. This guide will walk you through the common methods for fixing tapes at home. Think of it as a look behind the curtain at what a technician does. Understanding the complexity of the process can help you decide if it’s a challenge you’re ready to take on, or if you’d rather entrust your memories to an expert who can prepare them for their final, safe destination: a digital format.
Before you even think about opening up a cassette, remember that the goal is to make the audio playable so you can preserve it digitally. A successful physical repair is just the first step. The real win is saving those sounds for future generations to enjoy, long after the tape itself has worn out. If you proceed, do so with extreme caution, work in a clean and well-lit area, and be prepared for the possibility that things might not go as planned. This isn't a project to rush; it's a delicate operation on a piece of your family's history.
Essential Tools and Materials for the Job
To get started, you’ll need to gather a few specific items. Your toolkit should include a set of small screwdrivers for cassettes with screwed shells, needle-nose pliers for handling tiny parts, and high-quality clear Scotch tape for splicing. It’s also a good idea to wear safety glasses, especially if you have to pry open a welded (glued) shell, as plastic can snap unexpectedly. Before you touch the magnetic tape itself, wash your hands thoroughly with soap and water to remove any oils or dirt. If your cassette is in a welded shell, you’ll also need a "donor" cassette—an empty or unimportant tape with a screwed shell that you can use as a new home for your repaired tape. Having the right tools on hand makes the entire process much smoother.
Fixing Physical Tape Damage
The most intimidating part of any cassette repair is handling the magnetic tape itself. This thin ribbon is where your audio lives, and it’s incredibly fragile. Physical damage can range from a complete snap to frustrating wrinkles and kinks that garble the sound. Each type of damage requires a different, delicate approach. The key to success is working slowly and methodically, ensuring the tape remains properly oriented and as smooth as possible. Remember, any imperfection you introduce during the repair, like a crease or a bulky splice, will be audible during playback and could even cause further damage to your tape or player.
Splicing a Snapped Tape
If your tape has snapped in two, you’ll need to splice it back together. Carefully pull a few inches of tape out from each broken end. Lay the tape flat, making sure the side that touches the player’s heads is facing the same direction for both pieces. Use sharp scissors to make a clean, straight cut on both ends. Overlap the two ends slightly and join them with a small piece of clear Scotch tape on the non-playback side. Trim any excess tape from the edges to ensure the splice is the same width as the magnetic tape. A poorly executed splice can create a bump that causes playback issues.
Smoothing Out Wrinkles and Kinks
A tape that was "eaten" by a player often comes out with wrinkles and creases. For minor wrinkles, you can try gently smoothing the tape with a clean, soft cloth on a flat surface. However, for severe warping or deep kinks, the only solution is to cut out the damaged section entirely. This means you will permanently lose that small piece of the recording. You would then need to splice the two new ends of the tape back together. This is a significant trade-off, and it’s one of the main reasons why professional repair is often the better choice for truly irreplaceable recordings.
Reattaching Tape to the Hub
The magnetic tape is connected to the internal hubs by a clear or colored "leader tape." If this leader detaches, the cassette won't play. To fix this, you’ll need to open the shell and locate the tiny plastic plug, or "clincher," that holds the leader in place. Carefully slide the clincher off the hub, insert the end of the leader tape, and then slide the clincher back into its slot on the hub. These parts are incredibly small and easy to lose, requiring a steady hand and a good pair of tweezers. It’s a precise operation that can quickly become frustrating if you’re not careful.
Repairing the Cassette Shell
Sometimes the tape inside is perfectly fine, but the plastic housing that protects it is damaged. A cracked, warped, or broken shell can prevent the tape from playing correctly and leaves the delicate magnetic tape exposed to dust and damage. If the shell is the problem, you have two main options: attempting to fix the warp or transplanting the tape reels into a new, undamaged shell. Both procedures come with their own set of risks and require careful handling to avoid harming the precious tape inside. This is often the point where a simple fix becomes a complex project.
Fixing a Warped Shell
If the cassette shell is slightly warped, you can try to gently heat it to reshape it. Using a hair dryer on a low setting or a heat gun from a safe distance of about 6 to 12 inches, carefully warm the warped area. The goal is to make the plastic just pliable enough to bend back into shape. This method is extremely risky. If you apply too much heat, you can easily melt the shell or, even worse, destroy the magnetic tape inside. It’s a delicate balance that requires extreme caution, as a moment of overheating can cause irreversible damage to your recording.
Using a "Donor" Shell for Broken Housings
When a shell is cracked or shattered beyond repair, the best solution is to move the tape to a new home. This is where your "donor" cassette comes in. You’ll need to carefully unscrew both the broken cassette and the donor shell. Then, gently lift the tape reels from the broken housing and place them into the corresponding positions in the new shell. It is critical to keep the tape from unraveling and to ensure the reels are placed in the correct orientation. Once the reels are secure, you can screw the new shell together. This process makes your memories playable again, which is the perfect time to get them preserved with a video transfer service for permanent safekeeping.
Cleaning the Magnetic Tape
Over time, tapes can accumulate dust or develop mold, leading to muffled or distorted sound. To clean the tape, you’ll need to open the cassette shell and gently wipe the magnetic tape with a cotton swab lightly dipped in isopropyl alcohol. Be extremely gentle to avoid flaking off the magnetic oxide coating, which holds the audio information. It’s also wise to clean your cassette player’s heads and rollers, as a dirty player can transfer grime back onto your clean tape or may have been the source of the sound issue in the first place. This step ensures both your tape and your equipment are in good shape for playback.
Trusted Services for Cassette Tape Repair
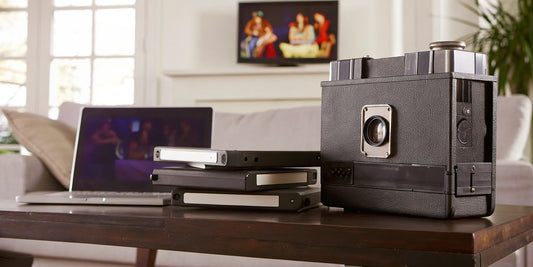
Searching for a reliable repair service can feel like a project in itself, so I’ve put together a list of trusted companies to get you started. My goal was to find options that cater to different needs. Some people just have one precious audio cassette that snapped, while others have a whole box of home movie tapes that need to be repaired and preserved for the next generation. This list includes both dedicated audio specialists and comprehensive services that can handle the entire digitization process for you.
When you’re choosing a service, think about your end goal. Do you want the tape fixed so you can play it in an old Walkman, or is your main priority to save the memories on that tape before they disappear forever? For family archives, a service that combines repair with high-quality digital transfer is often the most practical path. They can fix a chewed-up tape, clean the mold off another, and convert everything into a format you can actually watch and share with your family. For audiophiles or collectors with rare recordings, a specialist who lives and breathes vintage audio might be a better fit. Use these recommendations as a starting point to find the perfect match for your tapes and your peace of mind.
YesVideo
If your cassettes are filled with family memories like birthday parties and weddings, YesVideo is an excellent choice. They offer a complete video transfer service that includes minor repairs, cleaning, and even a new case if the old one is cracked. It’s a true one-stop shop for preservation. Instead of just getting a repaired tape back, you get your memories back on a modern, shareable format like a thumb drive, a custom DVD, or a private cloud account. Their team handles every order by hand in the U.S., so you can feel confident that your irreplaceable tapes are in good hands. This is the perfect solution if your main goal is to save and relive the moments stored on your old media.
Media Mojo
Media Mojo is a well-regarded service known for its expertise in handling a wide variety of media formats. If you have a mixed collection of tapes—maybe some VHS, a few audio cassettes, and even some film reels—they are equipped to handle it all. They offer specific tape repair services and are known in the industry for their high-quality work and attention to detail. Think of them as a versatile specialist. They’re a great option for those who need more than a simple fix and want to ensure their media is handled by professionals who understand the nuances of different formats. Their focus on quality makes them a reliable choice for preserving your media library.
8 Track Avenue
Don’t let the name fool you. While 8 Track Avenue built its reputation on saving the classic 8-track tape, they also have deep expertise in repairing cassette tapes. This is the place to go if you have a rare audio recording or a tape that holds immense sentimental value. Because they specialize in vintage formats, they have a unique understanding of how these tapes work and, more importantly, how they fail. Customers often praise their personalized service and dedication to the craft of audio preservation. If you’re an audiophile or a collector looking for a true specialist to handle your repair, 8 Track Avenue is a fantastic option.
Rewind Audio
Rewind Audio has earned a solid reputation within audio enthusiast communities for its dedicated cassette tape repair services. They are known for tackling a wide range of problems, from snapped tapes to tangled messes, with a strong focus on quality and customer satisfaction. This is a great choice if your primary need is simply to get a cassette working again, perhaps to play in a vintage deck or to digitize yourself. Because they are more of a specialized service, they focus intently on the mechanics of the cassette itself. For those who are passionate about audio fidelity and want their tape restored to its best possible playing condition, Rewind Audio is a name that frequently comes up.
National Audio Company
For a solution with a long-standing industry reputation, look no further than the National Audio Company. As one of the largest manufacturers and duplicators of audio cassettes, they know tapes inside and out. While they are famous for producing new tapes, they also offer restoration services backed by decades of experience. This is an industrial-strength option for your repair needs. If you have a large collection or a tape with significant damage, their extensive knowledge and professional equipment make them an incredibly reliable choice. Going with a major industry player like them provides confidence that your audio memories are being handled by true experts in the field.
Keep Your Tapes Playing: A Simple Care Guide
Your cassette tapes hold priceless memories, from a baby’s first words to your favorite mixtape from college. Giving them a little TLC can help them last longer, but it’s important to remember that magnetic tape has a limited lifespan. Physical care is a great first step, but the only way to truly future-proof these moments is to digitize them. Think of the following tips as your guide to keeping your tapes in the best possible shape until you’re ready to preserve them forever.
How to Store Your Cassettes to Prevent Damage
Proper storage is your first line of defense against tape degradation. Always keep your cassettes in their plastic cases to protect them from dust and physical damage. Store them upright, like books on a shelf, in a cool, dry place away from direct sunlight. Extreme temperatures and humidity are the enemies of magnetic tape. It’s also crucial to keep them far away from magnetic fields, so avoid placing them near speakers, TVs, or other electronics. The single best way to protect your recordings for future generations is to create a digital copy. This ensures that no matter what happens to the physical tape, your memories are safe.
Keeping Your Tapes Clean: A Quick Guide
Over time, cassette tapes can shed some of their magnetic oxide coating, which can gum up your tape player and affect playback quality. For the cassette itself, you can gently wipe the outer shell with a soft, dry, lint-free cloth. Avoid using any liquids or solvents directly on the cassette. It’s just as important to regularly clean your cassette player’s heads, capstan, and pinch roller with a designated cleaning kit. A clean player is less likely to damage your precious tapes. If a tape seems especially dirty or fragile, it’s best to leave the cleaning to an expert to avoid causing further harm.
Know Your Limits: When to Call a Repair Pro
Sometimes a cassette needs more help than you can provide at home. If the tape is tangled, snapped, or has pulled away from the spool, it’s time to call for backup. The same goes for a cracked or broken cassette shell or any signs of mold. Attempting a DIY repair on these issues can easily lead to permanent damage. When you’re looking for help, be sure to find a reputable service with positive reviews. For irreplaceable memories, turning to a trusted service that specializes in handling delicate old media is your safest bet. Professionals have the right tools and expertise to safely repair and digitize your tapes, saving your memories from being lost forever.
Giving Old Tapes a New Purpose: How to Re-record
While many of your old cassettes hold priceless family memories, you might also have a stack of tapes with old radio recordings or mixtapes you’ve long outgrown. Instead of letting them gather dust, you can give them a new life by re-recording over them. It’s a fun project, but it’s important to proceed with caution. Before you hit record, give the tape a listen to be absolutely sure you’re not about to erase something important. If you’re even slightly unsure, the safest bet is to get it digitized first. Once you’ve confirmed the tape is fair game, you can get it ready for a new recording. This process can be a great way to experiment with analog audio or create a new, personal mixtape for fun.
Keep in mind that the quality of your new recording will depend heavily on the age and condition of the original tape. Magnetic media degrades over time, so a 30-year-old cassette won't sound as crisp as a new one. However, for many projects, the slightly worn, vintage sound is part of the charm. The key is to make sure the tape is physically sound and that you follow a few simple steps to prepare it for its second act. By doing so, you can successfully repurpose old media and reduce waste, all while engaging in a creative audio project.
Enabling Recording on Protected Tapes
Before you can record, you need to check if the cassette is write-protected. Look at the top edge of the tape; you’ll see one or two small, square indentations. If these indentations are open, it means the small plastic tabs that once covered them have been broken off, and the tape is protected from being recorded on. However, if those little plastic tabs are still intact, you’re good to go. You can simply pop the cassette into your player and record over the existing audio. If you want a clean slate, you can erase the old content by running a silent recording from a source that is powered off. Just press record and let the tape run to the end to wipe it clean.
Tips for a High-Quality New Recording
The final sound quality of your new project depends on two things: the condition of the tape and the quality of your equipment. Before you start, inspect the cassette for any obvious signs of damage or wear. A tape that has been stored in a hot attic for decades may have degraded, which will affect the sound. For the best results, use a high-quality cassette deck that has been recently cleaned. Pay close attention to your recording levels to avoid distortion, which can make your audio sound fuzzy or blown out. If a tape seems particularly fragile or contains audio you can't risk losing, it’s better to leave it to the professionals. Instead of re-recording, consider a professional digitization service to preserve its contents safely.
Related Articles
- How to Digitize Cassette Tapes: A Simple Guide – YesVideo
- Convert Cassette to Digital: The Ultimate 2024 Guide – YesVideo
- Cassette to Digital: Your Ultimate Conversion Guide – YesVideo
- Save Your Soundtrack: How to Convert Cassette Tapes to Digital Format – YesVideo
Frequently Asked Questions
My cassette tape is a tangled mess. Is it even possible to fix? There's a very good chance it can be saved. Professional technicians see tangled, snapped, and chewed-up tapes all the time. They have the specialized tools and patience to carefully untangle the magnetic tape, smooth it out, and make it playable again. Even if the plastic shell is completely shattered, they can often transplant the tape into a new one. Don't throw it away until you've consulted an expert.
Why can't I just use a pencil to wind the tape back in myself? While winding a loose tape back with a pencil is a classic trick, it’s not a solution for a real tangle or break. Attempting a DIY repair on a fragile or damaged tape can easily make things worse. You might accidentally crease the tape, which creates a permanent audio dropout, or snap it completely. A professional has the right equipment to handle the delicate tape without causing further damage, ensuring the sound is preserved correctly.
Is it better to just repair the tape or should I get it digitized too? Think of repair as the first step and digitization as the final, most important one. A repaired cassette is still an old, fragile piece of media that will continue to degrade over time. Digitizing the audio after it's been repaired creates a permanent, high-quality copy of your memories. This digital file won't fade or break, and you can easily share it with family and listen to it for years to come.
How much should I expect to pay for a professional repair? Cassette repair is often more affordable than you might think, typically ranging from about $13 to $30 per tape. The final cost depends entirely on the extent of the damage. A simple fix, like replacing a worn-out pressure pad, will be on the lower end of that range. A more complex job, like moving tape from a broken shell to a new one, will cost more due to the time and skill involved.
What is the most important thing to look for in a repair service? The most critical factor is trust. You're not just sending a piece of plastic; you're sending them your memories. Look for a service with a proven track record of positive, independent reviews and testimonials. A reputable company will be transparent about its process and pricing and will communicate clearly with you. You should feel confident that your irreplaceable tapes are in good hands from start to finish.