Those MiniDV tapes in your closet are like tiny time capsules, but they’re trapped in an obsolete format. The camcorder that plays them is likely long gone, and even if you found it, your modern computer doesn’t have the right ports to connect it. This technology gap is a common roadblock for families wanting to access their old home movies. But don’t worry, it’s a solvable problem. Whether you’re ready to build a DIY setup or prefer to let an expert handle it, this article will show you exactly how to bridge that gap and complete your MiniDV to digital conversion.
Key Takeaways
- Your Tapes Won't Last Forever: MiniDV tapes can degrade in as little as 10-20 years. If you notice glitches or fading color, it's time to digitize them to stop the decay and permanently save your memories.
- Choose Your Conversion Path: Decide between a hands-on DIY project that requires time and specific equipment, or a professional service that offers convenience, expertise, and high-quality results without the hassle.
- Safeguard Your New Digital Files: After converting your tapes, protect the new video files by creating multiple backups. Storing copies on both an external hard drive and a cloud service ensures your memories are safe from device failure.
What is a MiniDV Tape?
If you were capturing family memories in the late ‘90s and early 2000s, you probably have a box of MiniDV tapes tucked away somewhere. These little cassettes were a huge step up from bulky VHS tapes, offering much better quality in a compact package. But like all physical media, they have a limited lifespan. Those tapes hold irreplaceable moments—from first steps to holiday gatherings—and it’s important to understand what they are and why they need a digital upgrade before it’s too late.
A Quick Look at the MiniDV Format
MiniDV is a digital video format that was introduced in 1995. It quickly became popular for consumer camcorders because the tapes were so small and could record high-quality video. Each cassette can hold up to 60 minutes of footage in standard mode, which was perfect for capturing everything from school plays to family vacations. Because the format was digital from the start, it offered a clearer picture and sound than its analog predecessors, making it the go-to choice for home movie enthusiasts for over a decade.
Why You Should Digitize Your Tapes
Those tapes might seem sturdy, but they won't last forever. MiniDV tapes can get damaged over time from humidity, temperature changes, or simple decay, making the video quality worse or even losing your memories completely. Turning your tapes into digital files keeps your memories safe and makes them incredibly easy to watch, share with family, and edit for years to come. A professional video transfer service can help you preserve these moments before the tapes degrade any further, ensuring they’re protected for future generations.
Signs Your Tapes Are Fading
MiniDV tapes use magnetic tape to store your videos, and this material can wear out and lose its data in as little as 10 to 20 years. You might not even realize your tapes are deteriorating until you try to play them. If you notice any visual artifacts like glitches or static, significant color fading, or audio issues like dropouts or distortion during playback, these are clear signs that your tapes are breaking down. Acting quickly when you see these issues is the best way to save the footage that’s still intact.
Should You Use a Professional Conversion Service?
If the idea of tracking down old equipment and spending hours in front of a computer sounds overwhelming, you’re not alone. Converting MiniDV tapes yourself is a big project, and for many people, using a professional service is a simpler, more reliable way to protect their memories. Handing over your irreplaceable home movies can feel daunting, but finding a trustworthy company that treats your tapes with care gives you peace of mind and a beautiful digital collection to show for it.
Professional services have the specialized equipment and expertise to handle delicate tapes and produce high-quality digital files. They take the guesswork out of the process, managing everything from cleaning and repairing tapes to optimizing the final video. It’s an investment in preserving your family’s history without the technical headaches. Instead of spending your weekend troubleshooting drivers and cables, you can let experts handle the conversion while you plan how you’ll share the final videos with your loved ones.
How YesVideo Converts Your Tapes
When you send your tapes to us, we treat them like our own. Our entire process is designed to keep your memories safe while creating the best possible digital version. Each tape is carefully labeled and tracked by hand from the moment it arrives at our US-based facility. Our technicians use professional-grade decks to capture your footage, ensuring a stable and clear playback. We then convert your video into a high-quality digital format. Once your video transfer is complete, you’ll get access to your memories in a private online account, where you can view, download, and share them with family and friends. We also return your original tapes.
What to Look for in a Conversion Service
Choosing the right service is all about trust. You need a company that will handle your one-of-a-kind tapes with the utmost care. Look for a service with a long history of experience and positive customer reviews. It’s also important to understand their process. Do they process everything in-house, or do they send your tapes to a third party? A company that handles everything on-site, like YesVideo, offers greater security and accountability. Check for clear communication and a tracking system that lets you monitor your order’s progress. Finally, consider the final product. A good service will offer flexible digital options, like cloud access, so you can easily share your newly digitized memories.
How Much Does Professional Conversion Cost?
The cost of professional conversion can vary, but it’s helpful to think of it as a one-time investment to safeguard priceless moments. At YesVideo, we keep our pricing straightforward with a flat rate per tape, which includes digitizing your footage and providing a digital copy through our MemoryCloud service. This simple pricing makes it easy to calculate the total cost for your collection. While the upfront cost is higher than a DIY setup, it covers the use of professional equipment, technician expertise, and the security of your memories. You won’t have to worry about hidden fees or the expense of buying your own gear, which you might only use once.
What Quality Should You Expect?
When you use a professional service, you can expect a high-quality, faithful digital copy of your original tapes. Professionals use broadcast-quality equipment that is far superior to consumer-grade camcorders. This gear helps capture the best possible video and audio from your MiniDV tapes, often resulting in a clearer and more stable picture than you could achieve at home. The goal is to create a digital file that stops the clock on degradation. Transferring your tapes is the key to protecting these irreplaceable memories, and having them organized as digital files makes them easy to find and enjoy whenever you want. From there, you can easily edit clips, create highlight reels, and share them for generations to come.
How to Convert MiniDV Tapes Yourself
If you’re feeling adventurous and have some tech confidence, converting your MiniDV tapes at home can be a rewarding project. It gives you direct control over the process from start to finish. However, it requires the right equipment, some patience, and a bit of troubleshooting. Before you start, know that this isn't a quick task—the transfer happens in real-time, meaning a 60-minute tape will take 60 minutes to digitize, not including setup.
This path is best for those who enjoy hands-on projects and already have some of the necessary gear. If you find the process daunting, remember that professional video transfer services exist to handle all the technical work for you. But if you're ready to roll up your sleeves, here’s what you’ll need to do to bring those memories into the digital age yourself.
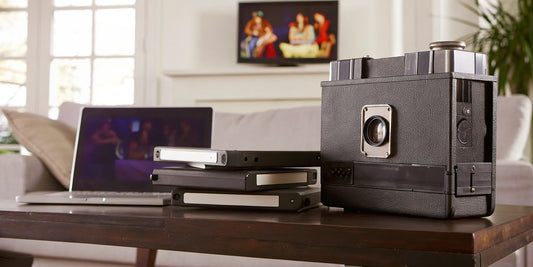
The Equipment and Software You'll Need
First things first, let's gather your tools. The most crucial piece of equipment is a working MiniDV camcorder or a dedicated tape deck to play your tapes. If you don't have the original camera, you might need to find one online, but be sure it’s in good working condition. You’ll also need a computer with enough storage space for the video files and a special cable to connect your camera to it—typically a FireWire (also called IEEE 1394) or USB cable. FireWire often provides better quality if your computer has the port. If not, you may need an adapter or a video capture card to bridge the connection. Finally, you'll need video capture software to record the footage onto your computer.
A Step-by-Step Guide to DIY Conversion
Once you have your gear ready, you can start the transfer process. It’s a good idea to tackle one tape at a time to keep things organized.
- Connect Your Gear: Plug your MiniDV camcorder into your computer using your FireWire or USB cable.
- Set the Mode: Turn on your camcorder and switch it to VCR or Playback mode.
- Load the Tape: Insert the MiniDV tape you want to convert.
- Open Your Software: Launch the video capture software on your computer.
- Start Capturing: In the software, find and click the "Capture" or "Record" button.
- Press Play: Press the play button on your camcorder.
- Watch and Wait: The video will now play and record to your computer in real-time. Once the tape is finished, stop the recording in your software and save the file.
Common Problems You Might Face
It’s not uncommon to hit a few snags during a DIY conversion. If your video quality looks fuzzy or distorted, double-check that all your cables are securely connected. Sometimes a loose connection is the simple culprit. Another frequent issue is the audio falling out of sync with the video. This can often be fixed by adjusting the settings within your video capture software. You might also find that your equipment just doesn’t want to work together. Compatibility issues between the camcorder, capture card, and computer can be frustrating, so confirm that all your components are compatible before you begin.
Tips for Getting the Best DIY Quality
To get the clearest possible picture and sound, it’s always best to play back tapes on the same camcorder they were originally recorded with. Different cameras can have slight variations in tape head alignment, which can affect playback quality. Once you’ve successfully digitized a tape, don’t stop there. Immediately save the new digital file to a reliable location, like an external hard drive or a cloud storage service. This creates a backup, ensuring your precious memories are safe from computer crashes or accidental deletion. Taking this extra step is key to preserving your family’s history for years to come.
Professional vs. DIY: Which is Right for You?
Deciding whether to digitize your MiniDV tapes yourself or hand them over to a professional service can feel like a big choice. Both paths lead to the same goal—preserving your memories—but they take very different routes. The right answer for you really comes down to what you value most. Are you working with a tight budget but have plenty of free time? Or is convenience your top priority?
Thinking about this choice isn't just about the final video file; it's about the entire experience. Do you enjoy tinkering with technology and learning a new skill, or does the thought of troubleshooting cables and software make you want to put the project off for another year? There’s no wrong answer. To help you figure out the best fit for your situation, let’s break down the key differences between the DIY approach and using a professional service. We’ll look at five main factors: your time, your budget, the quality you can expect, the equipment you'll need, and the technical skill involved.
Time: How Long Will It Take?
The biggest factor for many people is time. A DIY conversion isn't a quick process. You have to capture the video in real-time, which means a 90-minute tape will take at least 90 minutes to transfer, and that doesn't include setting up your equipment, troubleshooting any issues, or editing the final files. If you have a box full of tapes, you could be looking at a project that spans several weekends.
On the other hand, a professional service handles all the time-consuming work for you. Your main job is to gather your tapes and send them in. The experts take care of the rest, and you get your digital files back without having to spend hours in front of a computer. It’s the perfect option if your schedule is already packed.
Cost: Breaking Down the Expenses
When you look at the cost, it’s a classic trade-off between your money and your time. Going the DIY route might seem cheaper at first, but the costs can add up. You’ll need a working MiniDV camcorder, the right cables, and potentially video capture software or hardware. If you don’t already have this gear, you’ll have to buy it, and it might only be used for this one project.
With a professional service, you pay a set price per tape. For example, YesVideo’s video transfer service starts at $32.99 per tape, which includes a digital download of your memories. While the per-tape cost is higher than zero, you’re paying for expertise, high-end equipment, and the convenience of having it all done for you, with no surprise hardware expenses.
Quality: What Results Can You Expect?
Your home movies are irreplaceable, so the quality of the final digital file is incredibly important. With a DIY setup, the quality depends entirely on the condition of your tapes and the gear you’re using. An old camcorder or a poor connection can result in a digital copy that’s fuzzy or has audio issues.
Professional services use broadcast-quality equipment that’s maintained by experts. Technicians monitor the transfer process to ensure the best possible picture and sound quality, often resulting in a digital file that looks even better than what you could play on your old camcorder. They know how to handle fragile tapes and get the most out of the original recording, giving your memories the professional treatment they deserve.
Equipment: What Gear Do You Need?
To convert MiniDV tapes yourself, you’ll need a specific set of tools. The list includes a working MiniDV camcorder or tape deck, the tape itself, a FireWire or USB cable, a computer with the right ports, and video capture software. If your computer doesn't have a FireWire port (most modern ones don't), you'll also need to buy a special video capture card or adapter. Finding all this gear, especially a reliable camcorder, can be a challenge.
Choosing a professional service eliminates the need for any special equipment. You don’t have to hunt for old cables or worry about whether your computer is compatible. You just need to pack up your tapes and send them off. It’s a simple, stress-free process.
Skill: How Tech-Savvy Are You?
Let’s be honest: the DIY method requires a bit of technical know-how. You’ll need to be comfortable connecting hardware, installing software, and working through settings to get the best results. You might run into issues like dropped frames, audio sync problems, or software that just won’t cooperate. While there are plenty of online tutorials, it can be frustrating if you’re not used to this kind of project.
If you’d rather not play tech support, a professional service is the way to go. It’s designed for everyone, regardless of their technical skills. You can trust that the experts will handle all the tricky parts, so you can just sit back and enjoy your newly digitized memories without any of the hassle.
Best Practices for Converting Your Tapes
Whether you decide to convert your MiniDV tapes yourself or hand them over to a professional, a few key practices can make all the difference in your final results. Think of it like this: you’ve protected these tapes for years, so you want to give them the best possible treatment as they make their digital debut. Paying attention to details like resolution, audio quality, and storage will ensure your home movies look and sound just as you remember them.
Getting these things right from the start saves you from the headache of having to re-do the process or ending up with digital files you’re not happy with. It’s about honoring the memories held on those tapes. By following these simple guidelines, you can feel confident that your family’s precious moments are being preserved beautifully and will be ready to share for many years to come. Let’s walk through the four most important steps to get a high-quality conversion.
Choose the Right Video Resolution
One of the great things about MiniDV tapes is that they are already a digital format. This means you aren't converting from analog to digital, but rather transferring digital information from the tape to a computer file. Your main goal is to preserve the original quality, not artificially inflate it. Forcing a standard-definition video into a high-definition format can actually make it look worse. The best approach is to match the output resolution to the source. For most MiniDV tapes, this will be a standard definition resolution. A professional video transfer service handles all of this for you, ensuring the technical settings are perfectly matched to your tapes.
Get Clear Audio from Your Tapes
The sound of a loved one’s laugh or the background music at a birthday party is just as important as the visuals. Over time, the audio on tapes can degrade, leading to hissing or muffled sound. During the transfer process, it’s crucial to capture the clearest audio possible. If you’re doing it yourself, use high-quality cables and monitor the audio levels as you record. Professionals use specialized equipment to clean up and capture the best possible sound, making sure your videos have the rich, clear audio that brings your memories to life. This expert touch can make a huge difference in the final viewing experience.
Plan for Digital Storage Space
Once your tapes are converted, you’ll need a safe place to store the new digital files. Raw video files can be quite large, often taking up several gigabytes of space for just one hour of footage. Before you even start converting, make a plan for where you’ll save everything. A dedicated external hard drive is a great option, as is a secure cloud storage service. Having a plan prevents you from running out of space mid-project and ensures your newly digitized memories are protected from computer crashes. Services that offer digital media transfer often include cloud storage, giving you a secure and accessible home for your videos.
Check Your Final Digital Files
This last step is simple but essential: watch your new digital videos! As soon as a tape is finished converting, play the file back from beginning to end. Look for any glitches, audio dropouts, or moments where the video and audio aren't synced correctly. It’s much easier to fix a problem right after it happens, whether that means re-capturing the tape yourself or contacting your conversion service. Taking a few minutes to review each file gives you peace of mind that the transfer was successful and your memories are perfectly preserved for you and your family to enjoy.
How to Preserve Your New Digital Videos
You’ve successfully converted your MiniDV tapes—that’s a huge win! The hardest part is over. Now, the goal is to make sure those precious digital files are safe and accessible for years to come. Unlike physical tapes that degrade over time, digital files can last forever, but only if they’re stored correctly. A file sitting on your desktop isn't truly preserved. Proper preservation involves a simple but crucial strategy of storing, backing up, and organizing your videos.
Taking these next few steps ensures that your family’s memories are protected from hard drive failures, accidental deletions, or technological mishaps. Once your videos are properly stored, they're incredibly easy to watch, share with family and friends, and enjoy whenever you want. Let's walk through how to create a simple and effective system for keeping your newly digitized memories safe.
Where to Store Your Digital Memories
The first step is deciding where your digital videos will live. Storing them on your computer’s main hard drive is convenient for quick access, but it’s risky—if your computer crashes, you could lose everything. A more secure option is an external hard drive, which keeps your files separate from your computer. For even greater peace of mind, consider using a cloud storage service like Google Drive, Dropbox, or the MemoryCloud storage included with your digital media transfer. Cloud storage protects your files from local disasters like fire or theft and lets you access them from any device, anywhere. Most people find that a combination of these options works best.
Create a Foolproof Backup Plan
A single copy of a file is never enough. To truly protect your videos, you need a reliable backup plan. A great rule of thumb is to keep at least three copies of your most important files. Store these copies on at least two different types of media (like your computer and an external hard drive) and make sure at least one copy is stored off-site. Your off-site copy could be a second external hard drive you keep at a relative’s house or, more simply, your files in the cloud. This strategy ensures that no single event—whether it’s a spilled coffee on your laptop or a failed hard drive—can wipe out your memories for good.
Organize Your Digital Video Files
Now that your videos are safe, let's make them easy to find. A good filing system is the key to enjoying your memories without having to search through a mess of randomly named files. Start by creating a main folder called "Home Videos." Inside, create subfolders for each year. Within each year's folder, create another folder for the specific event, like "1999 > Christmas Morning" or "2003 > Beach Vacation." Rename your video files with a consistent format, such as YYYY-MM-DD_EventDescription.mp4. This simple structure makes it incredibly easy to locate exactly what you're looking for, so you can spend less time searching and more time reliving your favorite moments.
Keep Your Files Safe for the Future
MiniDV tapes rely on magnetic tape, a fragile medium that can wear out and degrade in as little as 10 to 20 years, taking your videos with it. By completing a video transfer, you’ve already saved them from fading away. Digital files don't degrade over time like tapes do, but the devices we store them on can fail. That’s why having a solid storage and backup plan is so critical. It’s the final step in future-proofing your family’s legacy. With just a little organization, you can ensure these moments are preserved forever, ready to be passed down and enjoyed by future generations.
Tips for a Smooth Conversion Process
A little prep work goes a long way in making your MiniDV conversion project a success. Whether you’re tackling this yourself or sending your tapes to a service, these tips will help you get the best possible results and avoid common headaches. Think of it as setting the stage for your memories to shine in their new digital format.
Prep Your Tapes Before You Start
MiniDV tapes can get damaged over time, which can degrade the video quality or, even worse, cause you to lose your memories completely. Before you plug anything in, take a few minutes to inspect your tapes. Look for any cracks in the plastic casing or signs of a tangled tape. If everything looks good, I recommend fast-forwarding the tape to the end and then rewinding it completely. This helps reset the tape tension and can prevent playback errors. It’s also a great time to label everything clearly so you can easily organize your digital files later. If a tape looks particularly fragile or damaged, it’s best to let a professional handle it to avoid further harm.
Handle Your Equipment with Care
The gear you use for conversion, especially an old camcorder, needs to be handled gently. If you’re pulling a camera out of storage after a decade, it might be a little finicky. The first thing you should do is find its instruction manual—a quick search online for the model number usually turns up a PDF. This will confirm important details, like how to send video over a Firewire connection. Make sure all your cables are plugged in securely, as a loose connection is a top cause of poor video quality. If your playback looks snowy or distorted, the camcorder’s heads might be dirty. You can try using a head-cleaning tape to gently clear away any dust or residue.
Troubleshoot Common Conversion Issues
It’s easy to get frustrated when technology doesn’t cooperate, but most DIY conversion problems have simple fixes. If you’re getting bad video quality, the first step is to check all your cables and connections. Make sure your camcorder is plugged in correctly and set to VCR or Playback mode. If you’re not getting any picture or sound at all, double-check that your computer’s capture software is set to the right input source (like Firewire or DV). Another common issue is "dropped frames," where the video looks choppy. This usually means your computer is struggling to keep up, so try closing all other applications while you’re capturing the video.
Simple Ways to Improve Video Quality
Once your video is successfully transferred to your computer, there are a few final steps to ensure it looks its best and stays safe for years to come. Always capture your video at the highest possible quality setting; you can create smaller, compressed versions later if you need them. After converting, it’s crucial to save your digital files to a backup location, like an external hard drive or a cloud storage service. Don’t leave your only copy on your computer’s main drive. This is also the perfect time to do some light editing, like trimming the beginning and end of clips, to make your home movies even more enjoyable to watch.
Make Your Decision
Deciding how to digitize your MiniDV tapes comes down to what works best for you, your budget, and your schedule. There’s no single right answer, but thinking through a few key points will help you land on the perfect plan for preserving your precious memories. Whether you decide to tackle it yourself or hand it off to the pros, the most important thing is to get those videos into a format you can enjoy for years to come.
Figure Out What You Need
The first step is to decide between two main paths: converting the tapes yourself or using a professional service. If you’re tech-savvy, have a small number of tapes, and enjoy a good project, the DIY route might be a great fit. It gives you complete control over the process from start to finish. However, if the thought of tracking down old equipment, installing software, and troubleshooting technical glitches sounds like a headache, a professional service is likely your best bet. Think honestly about how much time you have and whether you want to spend it managing a conversion project or simply waiting for your finished digital files to arrive.
Consider Your Budget and Timeline
Your budget and how quickly you want your videos back are big factors. Doing it yourself can seem cheaper upfront, but costs for a working camcorder, cables, and capture devices can add up quickly. Professional services have a clear per-tape cost, which makes budgeting straightforward. For example, our video transfer service has simple pricing that makes it easy to calculate your total. Also, consider the timeline. A professional service typically takes a few weeks from the time they receive your tapes, which is often faster than finding the time to complete a DIY project yourself between work, family, and everything else on your plate.
Take the Next Step
If you’ve looked around and realized your old MiniDV camcorder is long gone, or if you just don’t have the right cables and software, that might make the decision for you. Opting for a professional service is a simple and convenient solution when you don’t have the necessary gear. Instead of hunting for outdated electronics, you can pack up your tapes and send them to a team that has everything needed to create high-quality digital files. This way, you can turn your MiniDV tapes into digital memories you can easily share, whether you get them back as a digital download, on a thumb drive, or on a DVD.
Related Articles
- How to Convert DV Tapes to Digital
- How to Transfer MiniDV Tapes to DVD
- Resources for Preserving Home Videos
Frequently Asked Questions
How can I tell if my tapes are MiniDV? MiniDV tapes are quite distinct. They are small rectangular cassettes, just a bit larger than a standard matchbox, and are much smaller than a VHS tape. You will likely see the "MiniDV" logo printed directly on the cassette or its plastic case. If you have tapes from a camcorder you used between the mid-1990s and the late 2000s, there's a very good chance this is the format you have.
Is it really that urgent to convert my tapes? Acting sooner rather than later is definitely the best approach. The magnetic tape inside MiniDV cassettes wasn't designed to last forever and can start to break down in as little as 10 to 20 years. Waiting too long can result in permanent issues like video glitches, faded color, and distorted audio. Converting them now is the surest way to protect those moments before they begin to fade.
What if my old camcorder is broken or lost? Are my memories gone forever? Not at all! This is a very common problem and one of the main reasons people seek out a professional service. We have all the specialized, professional-grade equipment needed to play back your tapes, so you don’t need to have a working camcorder of your own. Your memories are absolutely still accessible and can be safely transferred.
Will the digital version look better than the original tape? The main goal of conversion is to create a perfect digital replica of what's on the tape, effectively stopping the aging process in its tracks. While a professional transfer uses high-end equipment that often captures a clearer and more stable picture than your old camcorder might, it can't add detail that wasn't there to begin with. You can expect a faithful digital copy that preserves the original quality of your footage.
What happens to my original tapes if I use a service like YesVideo? We know how irreplaceable your original tapes are. After we have successfully created your new digital files and made them available to you, we carefully pack up and return all of your original media. You get the best of both worlds: a modern, accessible digital version of your memories and your original tapes sent back to you for safekeeping.