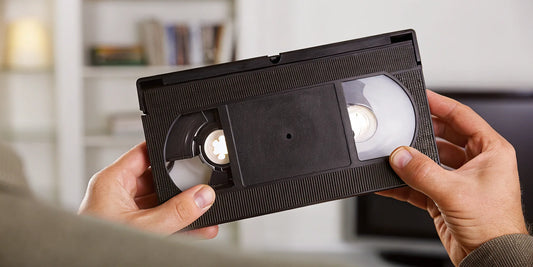
That horrible crunching sound is unmistakable. Your VCR just ate your favorite home movie, and now a tangled mess of black ribbon is spilling out of the cassette. It’s a heart-stopping moment, especially when the tape holds irreplaceable memories of birthdays, holidays, or loved ones. Before you panic and toss it in the trash, take a deep breath. Many of these issues are surprisingly fixable. With a little patience and the right guidance, you can often perform a successful rescue mission. This guide will walk you through the essential steps to repair a VHS tape, from untangling a simple jam to splicing a clean break, giving your precious memories a second chance.
Key Takeaways
- Master Basic Tape Repair at Home: You can fix many common issues, like a snapped or tangled tape, with just a few simple tools. The key is to work slowly and carefully to avoid causing more damage to the delicate magnetic film.
- A Repair Is a Bridge to Digitization: Fixing a VHS tape is a temporary solution to make it playable. The ultimate goal is to convert your footage into a digital format, which is the only way to permanently protect your memories from aging and decay.
- Protect Memories by Knowing Your Limits: For severe issues like widespread mold, water damage, or a shattered cassette, the safest move is to stop. Handing these complex repairs over to a professional service gives your irreplaceable footage its best chance of survival.
What Goes Wrong with VHS Tapes?
Before you can fix a treasured home movie, you need to understand what you’re up against. VHS tapes, while revolutionary for their time, are delicate. The magnetic tape inside the cassette is thin, and the plastic housing isn't indestructible. Over the years, a lot can go wrong, from simple mechanical failures to the slow, silent creep of environmental damage. Most issues fall into two categories: physical damage from handling or VCR malfunctions, and gradual degradation of the tape itself.
Recognizing the problem is the first step toward a solution. A tangled tape requires a different approach than one with mold, and a simple snap is much easier to fix than a warped cassette shell. By identifying the specific issue, you can figure out if it’s a simple DIY fix or a job that’s better left to the experts. The good news is that many common VHS problems are surprisingly repairable with a little patience and the right tools.
Spot the Warning Signs
You’ll often know something is wrong the moment you press play. The most dramatic sign of trouble is when a VCR "eats" your tape, leaving you with a tangled mess of magnetic film pulled from the cassette. Other times, the warning signs are more subtle. You might see a fuzzy or snowy picture, hear distorted or warbled audio, or notice the video freezing and skipping.
Before you even put the tape in, give it a quick inspection. Do you see any visible mold or mildew, which often looks like white or gray dust, on the tape itself? Is the cassette shell cracked or broken? If you gently shake the cassette, do you hear rattling sounds that could indicate loose or broken internal parts? These are all red flags that your tape needs attention before you risk playing it.
Why Tapes Break Down Over Time
Like all physical media, VHS tapes have a finite lifespan. The magnetic tape inside is made of a thin plastic base coated with magnetic particles held on by a binder. Over time, this binder can break down, a process sometimes called "sticky-shed syndrome," causing the magnetic layer to flake off. This results in a permanent loss of video and audio information. Tapes don't last forever, but their decline is often accelerated by how they're stored.
Exposure to heat, humidity, and magnetic fields are the biggest enemies of your home movies. High humidity can encourage mold growth, while temperature fluctuations cause the tape to expand and contract, leading to stretching and brittleness. This is why proper storage is so crucial for preserving your memories until you can transfer your videos to a more durable digital format.
Know When a Tape is Fixable
Many common VHS issues are fixable, especially if you catch them early. A snapped tape is one of the most straightforward repairs; you can splice the two ends back together and only lose a few seconds of footage. A mildly tangled tape can often be carefully wound back into the cassette by hand. Even a broken cassette shell can be replaced by transplanting the tape reels into a new, donor cassette. These repairs can bring your old memories back to life.
However, some damage is too severe for a DIY fix. Widespread mold can permanently damage the tape and may even harm your VCR. A tape that has been completely mangled or stretched is often unsalvageable. The magnetic tape itself is incredibly delicate, and extensive damage can make it unplayable and unrepairable. If you open the cassette and feel overwhelmed by the damage, it might be time to consult a professional.
Gather Your Repair Kit
Before you perform surgery on your precious home movies, let’s get your operating room prepped. Having the right tools and a clean, organized space makes all the difference. It can prevent a small, fixable issue from turning into a permanent problem. The good news is you don’t need a professional lab to get started. Most of what you’ll need is probably already in a drawer somewhere in your house.
Taking a few minutes to gather your supplies will make the entire process smoother and less stressful. Think of it as setting yourself—and your memories—up for success. Once you have everything laid out, you can focus completely on the delicate task at hand.
What You'll Need
You don’t need a lot of fancy equipment for a basic VHS repair. For most jobs, "you will need a Philips screwdriver and splicing tape (or thin Scotch tape)." A small, precision-sized screwdriver is best for handling the tiny screws on the cassette. If you don't have splicing tape, a thin piece of Scotch tape will work in a pinch, but be sure to trim it to the exact width of the VHS tape. It’s also helpful to have a pair of tweezers for handling the delicate magnetic tape and a pair of small scissors for making clean cuts.
Set Up Your Workspace
Find a clean, flat, and well-lit area to work, like a kitchen table or a desk. It’s important to work in a dust-free environment, so give your surface a quick wipe-down first. Dust and debris are the enemies of magnetic tape. When you’re ready to begin, place the cassette on your workspace and "make sure the front of the tape is facing you." This means the label side should be up. This orientation helps you keep track of all the tiny internal parts once you open the cassette shell and prevents confusion when it's time to put it back together.
Work Safely
Working with fragile magnetic tape requires a gentle and steady hand. The goal is to fix the tape, not cause more damage. As you handle the tape, "be careful not to cut the film itself or leave any sticky tape facing up." Exposed adhesive from your splicing tape can get stuck on the internal parts of the cassette or damage the heads inside your VCR player. Always work slowly and deliberately. If a tape holds irreplaceable memories and you feel nervous about fixing it yourself, consider sending it to a professional. A trusted video transfer service has the right tools and expertise to safely handle delicate repairs.
How to Repair a VHS Tape, Step by Step
Alright, let's get that tape fixed. Repairing a VHS tape can feel a bit like performing surgery, but with a little patience and a steady hand, you can often bring it back to life. The key is to work slowly and methodically in a clean, well-lit space. Before you begin, make sure you have your repair kit handy, including a small Phillips screwdriver, scissors, and proper splicing tape.
Remember, the goal here is to make the tape playable just long enough to save the memories stored on it. Once you've repaired it, the best next step is to get it digitized. A physical repair is a temporary fix, but a digital copy is forever. Let's walk through the process together, one step at a time.
Step 1: Open the Cassette
First things first, you need to get inside the cassette shell. Place the tape on your workspace with the front label facing down. You’ll see five small screws holding the plastic case together—one in each corner and one in the center. Using your Phillips screwdriver, carefully remove all five screws and set them aside in a small bowl so they don’t roll away. Once the screws are out, gently flip the cassette over and lift the top half of the shell straight up. Be careful not to jostle the spools or other internal parts.
Step 2: Assess the Damage
With the cassette open, you can now see what you’re working with. Look closely at the magnetic tape to find the problem area. Is the tape snapped in two? Is it tangled, twisted, or badly crinkled from being "eaten" by a VCR? Gently lift the spools to get a better look, but try not to pull out too much tape. Your goal is to identify the exact spot that needs fixing. A clean break is the easiest to repair, while a long, tangled section will require a bit more work.
Step 3: Fix Broken or Tangled Tape
Now it’s time to deal with the damaged section. If the tape is tangled or crinkled, you’ll need to cut out the unusable part. Using a sharp pair of scissors, make a clean, straight cut on either side of the damaged area. You want to remove all the wrinkled and stretched bits, leaving only smooth, healthy tape on both ends. Try to make your cuts as straight as possible, as this will help you create a seamless connection in the next step.
Step 4: Splice the Tape
This is the most delicate part of the repair. Take the two clean ends of the tape you just cut and carefully bring them together so they meet perfectly, without overlapping. Cut a small piece of VHS splicing tape (it’s much thinner and safer for VCRs than regular adhesive tape) and place it over the seam. Press down firmly to ensure it’s secure. It’s crucial that the splicing tape only covers the non-shiny side of the VHS tape and doesn’t leave any sticky residue exposed.
Step 5: Re-thread the Tape
With the tape spliced, you need to make sure it’s routed correctly inside the cassette. The tape should run from the left spool, around the various guide posts and rollers, and onto the right spool. If you’re unsure, you can often find diagrams online by searching for your specific tape type. Once it’s threaded correctly, gently turn one of the spools by hand to wind up any slack, ensuring the tape is taut but not overly tight.
Step 6: Test Your Repair
Carefully place the top of the cassette shell back on, making sure everything lines up. Replace the five screws and tighten them just enough to be snug. Now for the moment of truth. Before you play the tape, I recommend fast-forwarding it a bit and then rewinding it past the repaired section to make sure the splice moves smoothly. Once you’ve confirmed it’s working, you can play the tape. Remember, this repair is a lifeline to help you recover your footage. The best way to protect those memories for good is through a professional video transfer service.
Avoid These Common Repair Mistakes
You’ve rolled up your sleeves and are ready to save that tape. That’s fantastic! But before you get started, it’s just as important to know what not to do. A simple misstep can turn a fixable problem into a permanent one, and nobody wants that for their precious memories. Repairing a VHS tape is a bit like being a surgeon for your home movies—precision and the right approach are everything. It's easy to get excited and jump right in, but a few common pitfalls can trip up even the most well-intentioned DIYer. Let's walk through some of the most common mistakes people make so you can sidestep them completely. From using the wrong kind of tape for a splice to handling the delicate magnetic ribbon incorrectly, a little bit of caution goes a long way. We'll also cover why knowing when a repair is beyond a DIY fix is one of the smartest skills you can have. This isn't about discouraging you; it's about empowering you to make the best choices for your irreplaceable home movies. Think of this as your guide to a successful, stress-free repair mission, ensuring your memories get the careful treatment they deserve.
Don't Use the Wrong Materials
When you have a snapped tape, it’s tempting to reach for the roll of Scotch tape in your desk drawer. Please don’t do it! While it might seem like a quick fix, regular household tape is your VCR’s worst enemy. The adhesive on Scotch tape isn't designed for this kind of job and can leave a sticky residue on the sensitive parts inside your VCR, like the heads. Over time, this gunk can build up and damage your player and any other tapes you play. Instead, always use a proper VHS splicing kit, which includes tape specifically designed not to leave residue and to run smoothly through the player.
Handle Tapes with Care
Think of the magnetic ribbon inside the cassette as being as delicate as an old photograph. The tape inside VHS cassettes is incredibly fragile and can be easily ruined by fingerprints, dust, or creases, making them unplayable. When you’re working on a repair, it’s a great idea to wear lint-free cotton gloves to protect the tape from the oils on your skin. Always work on a clean, flat surface and handle the tape by its edges whenever possible. A gentle touch is your best tool here, as any new crinkles or folds can cause glitches, static, or a total loss of picture and sound in that section of your home movie.
Know When to Stop
Part of any successful DIY project is knowing your limits. If you open the cassette and find a tangled mess that looks like spaghetti, extensive mold, or a tape that has been completely snapped in multiple places, it might be time to pause. While it’s tough to admit defeat, sometimes a tape is too broken to fix at home. Forcing a repair on severely damaged media can make it worse. If the footage is irreplaceable, consider sending it to a professional video transfer service. Experts have specialized tools and techniques to handle delicate situations and can often salvage memories that seem lost for good.
Common DIY Myths
One of the biggest myths about VHS tapes is that they degrade dramatically in just a few years. The truth is, tapes are surprisingly resilient and deterioration takes a very long time under the right conditions. The real culprits are usually environmental factors, not time itself. Storing tapes in a hot attic, a damp basement, or near strong magnetic fields (like speakers) is what truly causes damage. Believing your tapes are doomed to decay quickly can lead to rushed, careless repairs. Instead, focus on providing stable, clean storage to keep them in good shape for as long as possible before you get them digitized.
Tackle Advanced Repairs
Sometimes, a VHS tape throws a curveball that’s a little more complicated than a simple snap. You might be dealing with a shattered plastic case, mysterious white spots that look suspiciously like mold, or audio that cuts in and out. These issues can feel intimidating, but with a steady hand and a bit of patience, you can often get them sorted out. Think of it as tape triage—assessing the damage and applying the right fix to save the precious memories inside. While these repairs are more involved, they follow the same core principle: handle everything with care. Before you give up on a tape, try working through these more advanced solutions. And remember, if a repair ever feels too complex or risky, professional services are always an option for handling delicate video transfers.
Fix a Broken Cassette Case
A cracked or shattered cassette case looks dramatic, but the tape inside is often perfectly fine. For minor cracks, you can carefully apply a small amount of super glue or clear tape to hold the pieces together. The key is to ensure the internal components, like the reels and rollers, can still move freely without getting stuck. If the case is completely destroyed, you can perform a "tape transplant." This involves finding a donor cassette (an old tape you don't need), opening both cases, and carefully moving the original reels into the new, intact shell. It’s a delicate operation, but it’s a fantastic way to rescue a tape from a hopelessly broken home.
Clean Mold and Mildew
Finding white or black fuzzy spots on your tapes is a clear sign of mold, usually caused by storage in a damp place. This is a serious issue, as mold can permanently damage the tape and harm your VCR. For very light mold, you can try gently wiping the tape surface with a soft, lint-free cloth as you manually wind it. Be extremely careful and work in a well-ventilated area. However, mold removal is risky and can be hazardous to your health. Because the spores can be difficult to eliminate completely, this is one repair where calling in the experts is your safest bet. Professional digitization services have specialized equipment to safely clean and preserve mold-damaged tapes.
Troubleshoot Audio Problems
If your video plays but the sound is muffled, distorted, or gone completely, a few things could be going on. First, rule out your equipment by playing a tape you know works well. If the audio is fine on that one, the problem is with your original tape. The audio track is stored along a narrow edge of the magnetic tape, so any crinkles, folds, or debris in that area can disrupt the sound. Visually inspect the tape for damage. Sometimes, simply fast-forwarding the tape to the end and then rewinding it completely can help reseat it properly in the cassette, which can fix minor audio tracking issues.
How to Deep Clean a Tape
Over the years, tapes can collect dust, residue, and other grime that leads to a snowy picture or audio dropouts. For a deep clean, you’ll need to open the cassette. Using a soft, lint-free cloth, gently wipe the surface of the magnetic tape as you slowly and manually wind it from one reel to the other. This physically removes the debris that can interfere with playback. For more stubborn spots, you can very lightly dampen your cloth with 99% isopropyl alcohol, but use it sparingly to avoid damaging the tape’s binder. This process requires patience, but it can significantly improve the playback quality of an old, dirty tape and prepare it for a high-quality film transfer.
Know When to Call a Professional
It takes courage to open up a precious VHS tape and try to fix it yourself. But sometimes, the most caring thing you can do for your memories is to recognize when a problem is bigger than a DIY project. Pushing a repair too far can accidentally cause permanent damage, and that’s the last thing you want for a one-of-a-kind home movie.
Think of it less as giving up and more as making a strategic move. Handing your tape over to a professional isn’t admitting defeat; it’s giving your memories the best possible chance of survival. Experts have the right tools, a controlled environment, and years of experience handling the most delicate situations. Knowing when to make that call is a key part of successfully preserving your family’s history.
The Limits of DIY Repair
While you can certainly handle a simple snapped tape or a tangled mess at home, some issues require a specialist’s touch. If you open the cassette and find extensive mold, clear signs of water damage, or a completely shattered plastic shell, it’s wise to stop right there. These problems require more than just a screwdriver and some splicing tape. Professionals use special cleaning agents, controlled drying environments, and replacement parts that you just won’t have lying around the house. Trying to clean heavy mold yourself, for instance, can spread spores and permanently etch the magnetic tape, destroying the footage you’re trying to save.
Signs Your Tape Can't Be Saved
This is the hard part, but it’s important to be realistic. Sometimes, a tape is simply damaged beyond repair. If the magnetic ribbon has been melted or warped by heat, shredded into tiny pieces, or stretched out like a rubber band, the recording is likely lost for good. Another fatal flaw is severe chemical damage, where the magnetic coating that holds the audio and video information has started to flake away. While a professional service can sometimes work miracles, even they have their limits. Getting an expert opinion is still the best course of action, as they can confirm whether your memories are recoverable before you invest any more time and hope.
How to Find a Trusted Service
When you’re ready to pass the torch, you want to be sure your memories are in good hands. Look for a service with a proven track record and plenty of experience handling fragile, aging media. A trustworthy company will be transparent about their process, explaining exactly how they handle repairs and what to expect. It’s a good sign if they process all orders by hand, as this ensures your tape gets the individual attention it deserves. After a successful repair, the final, crucial step is a professional video transfer to a digital format. This is the ultimate safeguard, protecting your footage from any future decay and making it easy to share for years to come.
Protect Your Repaired Tapes
You did it! You’ve successfully repaired your VHS tape and saved a precious memory from being lost. That’s a huge win. But the work isn’t quite over yet. Now that you’ve fixed the immediate problem, the next step is to protect your tape so you don’t have to do this all over again. VHS tapes are sensitive, and the magnetic tape inside is vulnerable to heat, humidity, and time itself. A good repair can be undone by poor storage.
Think of your tapes like old family photos—they need a safe environment to survive for the long haul. Storing them correctly prevents the film from becoming brittle, tangled, or covered in mold. It’s the best way to preserve the hard work you just put in and keep those memories intact. The following steps will help you create the perfect storage conditions to give your repaired tapes the longest life possible.
Store Your Tapes Correctly
The best way to store your VHS tapes is upright, like books on a shelf. Storing them flat can put uneven pressure on the tape and spools, leading to sagging and edge damage over time. It’s also a great idea to rewind each tape completely before putting it away. This ensures the tape is wound tightly and evenly on the spool, which helps prevent stretching or warping.
For maximum protection, place each tape in its own acid-free plastic case. This shields it from dust, debris, and accidental spills. Then, group these cases inside a larger, watertight container. This gives you an extra layer of defense against any potential water damage, which is one of the fastest ways to ruin a tape for good.
Control the Environment
Where you store your tapes matters just as much as how you store them. The ideal spot is a cool, dark, and dry place with a stable temperature. Big temperature swings can cause the tape and its plastic casing to expand and contract, which can lead to damage. Humidity is the enemy of magnetic tape, as it encourages mold growth and can make the tape layers stick together.
This means you should avoid storing your tapes in attics, basements, or garages. These areas often have poor climate control and are prone to dampness. A much better choice is a closet in the main part of your house, where the temperature and humidity levels are consistent year-round. Keeping them out of direct sunlight is also crucial, as UV rays can degrade the tape and fade the cassette shell.
Keep Your Tapes in Good Shape
A little proactive care goes a long way. Every year or so, take a moment to inspect your tapes. Check for any new signs of damage to the cassette or the tape itself. If you have old adhesive labels on them, consider carefully removing them. Over time, the glue can break down, leaving a sticky residue that can attract dirt or even seep into the cassette mechanism.
If your tapes are in simple cardboard sleeves, think about upgrading to hard plastic cases. These provide better structural support and protect against dust and moisture more effectively. Taking these small, preventative steps helps you catch potential problems before they become irreversible, ensuring your repaired tapes stay in playable condition for as long as possible.
Watch for Signs of Wear
Even with perfect storage, VHS tapes won’t last forever. It’s important to know what to look for as they age. Keep an eye out for signs of deterioration, like a brittle or flaky appearance on the tape itself. If you open the cassette door and notice a faint, vinegar-like smell, that’s a sign that the magnetic tape is beginning to break down chemically. You might also see white or gray powder, which could be mold.
If you spot any of these warning signs, it’s a signal that the tape’s time is running out. While a repair can fix physical breaks, it can’t stop the natural aging process. The most reliable way to preserve your memories for future generations is through a professional video transfer, which creates a permanent digital copy that won’t fade or degrade.
Digitize Your Tapes for Safekeeping
Once you’ve repaired your VHS tape, the next and most important step is to preserve it for good. Tapes are physical objects that degrade over time, but a digital file can last forever. Digitizing your home movies is the only way to truly protect them from the effects of aging, ensuring future generations can enjoy them. While DIY methods exist, professional digitization offers a level of quality and security that’s hard to replicate at home. Entrusting your tapes to experts means you’re not just converting them; you’re safeguarding your family’s legacy.
Why Go Pro with Digitization?
Think of your VHS tapes as living on borrowed time. The magnetic tape inside them naturally degrades, causing colors to fade, audio to warp, and the picture to get fuzzy. Professional digitization stops this process cold. Experts use high-grade equipment that captures your footage in the best possible quality, often looking even better than you remember. A professional video transfer service can also clean the tapes and make minor adjustments to improve playback. This process creates a pristine digital master copy of your memories, ready to be shared, edited, and enjoyed on any modern device without ever worrying about the original tape breaking again.
What to Look for in Quality
When you’re choosing a service, remember that you’re handing over irreplaceable memories. Look for a company that handles every tape by hand, not on an automated assembly line. This personal touch is crucial for older, more fragile tapes. A quality service will be transparent about its process, letting you track your order from start to finish. The final product should be a high-resolution digital file that’s easy to access and share. Check if they offer flexible delivery options, like a secure cloud link, USB drive, or DVDs, so you can choose what works best for your family.
Choose the Right Service for Your Memories
The right service is one you can trust completely. Look for a company with years of experience and a solid reputation for preserving family memories. A specialized service understands the unique challenges of older media, from standard VHS tapes to more obscure formats. They have the expertise to handle your entire collection, whether it includes tapes, photo albums, or film reels. Choosing a trusted partner means you can relax, knowing your precious moments are being treated with the care and respect they deserve, creating a digital archive your family will cherish for decades.
Related Articles
Frequently Asked Questions
Is it safe to play a repaired tape in my VCR? Yes, but you should be cautious. A properly repaired tape should play through your VCR without issue, but think of it as a rescue mission, not a permanent fix. The splice point is a weakness, and the goal is to play the tape just long enough to get it digitized. I recommend playing it once to save the footage and then retiring the physical tape for good.
I don't have splicing tape. Is regular Scotch tape really that bad? It really is that bad, and I can't stress this enough. The adhesive on standard household tape is completely different and can leave a sticky, gummy residue on the sensitive heads and internal parts of your VCR. This can damage your player and even harm other tapes you play afterward. It’s always better to wait and get the right materials for the job.
What's the difference between a tape that's fixable and one that's a lost cause? A tape is usually fixable if the problem is mechanical, like a clean snap, a minor tangle, or a cracked case. These are issues you can often solve with a steady hand. A tape is likely a lost cause when the magnetic ribbon itself is destroyed. If it has been melted by heat, stretched out beyond recognition, or is flaking apart due to chemical breakdown, the video and audio information is probably gone for good.
My tape looks fine, but the picture is snowy and the sound is bad. Is that fixable? This is a classic sign of natural aging. Over decades, the magnetic particles that store the audio and video information on the tape can weaken, leading to a fuzzy picture and poor sound. While a deep clean might help remove some surface dust, this kind of degradation is usually irreversible. It’s a clear signal that the tape is nearing the end of its life and should be digitized as soon as possible to preserve what’s left.
After I repair my tape, why do I still need to digitize it? Think of a repair as a temporary patch that makes your memories accessible again. It doesn't stop the natural aging process of the magnetic tape. Digitization is the only permanent solution. It creates a perfect, stable digital copy of your home movie that won't break, fade, or wear out over time. It’s the final step to ensure your memories are truly safe and can be easily shared for generations.