Your home movies on VHS tapes hold so many irreplaceable stories, from everyday moments to big family events. But that technology is outdated, and the tapes themselves are fading. To ensure these memories aren't lost forever, it's time to consider a VHS tape to DVD conversion. This process not only saves your precious memories but also makes them compatible with modern devices. It’s about protecting your family’s history, making those moments easy to access, enjoy, and share for generations to come, safe from the limits of aging analog media.
Key Takeaways
- Choose Your Conversion Path: Decide whether to use a professional service like YesVideo for expert handling of your VHS tapes or to manage the conversion process yourself at home to preserve those irreplaceable moments.
- Master Your DIY Conversion: If you're converting tapes at home, make sure you have the right equipment, clean your VHS tapes before starting, and always finalize your DVDs so they play correctly on other devices.
- Prioritize Quality and Future Access: Understand that the original tape's condition and your conversion tools directly influence video quality, and consider digital files alongside DVDs for more durable and shareable memories.
Why Should You Convert Your VHS Tapes to DVD?
Those stacks of VHS tapes tucked away in your attic or basement are probably filled with irreplaceable memories – birthday parties, family vacations, baby's first steps. But here's the thing: VHS tapes weren't built to last forever. Over time, the magnetic tape inside them can degrade, leading to fuzzy pictures, distorted sound, or worse, complete loss of your precious moments. Converting your VHS tapes to DVD is a fantastic way to preserve those memories in a more durable and reliable format. DVDs are much less prone to the wear and tear that plagues old tapes, meaning your home movies will be safer for years to come.
Beyond just preservation, think about accessibility. When was the last time you actually owned a working VCR? Many of us don't have them anymore! By transferring your VHS tapes to DVD, you bring those memories into the modern age. DVDs can be played on most DVD players, computers, and even some gaming consoles, making it so much easier to relive those special times and share them with family and friends. Plus, digital formats generally offer an enhanced viewing experience compared to the often-grainy quality of old VHS tapes. You might even find that the process makes it easier to edit or create highlight reels from your footage, giving your cherished moments a fresh new life.
The Lifespan of a VHS Tape
It’s a tough truth, but those beloved VHS tapes stored in your closet have an expiration date. The magnetic tape inside simply wasn't built to last forever and can start to break down after about 15 years. This is what causes the fuzzy pictures, distorted sound, and color loss you might see when you try to watch old home movies. Over a long enough timeline, this degradation can lead to the complete loss of your precious moments. This is why it’s so important to preserve those memories by digitizing them before they fade away.
The urgency to act is real, as the quality of the original tape directly impacts the final digital version. While tackling the project yourself is an option, it comes with its own hurdles. Finding a working VCR can be a treasure hunt in itself, and the necessary conversion equipment can be surprisingly expensive. By understanding that tapes have a limited window for high-quality conversion, you can make a plan to protect your family’s visual history before it’s too late, ensuring those moments can be cherished for many more years to come.
How to Convert VHS to DVD: Pro vs. DIY
So, you've got those precious VHS tapes filled with irreplaceable memories, and you're ready to bring them into the digital age by putting them onto DVDs. That's a fantastic idea! When it comes to making this happen, you generally have two main paths you can take: letting professionals handle the entire process for you, or rolling up your sleeves and tackling the conversion yourself. Let's take a closer look at what each option involves so you can decide which route feels right for you.
Hiring a Professional Service
If the thought of dealing with cables, software, and potential troubleshooting makes you want to simply put those tapes back in the attic, then professional conversion services are likely your best bet. This approach is all about convenience and getting great results without the personal time investment. Companies like Legacybox offer a really comprehensive service where they’ll take your VHS tapes, along with other old media like film reels and photos, and expertly convert them into digital formats. You can typically choose to receive your memories back on DVDs, thumb drives, or even access them via cloud storage. They usually offer different sized kits based on how many items you need to digitize. Another well-known option is CVS Photo, which provides a similar service for transferring various old media types, ensuring your cherished moments are preserved on a modern, durable format. This path is perfect if you value your time and want experts to ensure a quality transfer.
What Media Formats Can Be Converted?
When you opt for a professional service, you'll find they can handle a wide array of old media, not just your standard VHS tapes. This is great news if you have a mixed collection of memories! Most services can convert various videotape formats, including VHS-C, S-VHS, Hi-8, Digital 8, and MiniDV. Beyond tapes, they can also tackle old movie film like 8mm, Super 8, and 16mm reels. And it doesn't stop there. You can often digitize your physical photos, slides, and even entire photo albums, creating a complete digital archive of your family's history. This comprehensive approach means you can send in a box with different types of media and get everything preserved in one go, making the process incredibly straightforward.
Tackling the Project Yourself (DIY)
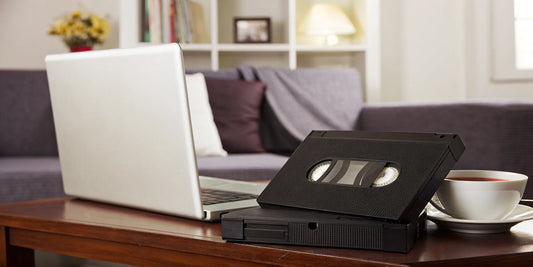
Now, if you're someone who enjoys a good hands-on project or you're working with a tighter budget, converting your VHS tapes to DVD at home can be a rewarding experience. One of the most straightforward methods is to get your hands on a used VCR/DVD recorder combo unit. You can often find these on online marketplaces like eBay or even local classifieds.
Once you have your combo unit, the process generally involves connecting the VHS player side to the DVD recorder side (usually with simple RCA cables). You'll then insert your VHS tape, pop a blank DVD into the recorder, press play on the VCR, and hit record on the DVD recorder. After the tape has finished playing and recording, it's really important to "finalize" the DVD in the recorder. This step ensures that the DVD can be played in standard DVD players, not just the machine it was recorded on. For those looking to get the best possible picture, you can even enhance your digitized videos using video editing software after the initial transfer is complete.
The Hidden Costs of DIY Equipment
While going the DIY route might seem like a great way to save money, the costs can add up faster than you'd think. First, you have to find the right equipment. A reliable VCR/DVD combo recorder isn't something you can just pick up at any store anymore, and searching for a used one in good condition can be a challenge. These units can cost anywhere from $250 to over $600. On top of that, many of the cheaper "VHS to digital" converters you see online aren't standalone devices. You need to read the product descriptions carefully, as they often require you to already own a working VCR or camcorder to play the tapes. When you factor in the cost of blank DVDs and the time spent on the project, the expenses can really start to climb, making a professional video transfer service a surprisingly cost-effective and hassle-free alternative.
Your DIY Conversion Toolkit: What Equipment Do You Need?
Ready to tackle converting your VHS tapes to DVD yourself? That's a fantastic way to safeguard those precious family memories and bring them into the digital age for easier viewing and sharing! Before you roll up your sleeves and dive into your collection of tapes, it's really important to understand what equipment you'll need. Embarking on a DIY conversion project can be incredibly rewarding, allowing you to personally handle these irreplaceable moments. However, the success of your project, and the quality of the final DVDs, heavily depends on having the right tools for the job.
Think of it like baking a special family recipe – you wouldn't start without making sure you have all the ingredients and the proper pans, right? Similarly, for VHS to DVD conversion, gathering the correct hardware and software beforehand will save you a lot of time and potential frustration. It ensures a smoother process from start to finish. There isn't a one-size-fits-all solution, as different methods require different pieces of equipment. We'll explore the main categories: dedicated VCR/DVD combo units that offer a streamlined approach, versatile video capture devices that bridge your old tech with your computer, and the computer software options that bring it all together, allowing for editing and finalizing your DVDs.
Understanding these options will empower you to choose the best setup based on your technical comfort, the quality you're aiming for, and your budget. So, let's get you prepped with the knowledge to make informed decisions and turn those analog memories into lasting digital treasures. This preparation is a key step in successfully preserving your home movies for generations to come.
All-in-One VCR/DVD Combo Units
For a straightforward approach, a VCR/DVD combo unit is a great option. These devices combine a VHS player and a DVD recorder into one machine, simplifying the transfer. You play your VHS tape and record it directly onto a blank DVD. Many find this an easy method as it minimizes cables and complex setups. Just insert your tape and a blank DVD, follow the unit’s instructions, and you’re preserving those moments. These units are designed for this task, making them a user-friendly choice if you prefer a direct hardware solution without much computer involvement in the initial capture.
Using a Video Capture Device
Another popular route is a video capture device. This gadget acts as a bridge, connecting your VCR (or VHS camcorder) to your computer. Typically, it plugs into your computer via USB and has inputs (like RCA or S-Video) for your VCR’s outputs. The device converts the analog video from your VHS into a digital format your computer saves. Many VHS to DVD converters are available, from basic models like the UCEC USB 2.0 Video Capture Device, which is compact and effective, to more advanced ones. This method offers flexibility if you want to edit videos on your computer before burning them to DVD.
Price Range and Product Variety
When you're ready to convert your VHS tapes, the cost varies depending on whether you choose a professional service or a DIY approach. Professional services typically charge per tape, with prices often ranging from $15 to over $25. For those who prioritize trust and quality for their irreplaceable memories, a dedicated service like YesVideo offers a secure, hands-on process where every tape is carefully digitized by experts in the USA. If you're more of a hands-on person, the DIY route requires an upfront investment in equipment. You can find basic video capture devices for around $40, while more robust VCR/DVD combo recorders can cost over $200. Your decision really comes down to balancing your budget against the convenience and guaranteed quality of a professional transfer.
Finding the Right Conversion Software
When using a video capture device, you'll also need computer software to manage recording and often to burn video files to DVD. Some capture devices include basic software, but dedicated programs offer more control and can enhance your final product. Good software significantly impacts the quality of your digitized memories. As you explore, you'll find certain software features are key for the best digital copies. For example, some programs let you adjust brightness, contrast, or edit out unwanted sections before finalizing your DVD. Understanding your software options is time well spent, as it can help refine your home movies.
How to Convert a VHS Tape to DVD at Home: Step-by-Step
Alright, so you've decided to take the plunge and convert those precious VHS tapes to DVD yourself! It's a rewarding project, and I'm here to walk you through it. Think of all those family holidays, birthdays, and everyday moments you're about to bring back to life. With a little patience and the right setup, you can definitely do this. Let's get those memories ready for a new generation to enjoy! If you're looking to transfer video tapes but find the DIY route a bit daunting, remember there are professional services like ours at YesVideo that can handle it for you.
Step 1: Prepare Your VHS Tapes
First things first, let's give your VHS tapes a little TLC. Before you even think about hitting 'play', it's a really good idea to inspect and, if needed, clean your tapes. Over the years, dust can settle, and tapes stored in less-than-ideal conditions might have some wear. Gently cleaning the tape shell and ensuring the tape itself moves freely can make a surprising difference in the final quality of your DVD. This step is super important because it helps ensure you're getting the clearest picture and sound possible from your original footage. Think of it as dusting off a treasured photo album before you share it – good prep leads to a great result!
Step 2: Connect Your Equipment
Now, let's talk about the gear. The most straightforward way to convert your tapes at home is by using a VHS-DVD combination player/recorder. These nifty devices are designed for exactly this task and can make the process much smoother. If you have a separate VCR and a DVD recorder, that works too! You'll typically connect your VCR (or even your old VHS camcorder, if that’s where your tapes are) to the DVD recorder using RCA cables – those are the ones with the red, white, and yellow plugs. Make sure your connections are snug to avoid any fuzzy pictures or crackly audio. Taking a moment to understand the setup will save you headaches later.
Step 3: Record and Finalize Your New DVD
Once everything is connected, you're ready for the main event! Pop your prepared VHS tape into the VCR or camcorder and a blank, recordable DVD (DVD-R is usually a good bet for compatibility) into your DVD recorder. Press play on your VHS source, and then hit the record button on your DVD recorder. You'll want to monitor the recording, at least at the beginning, to make sure everything is transferring smoothly. After the tape has finished playing and the recording is complete, there's one crucial last step: finalizing the DVD. This process makes the DVD playable on most standard DVD players, so don't skip it! It’s like saving your work on a computer – it closes out the disc so other devices can read it.
Who Offers VHS to DVD Conversion Services?
If you've decided that letting professionals handle your VHS to DVD conversion is the best path for you, that's a fantastic choice! It can save you a significant amount of time and potential frustration, plus you gain the peace of mind that comes from knowing your irreplaceable memories are being handled by people who do this every day. The good news is there are several companies out there ready to help you preserve your treasured home movies. Each service has its own unique approach and set of offerings, so it’s helpful to know a bit about them before you make a decision. Taking a little time to explore your options will ensure you find a service that aligns perfectly with your needs, helping you safeguard those precious family moments for many more years of enjoyment.
YesVideo
Here at YesVideo, we've been passionately helping families digitize their home movies and photos for over two decades. We truly understand that these aren't just tapes; they're your family's history, filled with laughter, milestones, and moments you never want to forget. That's why we treat every order with the utmost care, processing all media by hand right here in the USA. Our goal is to provide you with high-quality digital copies that make it easy to relive and share those special times. We believe in making the process smooth and trustworthy, so you can feel confident your memories are in good hands.
Media Formats and Turnaround Time
We know that memories come in all shapes and sizes, not just on VHS tapes. That’s why we handle a wide variety of formats. Beyond standard VHS and VHS-C tapes, we can digitize other video formats like Betamax, Hi8, and MiniDV. But it doesn't stop there. You can also send us your old 8mm and 16mm film reels, photo prints, slides, and negatives. We even offer photo album scanning, so you don’t have to take apart those carefully curated books. This means you can gather up your entire collection of analog memories and have them all preserved in one simple, trusted process.
Once we receive your precious media at our facility, our team gets to work carefully digitizing everything by hand. This dedicated process takes, on average, about 2-3 weeks. We know it can feel like a long time to be without your originals, but this timeframe allows us to give each tape, film, and photo the attention it deserves to ensure a high-quality transfer. When we're finished, we’ll send your original media back to you along with your new digital copies on DVD, a USB drive, or accessible through our private MemoryCloud for easy online viewing and sharing.
Legacybox
Legacybox is another popular choice for converting various types of media. They handle more than just VHS tapes; they can also digitize film reels, photos, and audio recordings. Their process involves sending you a specially designed box – the "Legacybox" – which you fill with all the media you want to convert. You then ship it back to them, they perform the digitization, and finally, they return your original items along with your new digital copies on a thumb drive, DVD, or via a cloud download. This can be quite convenient if you have a mix of different formats you're looking to preserve all at once.
Turnaround Time and Special Features
When you send your media to Legacybox, their standard process typically takes about four to six weeks from the time they receive your items. This timeline makes sense when you consider they handle a huge volume, digitizing over 700,000 items each week. For comparison, a service like CVS Photo estimates a turnaround of about three weeks. In terms of features, Legacybox emphasizes a secure, trackable journey for your memories with special barcodes and a guided shipping process. CVS, on the other hand, offers a great range of output options, including DVDs, USBs, and a direct digital copy for Google Photos, which is super convenient for easy sharing. Your choice might come down to whether you prioritize a highly structured process or a faster turnaround with flexible digital delivery.
Costco Photo Center
Many people are familiar with Costco for their bulk goods, but you might not know that Costco Photo Center also offers services to convert your old VHS tapes to digital formats. If you're already a Costco member, this can be a convenient option to consider while you're doing your regular shopping. They aim to provide a straightforward way to help you access and preserve those cherished family videos that might be tucked away in a closet. It’s a practical solution for getting your tapes digitized without needing to go too far out of your way.
Walmart Photo
Walmart Photo also steps in to help you bring your old home movies into the digital age with their Video Transfer service. They can convert VHS and S-VHS tapes into digital formats, including DVDs. Given Walmart's widespread presence, this service offers a high degree of accessibility for many people. You can often drop off your tapes at a local store, making it a simple option for those looking to preserve their video memories without a lot of hassle. Their goal is to make the process convenient and straightforward for their customers.
CVS Photo
You can also turn to CVS Photo for their home movie and photo transfer service. They handle a variety of old media formats, including VHS tapes, film reels, and photos, converting them into more modern digital formats. When your memories are digitized, you typically have the option to receive them on DVDs, USB drives, or as digital downloads. For many, the convenience of having a local CVS nearby makes this an attractive option, providing an easy drop-off point to start the process of safeguarding those irreplaceable family moments for future generations to enjoy.
Pricing and Service Details
When you start looking at professional services, you'll notice that pricing can vary. The general cost to convert a single VHS tape to a DVD often falls somewhere between $9 and $15. However, some services structure their pricing differently. For example, a service like CVS Photo might have a starting price closer to $25.99 for a DVD transfer. Other companies, like Legacybox, offer kits designed for a specific number of items. You simply choose a box size based on how many tapes, photos, or film reels you want to digitize, which can be a great option if you have a large collection to process all at once. It’s always a good idea to check the details of what’s included in the price, so you know exactly what you’re getting.
DVD Capacity and Digital Copies
A common question I hear is how much video can actually fit onto one DVD. Most services can put up to two hours of video onto a single disc, which often means you can combine the footage from two separate tapes. This is a great way to consolidate your collection! Beyond just DVDs, most conversion services now offer digital copies of your memories on a thumb drive or through a secure cloud download. I always recommend getting the digital files. They are much easier to share, you can edit them into highlight reels, and most importantly, you can back them up in multiple places. This ensures your precious moments are safe from being lost or damaged. Plus, digital copies make for incredibly thoughtful gifts for family members who want their own copy of the family history.
Walgreens Photo
If you're looking for a super convenient way to convert your old VHS tapes, Walgreens Photo is a solid option to consider. With stores practically on every corner, it’s an incredibly accessible choice for preserving those cherished family memories without having to ship them anywhere. They can transfer your VHS tapes not only to DVDs but also to Blu-ray discs or USB drives, giving you the flexibility to pick the format that works best for your family. The process is really straightforward: you just bring your tapes to the photo counter at your local Walgreens, and the staff will help you get your order started. It’s a practical solution if you want a professional to handle the job without the fuss of doing it yourself. You can find all the details on what they offer for video transfers directly on their site.
How to Pick the Best VHS to DVD Converter for You
Alright, so you're ready to pick out a VHS to DVD converter. It might seem like a small piece of tech, but choosing the right one can make a big difference in how your precious home movies turn out. Let's walk through what you should keep an eye out for, so you can feel confident in your choice.
What Features Actually Matter?
Before you dust off those treasured VHS tapes, let's talk about what to look for in a VHS to DVD converter. Whether you're using a standalone device or software, certain features are key to getting the best possible digital copies of your home movies. You'll want to find a converter that comes with software that makes it extremely simple to use, and ideally, includes essentials like an RCA cable and a video capture card. This way, you're not hunting for extra parts.
Also, pay attention to how well the converter can transform the VHS video while retaining the original file's resolution. And don't forget to check if it supports numerous video formats and is compatible with your Mac or Windows system. If you're watching your budget, there are basic options available that can still get the job done effectively without too many advanced features.
Shopping Tips for DIY Converters
When you're ready to buy your own conversion equipment, it helps to know what to look for. If you want the most direct path, a VCR/DVD combo unit is often a great option because it combines everything into one machine. For those who prefer more flexibility, pairing a separate VCR with a video capture device and computer software is the way to go. The software is especially important here, as better programs give you more control over editing and enhancing your final video. Understanding these options will help you pick a setup that matches your budget and technical comfort level. Just remember, the quality of your tools and the condition of the original tape will directly influence how your new DVDs look and sound.
Trusted Brands and Popular Models
When you start looking at specific converters, you'll notice a few brands often get recommended. For example, the Elgato Video Capture is frequently highlighted as one of the best VHS to digital converters due to its consistent performance and quality output. It's a solid choice if you want a reliable device for your video transfer project.
However, if you're looking for a significantly cheaper option, something like the Digitalnow offers a straightforward digitizing solution at a more affordable price. The general process usually involves connecting your VHS player to the converter device, then linking the converter to your computer, often via USB. After that, you'll play the tape and use the capture software to record the video. Many find this setup quite manageable for home use.
How to Get the Best Quality from Your VHS to DVD Conversion
When you decide to convert your cherished VHS tapes to DVD, you're aiming to preserve those memories in the best possible quality. But what exactly influences how good that final DVD will look and sound? It’s not just about hitting 'record.' Several factors, from the condition of your original tapes to the equipment you use, play a significant role. Understanding these can help you set realistic expectations and take steps to get the clearest possible picture. Whether you choose a DIY path or a professional video transfer service, knowing what impacts quality is key to a successful conversion project. Let's look at what makes a difference.
Understanding Tape Condition and Other Quality Factors
Getting the best possible picture from your old VHS tapes isn't always a simple plug-and-play situation. Several elements come together to determine the final quality of your DVD. The journey from tape to digital format has a few crucial stages, and each one matters. For instance, the original condition of your VHS tape is a major factor – tapes degrade over time, and how they were stored plays a big part. Beyond the tape itself, the VCR used for playback needs to be in good shape with clean heads. Once your memories are in a digital format, using professional video editing software can also help enhance the video, smoothing out some of the imperfections that old tapes often carry.
Tips for the Best Conversion Results
So, how can you make sure your home movies look their best on DVD? First things first: give those tapes some TLC. The most important step to [improve capture quality] is to clean the tape itself. Dust and grime are not your friends here! If you're tackling this yourself, using a dedicated VHS-DVD combination player/recorder can simplify the process, as these units are designed for this specific task. Always opt for high-quality blank DVDs, and choose the highest recording quality setting your machine offers. This might mean fewer hours per disc, but the visual payoff is worth it for those precious memories. And remember, a little preparation goes a long way!
Pro vs. DIY: Which Is More Cost-Effective?
Deciding whether to use a professional service or go the DIY route for converting your VHS tapes to DVD often comes down to two key things: your budget and how much time you're willing to spend. It's a classic "time versus money" situation, and figuring out which path is best for you really depends on your personal circumstances and how many tapes you're looking to digitize. Let's break down what each approach might mean for your wallet and your schedule, so you can make a choice that feels right.
The Cost of Professional Services vs. DIY
When you're looking at your finances, professional video transfer services typically charge on a per-tape basis. You might see prices ranging from about $9 to $15 for each VHS tape you want to convert. For instance, some services offer special rates, like $9 per tape if you have a larger batch of 10 or more. This makes budgeting pretty straightforward, especially if you know exactly how many tapes are in your collection. You can also find these conversion services at places like CVS Photo, which can be a convenient local option for some.
On the flip side, tackling the project yourself means investing in equipment. The costs for a VCR/DVD combo unit, blank DVDs, and any necessary converters can add up quickly. It's not uncommon for the initial outlay for decent equipment to exceed $1000, especially if you're starting from scratch. So, while doing it yourself might seem like a way to save money in the long run, that upfront equipment cost is a significant factor to weigh against the per-tape price of a professional service.
Breaking Down DIY Equipment Costs
If you're leaning toward the DIY route, it's smart to get a clear picture of the potential costs before you start. One of the most direct methods is finding a used VCR/DVD recorder combo unit, which you can often track down on online marketplaces like eBay. While these all-in-one machines are convenient, they are just one piece of the puzzle. You'll also need to budget for a supply of high-quality blank DVDs and potentially some extra cables or converters, depending on your specific setup. These smaller purchases can seem minor on their own, but those costs can certainly add up.
When you tally everything, the initial investment for a reliable DIY setup can be surprisingly steep. It’s not unusual for the total cost of equipment to climb, especially if you're starting from scratch and want reliable gear. This upfront expense is a significant factor to consider when weighing your options. Comparing this investment to the straightforward, per-tape pricing of a professional video transfer service helps clarify which path is truly more cost-effective for your specific project. For many, avoiding the technical hassle and high initial cost makes using a professional service the more practical choice.
The Time Commitment: Pro vs. DIY
Beyond the monetary cost, your time is an incredibly valuable resource. Converting VHS tapes to DVD yourself isn't always a quick weekend project; it can be quite time-consuming, especially if you're new to the process or have a lot of tapes. First, there's the hunt for the right equipment. Finding a reliable VCR that's compatible with a DVD recorder or a video capture device can be a challenge in itself, as these items aren't as common as they once were.
Then, there's the actual conversion process. Each tape needs to be played in real-time to record it onto a DVD. If you have a large collection, this can translate into many, many hours spent monitoring recordings and swapping tapes. While using a VCR/DVD combo is often considered one of the more user-friendly DIY methods, don't underestimate the setup, the learning curve, and the sheer hours involved. Professional services, like ours at YesVideo, handle all of this for you, which can be a huge time-saver and a much simpler way to preserve your memories.
Troubleshooting Your VHS to DVD Conversion
Taking on the project of converting your old VHS tapes to DVD is such a rewarding way to bring those treasured memories into the digital age, ready to be shared and enjoyed all over again. It’s a fantastic way to safeguard your family’s history! However, as with many tech-related tasks, you might encounter a few hiccups. Don't let that discourage you! Many common issues that pop up during the VHS to DVD process have pretty straightforward solutions. Whether you're seeing a fuzzy picture that doesn’t do your memories justice, or the sound seems to be marching to a different beat than the video, a few adjustments can often work wonders.
It's all part of the process of digitizing your home movies, and being prepared for these potential challenges can make the journey smoother. We'll walk through some of the typical problems you might face, like video quality concerns, audio sync issues, and equipment compatibility puzzles. Understanding these ahead of time means you'll be better equipped to tackle them, ensuring your precious home movies look and sound their best on their new DVD format. Getting these details right means your efforts will result in clear, enjoyable copies that your family can cherish for years.
Troubleshooting Poor Video Quality
One of the most common worries when you convert VHS tapes is how the final video will look. If your picture appears grainy, a bit blurry, or has those annoying tracking lines, there are a couple of things you can try. First off, it’s a good idea to clean your VHS tapes. Over the years, dust and tiny particles can settle on the tape, and as the saying goes, clean tapes generally yield better transfers. You can find VHS tape head cleaners specifically designed for this. Once you've converted your VHS footage to a digital file, using video editing software can also significantly enhance the video quality. Many programs let you tweak brightness, contrast, and color, and some even help reduce that fuzzy "noise," which can really sharpen up those beloved images.
Solving Audio Sync Issues
It’s definitely distracting when the audio doesn't quite line up with the video, making it seem like you're watching a poorly dubbed film. These audio sync issues can sometimes crop up during the conversion. Often, the problem might be linked to the original VHS tape's condition or the equipment you're using. If a tape has degraded over time, it might not play back smoothly, which can throw off the timing between sound and picture. Opting for a high-quality VHS to DVD converter can also be a big help in minimizing these problems. Better quality equipment is generally more capable of handling older media and keeping the audio and video tracks locked together throughout the transfer.
Solving Equipment Compatibility Problems
Before you even hit the record button, making sure all your gear can communicate effectively is super important. Your VHS player needs to be compatible with the video capture device or the VCR/DVD combo unit you’ve chosen for the job. It’s wise to look for converters that support a range of video formats and are compatible with both Mac and Windows operating systems, as this gives you more flexibility. Whether you are using a standalone device or software, certain features are key to achieving the best possible digital copies of your home movies. For instance, some converters come with built-in tools that can help stabilize shaky footage or improve color saturation, which is incredibly useful when you're working with tapes that have seen better days. Taking a few minutes to check these compatibility details can save you a lot of potential frustration down the line.
Preserving Your Memories Beyond DVDs
So, you've decided to rescue those precious memories from your old VHS tapes – that's fantastic! When you think about converting them, DVDs probably pop into your head first. They’ve been a go-to for a while, and having a physical disc can feel reassuring. But before you settle on just DVDs, let's explore why looking towards digital formats can be an even better way to safeguard those irreplaceable moments for the long haul.
While DVDs offer a tangible format, it's worth considering that digital copies often provide superior quality and preservation. Think about it: digital files aren't prone to scratches or the kind of wear and tear that can affect discs over time. Plus, the quality of a digital transfer can often be higher, giving you a clearer, more vibrant version of your original footage. This means your memories can be stored safely on various devices, like your computer, an external hard drive, or even in the cloud.
The beauty of digital is also its incredible accessibility. Imagine being able to pull up your favorite home movies from anywhere, at any time. Services like Legacybox can convert not just VHS tapes but also film reels and photos into digital formats, including options for cloud storage. This versatility means you're not limited to one type of physical media. As CVS Photo highlights, this kind of service is a wonderful solution for anyone wanting to preserve their old home movies and photos in a modern, accessible format. At YesVideo, we specialize in creating these lasting digital keepsakes, ensuring your treasured moments are not only protected but also easy to share and enjoy for generations.
Related Articles
- VHS Videos to DVD: The Ultimate 2024 Guide – YesVideo
- Best VHS Video to Digital Converters: Top Picks – YesVideo
- VHS to DVD Transfer: Top Services & DIY Guide – YesVideo
- Convert VHS to Digital: The Ultimate 2024 Guide – YesVideo
- Convert VCR to DVD: 2023 Guide + Best Converters – YesVideo
Frequently Asked Questions
My old VHS tapes seem fine. Why should I go through the trouble of converting them to DVD? That's a great question! While your tapes might look okay now, the magnetic tape inside them naturally breaks down over time, even if they're just sitting on a shelf. This can lead to faded colors, fuzzy sound, or even make them unplayable. Converting them to DVD, or even better, digital files, safeguards those precious memories on a more stable format. Plus, let's be honest, finding a working VCR these days can be a challenge, so digitizing makes your home movies much easier to watch and share with family.
I'm not very technical. Is there a simple way for me to convert my VHS tapes without getting overwhelmed? Absolutely! If the idea of cables and software settings makes your head spin, using a professional service is a fantastic, stress-free option. Companies like ours at YesVideo, or others like Legacybox, handle the entire video transferring process for you. You just send in your tapes, and they do all the technical work, returning your memories in a ready-to-watch digital format. It’s perfect if you value your time and want experts to ensure a quality transfer.
If I decide to convert my VHS tapes to DVD myself, what's one common mistake I should try to avoid? One of the most important steps, and one that's easy to overlook, is "finalizing" the DVD after you've recorded your VHS tape onto it. If you're using a VCR/DVD recorder combo unit or a standalone DVD recorder, this step closes out the disc. Without finalizing, the DVD might only play back in the machine it was recorded on, not in other standard DVD players or computers. So, always check your recorder's manual for how to finalize your discs!
What's the biggest difference in cost between paying a service and doing the VHS to DVD conversion on my own? When you use a professional service, you're typically paying a per-tape fee, which can range from around $9 to $15 or more, depending on the company and any special features. If you go the DIY route, you'll need to buy equipment like a VCR/DVD combo unit or a video capture device, plus blank DVDs. This initial investment can easily be over $100, and potentially much more for higher-quality gear. So, if you only have a few tapes, a service might be more economical, but for a large collection, DIY could be cheaper if you're willing to invest the time and effort.
Beyond DVDs, are there other, maybe even better, ways to save my home movies for the future? Yes, definitely! While DVDs are a good step up from VHS, digital files offer even more flexibility and longevity. When your movies are converted into digital files (like MP4s), you can store them on your computer, an external hard drive, or in cloud storage. This makes them super easy to share, edit, and back up. Plus, digital files don't degrade like tapes or get scratched like DVDs, so they're a really robust way to keep your memories safe for years to come.