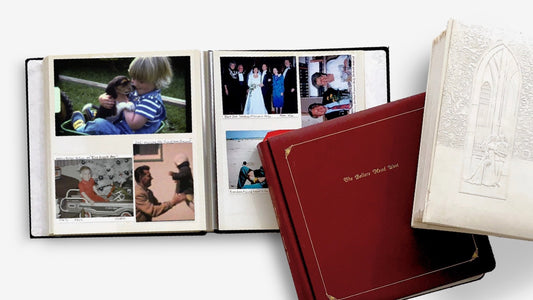
The best part of rediscovering old home movies is sharing them. Those Hi8 tapes are filled with priceless moments—the sound of a loved one's laugh, a baby’s first steps, the chaos of a family holiday. But right now, those memories are trapped on an obsolete format that’s difficult to watch and impossible to share. By choosing to convert Hi8 tapes to digital, you’re not just preserving them; you’re bringing them back to life. This guide will show you how to turn those tapes into files you can easily send to family, post online, or watch on any device, making your memories accessible for everyone to enjoy.
Key Takeaways
- Your Hi8 Tapes Have an Expiration Date: The magnetic tape in your old home movies is fragile and degrades over time, which can lead to distorted video or total loss. Digitizing your tapes is the only way to permanently protect those irreplaceable moments from fading away.
- Decide Between DIY and a Professional Service: Going the DIY route can be a rewarding project if you have the time and technical comfort. For a simpler path with guaranteed high-quality results, a professional service handles all the technical work, saving you time and potential frustration.
- Create a Digital Archive That Lasts: Once your videos are digitized, protect them by keeping copies in at least two places, like an external hard drive and a cloud account. A simple folder system organized by year and event will ensure you can always find and enjoy your favorite memories.
What Are Hi8 Tapes and Why Should You Convert Them?
If you have a box of home movies from the 80s or 90s, there’s a good chance you’re holding onto Hi8 tapes. They were the go-to for capturing everything from birthday parties to baby’s first steps, but those tapes weren't made to last forever. Let's talk about what they are and why now is the perfect time to give those memories a modern, digital home where they can be safe for years to come.
The Lowdown on Hi8 Tapes
Think of Hi8 tapes as the high-definition of their day. As part of the "8mm" tape family, they were a major step up from older formats like Video8. Introduced in the late 1980s, Hi8 tapes offered much better video quality with around 400 lines of resolution, which meant clearer, sharper home movies. This is why so many of our most treasured family videos from that era were recorded on them. They were compact, the camcorders were relatively easy to use, and they captured moments with a quality that felt revolutionary at the time.
Why It's Time to Go Digital
Like all magnetic tapes, Hi8s have a limited lifespan. Over the years, the special coating on the tape itself can start to break down, causing your video to look distorted, snowy, or even become unplayable. Every year that passes puts those memories at greater risk of being lost for good. By digitizing your tapes, you’re not just making a copy; you’re creating a permanent, high-quality archive. This proactive step ensures your family’s history is protected from physical decay, so future generations can enjoy these moments just as you remember them. It’s the best way to safeguard your videos from the effects of time.
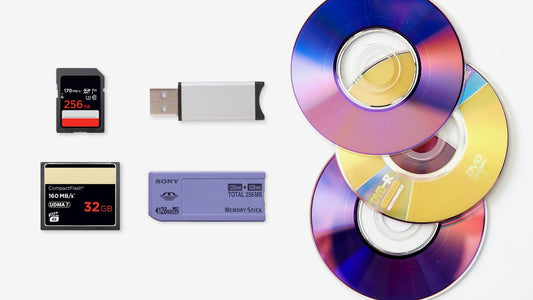
Your Digital Format Options
When you convert your Hi8 tapes, you get to choose how you want to receive your new digital memories. Common options include a convenient thumb drive that you can plug into any computer or smart TV, a classic set of DVDs for easy viewing, or secure cloud storage. A cloud account is a fantastic choice because it lets you download, share, and watch your videos from anywhere, on any device. Plus, professional services will always return your original tapes along with your new digital copies, so you don’t have to worry about losing your originals in the process.
The Best Professional Hi8 Conversion Services
If the idea of tracking down old equipment and troubleshooting software sounds like more of a headache than a fun project, you’re not alone. The DIY route isn’t for everyone, and that’s perfectly okay. Thankfully, there are fantastic professional services that specialize in converting Hi8 tapes to digital formats. Handing your precious memories over to experts means you can relax, knowing your tapes are being handled with care by people who do this every single day. These companies have the right equipment and experience to get the best possible quality from your old tapes, saving you time and potential frustration. From mail-in kits to local drop-off options, there’s a service out there that will fit your needs.
YesVideo
With over 20 years of experience, YesVideo is a leader in helping families preserve their memories. We’ve digitized millions of tapes, and our entire process is designed to be simple and secure. You just send in your Hi8 tapes, and our team of technicians in the US handles every step of the video transfer by hand. We understand that these aren’t just tapes; they’re irreplaceable moments. That’s why we focus on providing a high-quality, trusted service to bring your home movies into the digital age, so you can easily watch and share them with loved ones for years to come.
Legacybox
Legacybox is known for its signature, all-in-one mail-in kit. The process is designed to be incredibly straightforward. They send you a crush-proof box that includes instructions, safety barcodes for tracking each of your tapes, and a pre-paid return shipping label. You just pack your Hi8 tapes and send them off. Their team digitizes everything by hand at their US facility and sends your original tapes back to you along with your new digital copies on a thumb drive, a disc set, or a digital download. It’s a popular option for those who appreciate a guided, step-by-step experience.
Kodak Digitizing
Another well-known name in the memory-keeping world, Kodak Digitizing offers a similar mail-in service. When you place an order, they send you a KODAK Digitizing Box to fill with your Hi8 tapes. The kit comes with detailed instructions, barcodes for tracking your media, and a pre-paid UPS return shipping label. Their team converts your tapes to your choice of digital files on a thumb drive, DVDs, or both. They emphasize that this process is key to saving your home movies before the tapes degrade over time, offering a reliable way to convert your Hi8 tapes.
ScanCafe
ScanCafe provides a service to convert your Hi8 tapes into digital files, like MP4s, or onto DVDs. They stand out by emphasizing what customers should look for in any digitization company: extensive experience, positive reviews, and transparent pricing. When you visit their site, they offer a lot of helpful information and resources, so you can feel confident in your decision. Their approach is to educate the customer, which is a great way to build trust. You can learn more about their process and philosophy on their blog, which is full of useful tips for preserving old media.
Costco Photo Center
If you’re a Costco member, you might find their video transfer service to be a convenient option. You can drop off your Hi8 tapes at the Photo Center in your local warehouse. Costco partners with a third-party service to handle the digitization process, converting your tapes to a digital format on a DVD or USB drive. While you don’t get the direct-to-technician experience of some other mail-in services, it’s a straightforward and accessible choice for preserving your home movies while you’re on a weekly shopping run. Their video transfer service is a simple way to check another item off your to-do list.
CVS Photo
Much like Costco, CVS Photo offers a convenient way to digitize your Hi8 tapes without having to mail them yourself. You can bring your tapes to the photo counter at most CVS locations. They also work with an outside partner to complete the conversion, providing you with a DVD copy of your home movies. This is a great option if you prefer handling the drop-off and pickup in person at a familiar local store. The CVS video transfer service makes it easy to get started on your preservation project while you’re picking up prescriptions or other essentials.
Walmart Photo
Walmart Photo also provides a video transfer service that includes Hi8 tapes. This is another accessible option for anyone who prefers the convenience of a local drop-off point. You can bring your tapes to the Photo Center at a participating Walmart store, and they will send them out to be digitized by their vendor. Your memories are then returned to you on a DVD. For those who do their shopping at Walmart, their video transfer service can be a simple and no-fuss way to ensure your old home movies are preserved for the future.
How to Convert Hi8 Tapes Yourself: Your Equipment Checklist
If you're ready to roll up your sleeves and convert your Hi8 tapes yourself, you've come to the right place. Taking on a DIY project like this can be incredibly rewarding, giving you a hands-on role in preserving your family’s history. The key to a successful transfer is having all the right equipment ready to go before you begin. This checklist will walk you through the essential gear you'll need to create your own home digitization setup. We'll cover everything from the camcorder that will play your tapes to the software that will save them onto your computer. Getting organized first will make the entire process smoother and help you get the best possible quality from your old home movies. Let's get your toolkit assembled.
Find a Working Camcorder
First things first, you need a way to play your tapes. The best option is a working Hi8 camcorder, which will play the tapes in their native format. If you still have your original camera, test it out to make sure it’s still in good shape. If not, you can often find used camcorders on sites like eBay or even borrow one from a friend or relative. It's important to know that while Video8 tapes can be played on Hi8 and Digital8 camcorders, Hi8 tapes are only compatible with Hi8 and Digital8 models. Make sure the player you get can handle the specific type of 8mm tape you have.
Select a Video Capture Device
This little gadget is the magic wand of your setup. A video capture device is what translates the analog video signal from your camcorder into a digital format your computer can understand and save. These devices typically connect to your computer via a USB port and have inputs for the cables coming from your camcorder. There are many options available online, ranging from simple, budget-friendly models to more advanced ones. A popular choice for home projects is an analog-to-digital video converter that simplifies the connection between your old and new tech.
Gather the Right Cables
Now it's time to connect everything. You'll need the right cables to get the video and audio from your camcorder to your video capture device. Most Hi8 camcorders use RCA cables (the ones with the red, white, and yellow plugs) for output. Some may also have an S-Video port, which offers a slightly better picture quality because it separates the color and brightness signals. Check the output ports on your camcorder and the input ports on your capture device to see what you need. Using the best possible connection, like S-Video if available, is a simple way to improve your final video quality.
Pick Your Conversion Software
The final piece of the puzzle is the software that will record the video on your computer. This program is what you'll use to "capture" the footage as it plays from the camcorder. Some video capture devices come with their own basic software, which is often the easiest place to start. If yours doesn't, or if you want more control, free programs like OBS Studio are powerful and versatile options. Your computer's built-in camera app might also work in a pinch. The goal is to find software that can record from an external video source and save the file in a common format like MP4.
A Step-by-Step Guide to DIY Conversion
Alright, if you've decided to take the DIY route, let's walk through the process together. Converting your Hi8 tapes at home can be a rewarding project, but it does require some specific equipment and a bit of patience. Think of it as a weekend project that will bring decades-old memories back to life. Before you start, make sure you have everything from your equipment checklist ready to go. This guide will break down the conversion process into simple, manageable steps. If at any point it feels too overwhelming, remember that professional video transfer services exist to handle all the technical details for you. But if you're ready to roll up your sleeves, let's get started.
Step 1: Set Up Your Equipment
First things first, you need a working Hi8 camcorder. Dust off your old one from the attic and test it to make sure it still plays tapes properly. If you no longer have it, don't worry. You can often find used camcorders on sites like eBay or even borrow one from a friend or family member. The key is to have a reliable player. This is the heart of your setup, as the quality of the playback device will directly impact the quality of your final digital file. Make sure the heads are clean to avoid any static or distortion in your video.
Step 2: Connect Your Devices
Once you have your camcorder, it's time to connect it to your computer. This is where your video capture device and cables come into play. You'll typically connect the camcorder's A/V output (the red, white, and yellow ports) to the corresponding inputs on your analog-to-digital converter. Then, plug the converter into your computer's USB port. If your camcorder and capture device support it, using an S-Video connection can provide a slightly sharper image than the standard yellow composite video cable. Double-check that all connections are snug and secure before moving on to the next step.
Step 3: Record and Capture Your Video
With everything connected, open your video capture software on your computer. Get your tape cued up to where you want to begin recording. The process is pretty straightforward: press the 'Record' button in your software first, and then immediately press 'Play' on your camcorder. You'll see the video playing back in real-time on your computer screen as it's being captured. You can also find special Hi8 tape converters that are designed to simplify this process, acting as an all-in-one solution that plugs directly into your camcorder and helps create digital files.
Step 4: Save and Organize Your Files
As the tape plays, your computer is saving the footage. Once the tape is finished or you've captured the segment you want, stop the recording in your software and then stop the camcorder. Now, you'll need to save the new digital file. Most software will prompt you to choose a name and location. I recommend creating a dedicated folder on your computer or an external hard drive for all your digitized videos. Give each file a descriptive name, like "Family_Christmas_1995.mp4," to make it easy to find your favorite moments later. Don't forget to back up your files to a cloud service for extra security.
Quick Tips for Better Quality
To get the best possible results, a few extra tips can make a big difference. For instance, some experts suggest that using a Digital8 camera can yield higher quality. These cameras can play analog Hi8 tapes and transfer the video digitally to your computer using a Firewire cable, which can offer a more direct and stable data transfer. This method bypasses the need for a separate analog-to-digital converter. Also, be mindful of the file format you save in. While common, converting to the DV format can sometimes degrade the quality of NTSC videos, so testing different output settings in your software is a good idea.
How to Get the Best-Quality Conversion
If you’ve decided to convert your Hi8 tapes yourself, you’ll want to make sure the final digital video is as clear and vibrant as possible. The quality of your conversion depends heavily on the condition of your tapes, the equipment you use, and the process you follow. Taking a few extra steps can make a huge difference in preserving the precious moments captured on those tapes.
Prepare Your Tapes for Transfer
Before you even think about plugging anything in, take a close look at your Hi8 tapes. They are more delicate than you might remember, and the magnetic tape inside can degrade over time, especially if they’ve been stored in a hot attic or damp basement. Check for any visible signs of damage, like a cracked casing or mold. If a tape looks okay, I recommend gently fast-forwarding it to the end and then rewinding it completely. This helps reset the tape tension and can prevent snags or breaks during playback. It’s a simple step that can save you from a major headache and potentially damaging a one-of-a-kind memory.
Choose the Right Equipment
The gear you use for the conversion will have the biggest impact on your final video quality. For the best results, try to find a used Digital8 camcorder. These cameras are great because they can play analog Hi8 tapes and convert the signal to a digital format internally, sending it to your computer via a Firewire cable for a high-quality transfer. If you can’t find one, another solid option is a dedicated video converter box, which can capture video in professional-grade formats. The most basic setup involves a standard Hi8 camcorder and a simple USB converter cable, but be aware that any playback glitches, like tracking issues, will be baked into your final digital file.
Use the Best Connection Type
How you connect your camcorder to your computer matters. Your goal is to use the connection that provides the cleanest signal. If your camcorder and capture device both have S-Video ports, use them. S-Video cables separate the color and brightness signals, which results in a sharper and more stable picture than the standard yellow RCA (composite) cable. The composite cable bundles all the video information into one signal, which can lead to a slightly blurrier or less vibrant image. It’s a small detail, but when you’re preserving memories, every little bit of quality counts. Check the back of your devices—using an S-Video cable is an easy win.
Adjust Your Software Settings
Once your hardware is connected, it’s time to get your video capture software ready. Before you hit record on that two-hour tape of your first family vacation, do a short test run. Record a minute or two of footage and play it back to check for any issues with the video or audio. This is also the time to explore your software’s settings. You’ll want to choose the highest quality settings for resolution and file format that your computer can handle. When you’re ready for the real deal, start recording in the software first, then press the play button on your camcorder to ensure you capture the entire tape from the very beginning.
How to Avoid Common Problems
Don’t be surprised if you run into a few hiccups. Old tapes can have fuzzy sections or distorted audio where the magnetic coating has worn down. Sometimes, a tape might get stuck or tangled in the player. If the picture looks grainy, try cleaning your camcorder’s heads with a special head-cleaning tape or a gentle puff of compressed air. If a tape gets stuck, don’t force it. Try gently fast-forwarding and rewinding a short distance to see if it will loosen up. If a tape is badly tangled or shows signs of mold, it’s best not to play it. For these delicate situations, a professional video transfer service has the specialized equipment to safely handle and digitize your irreplaceable memories.
Professional Service vs. DIY: Which Is Right for You?
Deciding whether to convert your Hi8 tapes yourself or hand them over to a professional is a big choice. There’s no single right answer—it really comes down to what you value most. Are you looking to save money with a hands-on project, or do you prefer to save time and guarantee high-quality results? To figure out the best path for your precious memories, let’s walk through a few key questions. Thinking about your time, budget, technical comfort level, and quality expectations will help you make a decision you feel great about.
How Much Time Can You Commit?
The biggest factor that surprises people about DIY conversion is the time commitment. Digitizing a tape isn't a quick file transfer; you have to capture the video in real-time. That means for every two-hour tape you have, you’ll spend at least two hours just recording it onto your computer. If you have a box full of tapes, that can easily add up to a full weekend or more of work. A professional video transfer service handles this entire process for you. You just pack up your tapes and send them off, saving you hours of tedious work and letting you focus on the fun part: reliving the memories.
What Level of Quality Do You Expect?
Your final video quality with a DIY setup depends entirely on your equipment. Using an old camcorder with a basic analog-to-digital converter might result in a video that’s fuzzy or has washed-out colors. While you can get better results with a Digital8 camcorder and a Firewire connection, finding that specific gear can be a challenge. Professional services use high-end, specialized equipment designed for optimal transfers. They can often correct colors, stabilize shaky footage, and deliver a final digital file that looks even better than the original tape. If top-notch quality is your main goal, a professional service is the most reliable choice.
Are You Comfortable with the Tech?
A DIY conversion requires you to be a bit of a tech detective. You’ll need to find a working camcorder, connect it to a capture device, install the right software, and troubleshoot any issues that pop up—like your computer not recognizing the camera. For some, this is a fun challenge. For others, it can be a major headache. If you’d rather not spend your time fiddling with cables and software settings, a professional service is the way to go. They have the process down to a science, so you can avoid the technical frustration and just wait for your finished digital videos to arrive.
Comparing the Costs
At first glance, DIY seems like the cheaper option, but the costs can add up quickly. If you don't already have a working Hi8 camcorder, you might have to buy one, which can cost a few hundred dollars. Add in the price of a good capture device and software, and your project budget can grow. Professional services have a straightforward pricing structure, usually charging per tape. This makes the cost predictable. When you consider the value of your time and the price of buying equipment you may only use once, a service like YesVideo’s film transfer can often be the more cost-effective solution.
When to Go Pro vs. When to DIY
So, what’s the final verdict? If you have just one or two tapes, enjoy technical projects, and already have most of the equipment, a DIY approach can be a rewarding experience. However, if you have a large collection, value your time, want the best possible quality, or feel uneasy about the technical steps, a professional service is your best bet. Entrusting your irreplaceable memories to experts ensures they are handled with care and preserved beautifully for years to come. It gives you peace of mind knowing your family’s history is in good hands.
How to Preserve Your New Digital Memories
Once you’ve converted your Hi8 tapes, the next crucial step is making sure those digital memories are safe for the long haul. Unlike a physical tape that degrades in a closet, digital files can last forever if you take a few simple steps to store, back up, and organize them properly. Think of it as building a digital time capsule for your family’s most precious moments.
Where to Store Your Digital Videos
The best strategy for storing your newly digitized videos is to not put all your eggs in one basket. I recommend using a mix of local storage (like your computer or an external hard drive) and cloud storage. This gives you both immediate access and a secure off-site backup. Cloud storage services are fantastic because they protect your files from local disasters like a hard drive crash or house fire. Plus, they make sharing a snap. With a service like YesVideo’s included MemoryCloud account, you can easily create shared albums for family and friends to enjoy from anywhere, without having to email massive files back and forth.
Create a Reliable Backup System
Having a single copy of a digital file is risky. A reliable backup system ensures that if one copy is lost or corrupted, you have others to fall back on. A good rule of thumb is to keep three copies of your most important files: one on your computer, a second on an external hard drive, and a third in the cloud. This approach protects you from almost any scenario. You can use reliable transfer methods like Dropbox or Google Drive for your cloud copy, which automatically syncs your files. Just set it up once, and you’ll have peace of mind knowing your memories are protected.
How to Organize Your Files
You went to all this trouble to digitize your videos, so make sure you can actually find them! A little organization now will save you major headaches later. Start by creating a main folder called "Home Videos," then create subfolders for each year. Inside each year, you can make folders for specific events, like "1995 - Christmas" or "1998 - Beach Vacation." For filenames, a consistent format like "YYYY-MM-DD_Event-Name.mp4" works wonders. This simple system of storing all your data makes it easy to locate specific moments when you want to take a trip down memory lane.
Tips for Future-Proofing Your Memories
Technology changes fast, so how do you make sure your videos are viewable in 10, 20, or even 50 years? First, stick with common file formats like MP4, which is the universal standard for video and is likely to be supported for decades. When you get your tapes digitized by a service like YesVideo, you’ll receive them in this future-proof format. Second, plan on checking your files every few years. This involves migrating them to new external hard drives or cloud services as technology evolves. By making digital copies and periodically updating your storage, you ensure your family’s legacy remains accessible for generations to come.
Related Articles
- 9 Best VHS Converters (Hardware & Services)
- Best VHS Video to Digital Converters: Top Picks
- VHS to DVD: Top Transfer Services & DIY Guide
- How to Digitize 8mm Film: Pro vs. DIY Guide
- Video Transfer
Frequently Asked Questions
What if my Hi8 tapes are damaged, moldy, or broken? Can they still be saved? It’s a common worry, especially with tapes that have been stored for decades. If a tape has minor damage, like a cracked casing, it can often be repaired before transfer. However, issues like mold or a badly tangled tape require special care. Trying to play a damaged tape in a regular camcorder can ruin both the tape and the player. For these fragile memories, I strongly recommend sending them to a professional service. They have the tools and expertise to safely assess the damage and salvage what they can without risking further loss.
Will the digital copy look better than my original Hi8 tape? The goal of digitization is to create a perfect digital replica of your tape in its current condition. A professional service uses high-end equipment that captures the absolute best possible quality from the tape, which often looks much cleaner and more stable than what you’d see on an old TV. They can also make minor improvements, like color correction. However, the process can't reverse significant degradation that has already happened over time, like fuzzy spots or audio distortion. Think of it as preserving the best version of your memory before it fades any further.
How long does it take to get my videos back from a professional service? Turnaround times can vary, but you can generally expect the process to take a few weeks from the time the service receives your tapes. Remember, every tape is carefully handled and digitized by a technician, so the process isn't instant. This hands-on approach ensures the best quality for your irreplaceable videos. Most companies provide tracking information so you can follow your order’s progress and will always return your original tapes along with your new digital copies.
Once my videos are digital, can I edit them or pull out short clips? Absolutely! This is one of the best parts of having digital files. Your videos will typically be delivered as MP4 files, which are incredibly easy to work with. You can use simple video editing software on your computer or even apps on your phone to trim your videos, combine clips from different tapes, add music, and create highlight reels. It’s a wonderful way to pull out those perfect little moments to share with family or on social media.
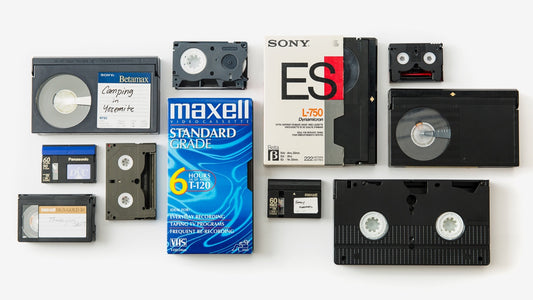
I have a mix of Hi8, Video8, and Digital8 tapes. Can they all be converted together? Yes, and this is a very common situation. While the tapes look similar, they are slightly different formats. The great thing about using a professional service is that you don’t have to worry about sorting them or finding different players for each type. Companies like YesVideo are equipped to handle the entire 8mm family of tapes, so you can put them all in the same box and send them in together for a simple, streamlined process.