Every family has a story, but the pieces are often scattered across attics and basements. A faded photo here, a silent film reel there—these are the chapters of your family’s unique history. Creating a digital family archive is how you gather these chapters into one cohesive story. It’s about transforming a collection of artifacts into a living history that can be explored, shared, and passed down for years to come. This guide will walk you through the process of becoming your family's historian, preserving these moments and building a beautiful, lasting legacy.
Key Takeaways
- Safeguard Your History and Share It Easily: Converting physical media to digital files protects your family’s story from being lost to time or accidents. It also turns your collection into a shareable library that connects relatives across any distance.
- Build a Simple, Searchable System: You don't need a complex setup. Organize your files with a straightforward folder structure (like by year) and a consistent naming format. This simple step makes finding any photo or video effortless for years to come.
- Commit to a Long-Term Plan: A family archive is a living project. Keep it safe by following the 3-2-1 backup rule (three copies, two media types, one off-site) and create a simple routine for adding new memories as they happen.
Why Start a Digital Family Archive?
That box of old home movies in the attic, the photo albums tucked away in a closet—these are the building blocks of your family’s story. But physical media is fragile, and sharing it with loved ones can be a challenge. Creating a digital family archive is the best way to protect these irreplaceable moments and bring them back into your life. It’s about transforming dusty relics into a living collection that your entire family can access and enjoy for years to come. Let’s look at why this project is so important.
What Exactly Is Digital Preservation?
Think of digital preservation as creating a modern, future-proof photo album. It’s the process of taking your physical memories—like photos, videos, and film reels—and converting them into digital files. But it doesn’t stop there. Preservation also means organizing those files and storing them in a way that ensures they’ll be safe and accessible long-term. Just like a physical photo can fade, a digital file can be lost or become unreadable if not managed correctly. The goal is to create a lasting digital legacy, ensuring that your family’s most important moments are protected from technological decay and can be viewed on the devices of tomorrow.
Keep Your Memories Safe from Damage and Loss
Your physical memories are more vulnerable than you might think. Videotapes degrade, film becomes brittle, and photos fade or get damaged by moisture. Accidents like fires or floods can wipe out your entire collection in an instant. In fact, it's estimated that a huge number of family photos and stories are damaged or lost forever. Digitizing your collection creates a vital backup. By creating high-quality digital copies, you’re safeguarding your family’s history against physical decay and unforeseen disasters. Services like photo transfer can create a permanent digital record, giving you peace of mind that your memories are safe, no matter what happens to the originals.
The Risk of Losing Physical Media
Those shoeboxes filled with photos and home movies are priceless, but they're also living on borrowed time. Physical media simply wasn't made to last forever. The magnetic tape in your VHS collection degrades with each passing year, old film reels become brittle and can snap, and the colors in your favorite photographs will inevitably fade. Beyond the slow march of time, there’s always the risk of a sudden accident—a fire, flood, or even just a leaky pipe—that could destroy your entire collection in a moment. This is why creating a digital backup is so essential. By choosing a professional service to transfer your videos, you create a high-quality digital copy that safeguards your family’s history against decay and disaster, ensuring those memories are preserved for good.
Share Your Family Story with Everyone
One of the best parts of having a digital archive is how easy it becomes to share your memories. Instead of one person holding onto the only copy of a precious photo album or home movie, everyone in the family can have access. Imagine sending your cousin a link to your grandfather’s wedding video or posting a childhood photo of your mom for her birthday. A digital archive breaks down geographical barriers, allowing you to connect with relatives across the country or even the world. It turns your memories from static objects in a box into dynamic stories that can be shared, celebrated, and enjoyed together in real-time.
Pass Down Your Memories for Generations to Come
Creating a digital archive is a gift to your future family. While your old VHS tapes and 8mm films won't last forever, a well-maintained digital collection can be passed down indefinitely. This is your chance to build a true family legacy. Your children, grandchildren, and great-grandchildren will be able to see your wedding day, hear your parents’ voices, and witness moments they were never a part of. By taking the steps to create a family archive now, you are preserving your family’s story in a format that will endure. You’re not just saving files; you’re ensuring the faces, voices, and moments that define your family are never forgotten.
Your Step-by-Step Guide to Digitizing Memories
This is where the magic happens. Turning those boxes of photos, tapes, and films into digital files is the most hands-on part of creating your family archive. It can feel like a huge undertaking, but breaking it down into manageable steps makes all the difference. Whether you decide to tackle it yourself or hand it off to the pros, the goal is the same: to create high-quality digital copies that will stand the test of time.
Think of this process as a conversation with your family’s past. Each photo you scan and every video you convert is a story waiting to be retold. The key is to approach it with a plan. We’ll walk through everything from picking the right gear to handling different types of media. By the end, you’ll have a clear path forward for transforming your physical memories into a lasting digital legacy that you can easily share and enjoy for years to come.
Expert Tips Before You Begin
Before you dive into scanning and converting, taking a moment to plan can make this project much more manageable and rewarding. It’s easy to get overwhelmed by the sheer volume of memories, but a little strategy goes a long way in creating an archive that’s both meaningful and easy to use. Think of it as creating a roadmap for your project. By setting some ground rules from the start, you’ll ensure the final collection is a joy to explore, not a cluttered digital shoebox. Here are a couple of key things to keep in mind as you get started.
Be Selective with What You Digitize
It’s tempting to want to save every single thing, but one of the best pieces of advice is to be selective. You don't have to digitize every photo and every minute of footage. Culling your collection first will save you a significant amount of time, effort, and even money, especially if you're using a professional service. Go through your photos and set aside the blurry shots, the near-duplicates, and the ones where everyone's eyes are closed. Focus on preserving the images and videos that truly tell a story or capture a meaningful moment. This isn't about erasing memories; it's about curating your family's highlight reel, making the final archive more focused and enjoyable for everyone.
Manage Your Expectations
It's also important to remember the role of your new digital files. Think of them as an incredible, shareable backup, but not a perfect replacement for the originals. A digital copy of your grandmother's wedding photo is priceless for sharing and safeguarding, but it doesn't hold the same tangible connection as the physical print she held in her hands. Digital files are your insurance policy against loss and decay, ensuring the memory itself survives. Continue to care for your original items as best you can. The goal of a video transfer is to create a secure and accessible copy, giving you the best of both worlds: the tangible original and the timeless digital version.
Choosing the Right Gear for DIY Digitizing
If you’re going the DIY route, having the right tools is essential. For photos, slides, and documents, a good flatbed scanner is your best friend. Look for one that can scan at a high resolution—at least 600 DPI is a great starting point for photos. For slides and film negatives, you’ll need a scanner with a transparency adapter or a dedicated film scanner to get clear, vibrant images. Before you buy, check your local library! Many have high-quality scanners available for public use, which can save you a lot of money.
Using Library Scanners for Free
Before you invest in expensive equipment, it’s worth a call to your local library. Many libraries now have dedicated makerspaces or local history sections equipped with high-quality gear that’s free for public use. You can often find special overhead scanners that are perfect for digitizing delicate old photos, scrapbook pages, or even entire photo albums without having to remove each picture. These scanners are typically much better than a basic home model and can save you a significant amount of money. Just be sure to bring a USB drive to save your files, and check your library’s website to see if you need to reserve a time slot.
Trying Camera Scanning for Quick Results
If you have a large number of photos and speed is your priority, camera scanning can be a great alternative to a traditional flatbed scanner. Using a good quality camera—even the one on your smartphone—you can digitize photos much more quickly. The key to getting a good result is setting it up correctly. Place your photo on a flat, non-reflective surface in a well-lit area, avoiding direct light that can cause glare. Position your camera directly above the photo, making sure it’s parallel to the surface to prevent distortion. Using a simple tripod can help keep your shots steady and consistent. You can find plenty of online guides to help you perfect this technique.
Stitching Large Documents with Software
What about those items that are too big for your scanner, like an old newspaper clipping announcing a wedding or a child’s oversized artwork? You don’t have to leave them out of your archive. The solution is to scan them in smaller, overlapping sections. Once you have your pieces, you can use photo editing software to stitch them together into a single, seamless image. Programs like Adobe Photoshop have a "Photomerge" tool designed for this exact purpose, but there are also free alternatives available. This simple trick ensures that even your largest and most unwieldy memories can be perfectly preserved in your digital collection.
DIY vs. Pro Services: Which Is Right for You?
The DIY approach gives you complete control, but it requires a significant investment of time and patience. It’s a great option for scanning photos and documents if you enjoy the process. However, for media like videotapes and film reels, professional help is often the better choice. The equipment is specialized and expensive, and old tapes can be incredibly fragile. A professional photo transfer service can also save you hundreds of hours of work. Services like YesVideo have the expertise and technology to safely handle delicate formats and produce high-quality digital files, letting you focus on enjoying the memories instead of troubleshooting old hardware.
Understanding Professional Service Costs
When you opt for a professional service, you're paying for expertise, specialized equipment, and most importantly, time. The cost can vary widely depending on what you need digitized. Factors like the format (videotapes, film reels, or photos), the quantity of your media, and your preferred digital output (like a thumb drive, cloud storage, or DVDs) all play a role in the final price. For example, digitizing a single videotape might cost less than a delicate reel of 8mm film. While there's an upfront investment, consider the value of having your memories handled by experts. Companies like YesVideo have spent decades perfecting the process, ensuring your fragile originals are treated with care and converted into high-quality digital files that your family can enjoy for years to come.
Exploring Service Models: Mail-In vs. In-Home
Most professional digitization companies operate on a mail-in model. This is the most common and affordable approach. You simply pack your media into a secure box, ship it to the company’s processing facility, and they handle the rest. Trusted services like YesVideo provide a trackable, secure process where your memories are digitized by hand and returned to you along with your new digital copies. For those who are hesitant to part with their originals or have an exceptionally large collection, some companies offer a premium in-home service. A service called Legacy Digital, for instance, offers home visits where technicians scan your items on-site, though this "white-glove" option comes at a much higher price point. For most families, a reputable mail-in service offers the perfect balance of security, quality, and affordability.
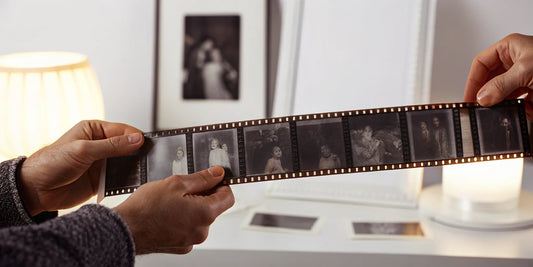
Digitizing Photos, Slides, and Documents
Ready to start scanning? First, gently clean your photos and the scanner glass with a soft, lint-free cloth to avoid digitizing dust specks. Place your photo on the scanner bed and scan at a resolution of at least 600 DPI to ensure you capture all the detail. For oversized items like newspaper clippings or large portraits, you can scan them in sections. Then, use a photo editing program to stitch the pieces together into a single, seamless image. Save your final scans as high-quality file types like TIFF for archival purposes and JPEG for easy sharing.
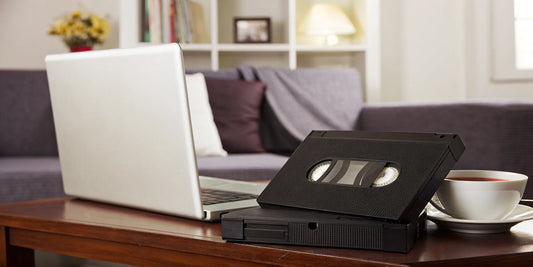
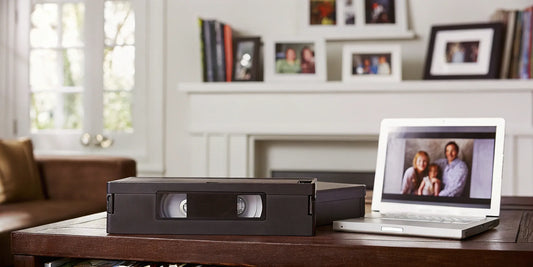
Converting Old Videos and Film Reels
Digitizing video and film is a different ballgame. Formats like VHS, Hi-8, MiniDV, and 8mm film reels are delicate and can degrade over time. While DIY converter kits exist, they often result in a loss of quality and can even damage your precious tapes if not used correctly. This is where professional services truly shine. Experts use commercial-grade equipment to carefully perform a video transfer that preserves the original quality. For old home movies, a professional film transfer is the safest and most reliable way to bring those moving pictures back to life for the next generation.
Preserving Your Family's Audio Recordings
Do you have old cassette tapes with a grandparent’s voice or a recording of your childhood piano recital? These audio memories are just as important to preserve. Like videotapes, audio formats such as cassettes and reel-to-reel tapes require specific equipment to digitize properly. You can find USB cassette players that connect to your computer, but the sound quality can be inconsistent. For the best results and to ensure your fragile tapes are handled with care, consider a professional service. They can clean up the audio, reduce background noise, and deliver a crisp digital file that captures the sound just as you remember it.
Your Quick Digitizing Quality Checklist
As you digitize your memories, keep a few quality checks in mind. Always work with the highest resolution and quality settings your equipment allows. It’s better to have a large file you can shrink later than a small one you can’t enlarge. Once you have your digital files, the most important rule is to back them up. A great strategy is to save everything in at least two places. For example, use two separate external hard drives. Keep one at your home and give the other to a trusted family member who lives elsewhere for safekeeping.
How to Organize Your Digital Family Archive
Once you have all your precious memories digitized, the next step is creating a system that makes them easy to find and enjoy. Think of it as moving your memories from a dusty shoebox in the attic to a beautiful, browsable library on your computer. Taking the time to organize your files now will save you countless hours of searching later and make it simple to pull up that perfect photo or video clip whenever you want. A well-organized archive turns a random collection of files into a living family story.
The key is to create a simple, consistent system that you can stick with. You don’t need to be a tech wizard to do this. It’s all about creating logical folders, naming your files clearly, and using a few simple tools to make your collection searchable. With a solid organization plan, you can quickly find any memory, whether it’s from last year or fifty years ago. This process ensures that the memories you worked so hard to preserve with services like photo transfer are always just a few clicks away.
Start with a Simple Folder Structure
The foundation of any good digital archive is a clear and simple folder structure. The goal is to create a system so intuitive that anyone in your family can find what they’re looking for. A great way to start is by creating main folders for each year. Inside each year’s folder, you can create subfolders for specific events, holidays, or months. For example, you might have a main folder called “1998,” and inside it, subfolders like “Summer Vacation to the Grand Canyon,” “Christmas at Grandma’s,” or “David’s 10th Birthday.” This chronological approach makes it easy to see your family’s story unfold over time.
Create a Consistent File Naming System
Giving your files descriptive names is one of the most powerful things you can do for your archive. A filename like IMG_2049.jpg tells you nothing, but 1998-08-15_GrandCanyonTrip_MomAndDad.jpg tells you the date, the event, and who is in the photo. I recommend picking a naming convention and sticking to it for every file. A popular format is YYYY-MM-DD_EventDescription_People. This method automatically sorts your files chronologically and makes them searchable on any computer, even without special software. It might seem tedious at first, but this consistency will make your archive incredibly easy to manage in the long run.
Use Tags and Details to Find Anything Fast
Most photo management applications, like Google Photos or Apple Photos, allow you to add extra information to your files called metadata. This is where you can add tags, captions, and locations without changing the filename. Think of it as adding digital sticky notes to your photos. You can tag every person who appears in a photo, write a short description of what’s happening, and even pinpoint the location on a map. Taking the time to add these details means you can later search for things like “all photos of Aunt Carol” or “every picture from our trip to Italy” and get instant results.
Group Your Memories into Meaningful Collections
While folders are great for organizing files, creating collections or albums is perfect for telling stories. You can group related photos and videos from different folders into a single collection based on a theme. For example, you could create an album called “Our Wedding Memories” that pulls together photos from the rehearsal dinner, the ceremony, and the reception. You could also make collections like “The Kids’ School Plays” or “Family Christmases Through the Years.” This is a wonderful way to curate your favorite moments, making them easy to share with family and enjoy without having to dig through your entire folder structure.
Set Up a Foolproof Backup Plan
A digital archive is only as safe as its backup. Technology can fail, so having just one copy of your precious memories on a single computer or hard drive is a huge risk. The best practice is to have at least two separate backups. Keep one copy on a local external hard drive that you store in a safe place. For the second, use a cloud storage service. This combination protects your files from almost any disaster, whether it’s a hard drive crash, a software bug, or even a fire or flood at your home. Your memories are irreplaceable, so a solid backup plan is non-negotiable.
Applying the 3-2-1 Rule with SSDs
For archivists, the gold standard for backups is the 3-2-1 rule, and it’s a simple concept that works perfectly for a family archive. It means you should have three copies of your files, on two different types of media, with one copy stored off-site. Here’s a practical way to do it: your first copy lives on your main computer. The second copy goes onto a reliable external drive, like a Solid State Drive (SSD), which you keep at home. For your third copy, use another external SSD and give it to a trusted family member who lives elsewhere or store it in a safe deposit box. This strategy ensures that even if something happens to your home, your family’s digital legacy is safe and sound.
A Warning About Cloud-Only Storage
Cloud storage services like Google Photos, Dropbox, and iCloud are incredibly convenient for accessing and sharing your memories, but they should not be your only backup. When you use a cloud service, you are essentially renting space, and the company can change its rules, pricing, or even shut down with little notice. Relying solely on the cloud for your most important family history is a risky bet. Instead, think of cloud storage as the perfect off-site copy in your 3-2-1 backup plan. By pairing it with a physical hard drive that you control, you get both convenience and security, following digital preservation best practices and ensuring your archive is truly protected for the long haul.
How to Choose the Right Cloud Storage
When it comes to backing up your memories online, you have plenty of options. Services like Google Drive, Dropbox, and iCloud are popular choices for general file storage and sharing. When selecting a service, consider a few key factors: storage capacity, cost, security features, and how easy it is for your family to access the files. Some services are better for photos, while others are designed for large video files from a film transfer. Do a little research to find a provider that fits your family’s needs and budget, ensuring your archive has a secure home online.
Specialized Platforms for Family Archives
While general cloud storage is a great starting point for backing up your files, a new generation of platforms is designed specifically for building and sharing a family history. These services go beyond simple storage, offering tools that help you weave your individual photos, videos, and documents into a cohesive family narrative. They are built with the understanding that you’re not just saving files; you’re preserving a legacy. Whether you want to build an interactive family tree or create a private digital museum, there’s a specialized tool that can help bring your family’s story to life in a meaningful and organized way.
Platforms That Organize Around a Family Tree
Some of the most intuitive platforms use a family tree as the central organizing principle for your archive. Services like MyFamilyArchive act as a central hub where you can upload all your digitized memories and link them directly to individuals in your family tree. This approach adds incredible context to your collection. Instead of just having a folder of photos from the 1970s, you can see exactly who is in each picture and understand their relationship to everyone else. It transforms your archive from a simple collection of files into a rich, interconnected history of your family’s life, making it easy to explore the stories behind the faces.
Services That Create a Private Family Museum
If you’re looking to create a more curated and polished experience, some services help you build what is essentially a private online "Family Museum." Platforms like Legacy Digital are designed to showcase the best parts of your family’s history in a beautiful, shareable format. This approach combines the benefits of digitization with the engaging feel of a social media feed or a family history website. It’s perfect for turning your collection of digitized home movies and photos into compelling stories that you can share with relatives. It’s less about raw storage and more about creating a thoughtful presentation of your family’s most cherished moments.
Permanent, Long-Term Storage Solutions
For ultimate peace of mind, you might consider a service focused on permanent, long-term preservation. Unlike typical subscription-based cloud storage, non-profit platforms like Permanent.org offer permanent digital storage for a one-time payment. They are structured as digital endowments, with funding designed to keep your data safe and accessible forever by backing it up in multiple locations. This model is built for true legacy planning, ensuring that the digital files from your album scanning and video transfers will be protected for future generations to access, long after subscription services might have come and gone. It’s a powerful option for anyone serious about creating a lasting archive.
Tools for Genealogy Buffs
For the family historian who loves digging into their roots, many of these specialized platforms offer robust tools for genealogical research. Within these systems, you can build out a detailed family tree and give each person their own "Collection Page." This becomes the perfect place to attach all the memories and documents you have for that individual—photos, videos, letters, and official records. It allows you to create a comprehensive profile for each ancestor, turning your archive into a dynamic resource for family history research. It’s an ideal way to organize your findings and visually connect the dots between generations.
Keep Your Digital Archive Secure
Protecting your digital archive from unauthorized access is just as important as protecting it from data loss. Start by using a strong, unique password for your cloud storage account. Even better, enable two-factor authentication (2FA) if the service offers it. This adds a second layer of security by requiring a code from your phone or another device to log in, making it much harder for anyone else to access your account. Regularly check your security settings and be mindful of who you share access with. These simple steps will help ensure your family’s private memories stay that way.
Keeping Your Digital Archive Alive for Years
Creating your digital family archive is a huge accomplishment, but the work doesn’t stop the moment the last photo is scanned. Think of your archive as a living garden rather than a time capsule. It needs a little ongoing care to stay organized, accessible, and relevant for years to come. This maintenance isn't a chore; it's a continuation of the beautiful act of storytelling you started. By setting up a simple routine, you prevent your carefully curated collection from becoming another forgotten folder of digital clutter. A few small, consistent actions can make all the difference, ensuring your archive grows with your family and remains a cherished resource for everyone. This ongoing process keeps your shared history alive and well, making it easy for future generations to connect with their roots and enjoy the memories you’ve worked so hard to preserve. The following steps will help you build a simple, sustainable plan to care for your family’s legacy.
Schedule Regular Archive Check-ins
Just like you’d schedule a yearly check-up, your digital archive benefits from a regular review. Set a recurring reminder in your calendar—once or twice a year is perfect—to spend a little time with your collection. During this check-in, you can add any new photos or videos from recent holidays or events, double-check that your backup systems are working correctly, and tidy up any files that have fallen out of place. This simple habit prevents the task from becoming overwhelming and ensures your archive is always up-to-date. A consistent review keeps your family’s story current and makes it easy to find exactly what you’re looking for when you need it.
Make It a Fun Family Project
Your family archive is a shared history, so why should maintaining it be a solo job? Turning archive maintenance into a family activity can be a wonderful way to connect and share stories. Ask your siblings to help you identify relatives in old photos, or have your kids help you scan their latest school art projects. Engaging family members not only lightens the workload but also enriches the collection with different perspectives and memories. You could even host a "scanning party" during a family get-together, making the process of adding new memories a fun and collaborative tradition that everyone can look forward to.
Revisit Your Long-Term Storage Plan
Your storage strategy is the foundation of your archive’s longevity. For any physical originals you decide to keep, store them in archival-quality, acid-free boxes away from extreme temperatures and humidity. For your digital files, the "3-2-1 backup" rule is your best friend: keep at least three copies of your data, on two different types of media, with one copy stored off-site. This could mean having your archive on your computer, an external hard drive, and a cloud storage service. Regularly review your plan to make sure it’s still working for you and that your chosen storage methods are current and reliable.
What Should You Do with the Originals?
Once you’ve digitized your memories, you’re faced with a new question: what do you do with the original tapes, photos, and film reels? There’s no one-size-fits-all answer. Some items, like a grandparent’s wedding album or your baby’s first photo, have immense sentimental value and are worth preserving carefully. Others, like blurry duplicates or damaged videotapes, might be taking up unnecessary space. The key is to make a thoughtful decision about each item. You can safely discard what you no longer need, freeing up physical space while knowing the digital copy is safe and sound in your archive.
Where to Find Archival-Quality Supplies
For the originals you choose to keep, proper storage is key to slowing down their natural decay. Everyday cardboard boxes and plastic bins can actually speed up deterioration because they contain acids and chemicals that damage paper and film over time. Instead, you’ll want to invest in materials specifically designed for preservation. Look for products labeled "archival-quality," "acid-free," and "lignin-free." You can find specialized archival-quality boxes, folders, and sleeves from trusted suppliers like Gaylord Archival, University Products, or Hollinger Metal Edge. These materials create a safe, stable environment that will help protect your precious originals for many more years.
The Best Place to Store Originals at Home
Where you store your originals at home matters just as much as what you store them in. The biggest enemies of old media are extreme temperatures and humidity, which cause materials to become brittle, warp, or grow mold. That’s why you should avoid storing your memories in attics, basements, or garages, where conditions fluctuate dramatically with the seasons. A much safer spot is an interior closet in a guest room or home office. These areas tend to have a more stable, climate-controlled environment, offering the best protection against the elements and ensuring your physical keepsakes remain in the best possible condition.
How to Maintain File Quality Over Time
To ensure your digital memories look as good in 50 years as they do today, it’s important to save them in the right format. For your master archive, use high-quality, "lossless" file formats like TIFF or PNG for images. Unlike JPEGs, these formats don't lose quality each time they're opened and saved. While JPEGs are great for sharing online or via email, your core collection should be stored in the highest resolution possible. When you use a professional film transfer service, you can trust that your home movies are being converted with quality and longevity in mind, giving you a pristine digital master to preserve.
Make Your Archive Easy to Access and Share
The true joy of a family archive comes from sharing it. Make your collection easily accessible to the whole family by using a cloud storage service like Google Drive, Dropbox, or the MemoryCloud account included with your YesVideo order. You can create shared folders that everyone can view from their own devices, wherever they are. This makes it simple for your cousin to find a photo for a birthday slideshow or for everyone to watch old holiday videos during a virtual family call. An accessible archive becomes a dynamic part of your family life, not just a collection of files sitting on a hard drive.
Don't Forget to Plan for New Memories
Your family’s story is constantly unfolding, so your archive should, too. Create a simple workflow for adding new memories as they happen. This could be as easy as setting a reminder on the first of every month to upload your favorite phone photos from the previous month. You can also make it a tradition to digitize your children’s artwork at the end of each school year or to gather photos from everyone after a family vacation. By establishing a routine for preserving family photos and videos, you ensure your archive grows with your family and captures the moments that matter most, year after year.
Related Articles
- 8 Best Companies to Digitize Your Home Movies – YesVideo
- 8 Best Digitizing Services Reviewed for 2025 – YesVideo
- Best Storage for Old Photos
- Picture Scanning Service Guide
- Digital Conversion Service Guide
Frequently Asked Questions
Why can't I just keep my original photos and tapes in a safe box? Storing your originals safely is a great first step, but physical media is naturally fragile. Videotapes and film degrade over time, losing color and sound quality, while photos can fade or suffer from water damage. A digital archive creates a perfect copy that won't decay, protecting your family’s story from accidents like fires or floods and the slow march of time. It also makes it possible to share those memories with anyone, anywhere, which is something a box in the attic just can't do.
I have so many photos and tapes. Where do I even begin? Feeling overwhelmed is completely normal! The best way to start is to not think about the entire collection at once. Instead, pick one small, meaningful project. This could be your parents' wedding album, a single box of your most cherished childhood photos, or the home movies from a favorite family vacation. Tackling one specific set of memories makes the process feel manageable and gives you a rewarding win that will motivate you to continue.
Is it better to use a professional service or do it myself? This really comes down to what you value more: hands-on control or high-quality results without the time commitment. Scanning photos yourself can be a rewarding project if you have a good scanner and the patience for it. However, for videotapes and film reels, professional services are almost always the better choice. They use specialized equipment that handles fragile media safely and captures far better quality than home-use converters, saving you from a huge technical headache.
What should I do with my original photos and tapes after they're digitized? Once you have high-quality digital copies safely backed up, the decision is entirely up to you. Many people choose to keep originals that have strong sentimental value, like a wedding album or a handwritten letter, storing them in archival-safe containers. For other items, like duplicate photos or tapes that were in poor condition, you might feel comfortable letting them go. The peace of mind comes from knowing the memory itself is preserved perfectly in your digital archive.
How can I be sure my digital files will be safe and viewable in the future? The key to a future-proof archive is a solid backup plan. The simplest and most effective strategy is to keep at least two copies of your files in different places. For example, you can save your entire archive on an external hard drive that you keep at home, and also upload it to a secure cloud storage service. This protects your memories from everything from a computer crash to a house fire, ensuring your family’s story is safe for generations to come.