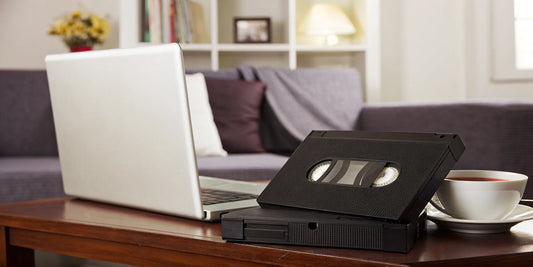
Your family's most precious moments shouldn't be trapped on tapes in a dusty box. The real magic of digitizing your home movies is bringing them back into your life—letting you text a clip of your wedding dance to your spouse on your anniversary or stream childhood Christmas mornings on your smart TV. Converting them to digital files makes them instantly accessible, shareable, and secure. To make it happen, you can use a VHS to digital converter at home or send your tapes to a trusted service. Either way, your family’s history becomes a living archive, ready to be relived and passed down.
Key Takeaways
- Act Now to Save Your Memories: VHS tapes degrade over time and the VCRs needed to play them are becoming obsolete. Digitizing your collection is the only way to stop the clock on deterioration and protect your family's story from being lost forever.
- Decide on Your Conversion Path: You can either tackle this as a hands-on DIY project or use a professional service. The DIY route offers control if you're tech-savvy, while a service like YesVideo guarantees expert quality and saves you significant time and frustration.
- Build a Secure Digital Library: Once your videos are digitized, create a simple naming system and back up your files to both a physical drive and a cloud service. This final step ensures your memories are safe, organized, and easy to share with loved ones.
Why Convert Your VHS Tapes to Digital?
If you have a box of old home movies sitting in a closet, you’re holding onto priceless family memories. Those tapes capture everything from a baby’s first steps to goofy holiday moments and once-in-a-lifetime vacations. But VHS tapes weren't made to last forever, and the VCRs needed to play them are becoming relics of the past. Converting your tapes to a digital format is the best way to protect those moments from being lost to time.
Digitizing your collection does more than just save your videos; it brings them back to life. Instead of gathering dust in the attic, your memories can be easily watched, shared, and enjoyed by everyone in the family, no matter where they are. It’s about making sure those moments can be passed down and relived for generations to come. Think of it as building a digital family archive that’s safe, accessible, and ready to share. This simple act transforms fragile tapes into timeless digital treasures, letting you reconnect with your past and share it with future generations. It's a project that feels good to complete, giving you peace of mind that your family's story is secure.
Save Your Memories Before They're Gone
Every time you watch an old VHS tape, the magnetic tape inside wears down a little more. Over time, this causes the video and audio quality to degrade, leading to faded colors, distorted sound, and static. This process is unavoidable with analog media. By choosing a video transfer service, you create a perfect digital copy that won’t degrade, no matter how many times you watch it. This single step ensures that the laughter, voices, and moments captured on tape are preserved exactly as you remember them, safe from the physical decay that affects all old media.
Stop Your Tapes From Degrading Over Time
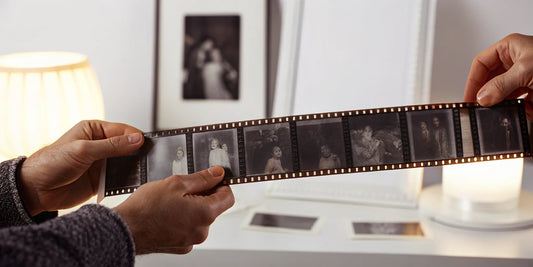
VHS tapes have a limited lifespan, typically degrading significantly after just 15 to 20 years. The magnetic tape can become brittle, get tangled in the VCR, or even grow mold if stored improperly. On top of that, finding a working VCR is getting harder and more expensive every year. Waiting too long to convert your tapes puts your memories at risk of being lost forever. Digitizing them now stops the clock on deterioration. It’s a proactive step to save your family’s history before the technology becomes completely obsolete and the tapes themselves are unplayable. You can even preserve your film reels and other old formats.
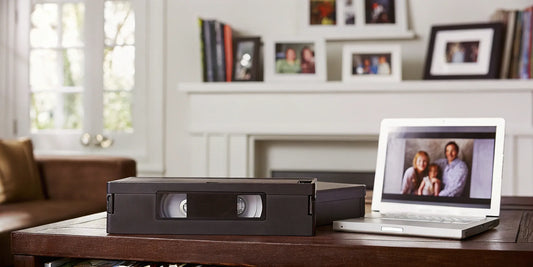
Make Your Home Movies Shareable Again
One of the best parts of digitizing your home movies is how simple it makes sharing them. Instead of mailing a clunky tape, you can send a video file to a relative across the country in seconds. You can upload clips to social media for a family reunion, create a highlight reel for a milestone birthday, or stream your entire collection on your smart TV. These new digital keepsakes can be stored safely in the cloud, on a thumb drive, or on your computer, so you always have a backup. Your memories become more accessible and integrated into your modern life, ready to be enjoyed anytime, anywhere.
How to Choose the Right VHS to Digital Converter
Choosing the right VHS to digital converter can feel a bit like sorting through a box of old cables—confusing and a little intimidating. But it’s simpler than it looks once you know what to focus on. The main goal is to find a tool that can faithfully capture the moments on your tapes without adding a layer of technical frustration to the process. A good converter will work seamlessly with your computer and VCR, while a poor one can lead to glitchy videos, compatibility headaches, and hours of wasted time.
When you start looking, you'll see a wide range of options, from simple, budget-friendly dongles to more robust hardware. The key is to focus on a few core elements: the quality of the video it can capture, the software it uses, the types of connections it offers, and how easy it is to actually use. Thinking about these factors beforehand will help you pick a converter that fits your needs and technical comfort level, ensuring your precious home movies make the jump to digital in the best possible shape.
Aim for the Best Possible Video Quality
The first thing to accept is that the final video quality largely depends on the condition of your original VHS tape. If a tape was recorded poorly or has degraded over the years, the digital copy will reflect that. However, the converter you choose plays a huge role in preserving the quality that is there. A high-quality converter is designed to capture a clean, stable signal from your VCR. Cheaper devices can sometimes introduce digital noise, color issues, or syncing problems, which can make your final video look even worse than the original tape. Look for converters known for reliable signal processing to give your memories the clear transfer they deserve.
Does It Work With Your Mac or PC?
A converter is only as good as the software that runs it. This software is what tells your computer how to interpret the video signal from the VCR and record it as a digital file. While many converters come bundled with their own software, it’s often basic or outdated. For better results, it’s wise to use well-known video capture software that’s compatible with your operating system, whether it's Windows or macOS. Programs like Shotcut or even the classic Windows Movie Maker are often more reliable and offer greater control. Before you buy a converter, check to see if it works well with trusted third-party software to avoid a major source of DIY frustration.
What Cables and Connections Do You Need?
To get video from your VCR to your computer, you need a physical link. This is where the video capture device comes in. These gadgets act as a bridge, typically connecting to your VCR with RCA cables (the red, white, and yellow plugs) and to your computer via a USB port. Some VCRs and converters also support an S-Video connection, which can offer slightly better picture quality by separating the color and brightness signals. Most popular and user-friendly converters, like those from Elgato or Roxio, use a simple USB connection, making them easy to plug in and get started with almost any modern computer.
How User-Friendly Is the Converter?
Let’s be honest: not everyone wants to spend a weekend troubleshooting drivers and video settings. The DIY conversion process can be time-consuming and requires a bit of technical patience. If you’re looking for a straightforward, worry-free solution, a professional service is often the best path. When experts handle your video transfer, you get peace of mind knowing your irreplaceable memories are in good hands. Professionals use high-end equipment, can often clean and make minor repairs to tapes, and deliver a final product you can enjoy right away, letting you skip the technical setup entirely.
What Extra Features Are Worth It?
While the core function is what’s most important, some converters come with extra features that can be useful. For instance, some kits include basic video editing software that lets you trim unwanted footage or add simple titles. Others might offer the ability to burn your videos directly to a DVD, though saving them as digital files on your computer or in the cloud is a more flexible and future-proof option. Popular models like the Elgato Video Capture or Diamond VC500 are well-regarded because they focus on doing one thing well: capturing high-quality video reliably and with minimal fuss, which is what truly matters.
Tips for Buying a Converter Online
When you're ready to buy a converter, it's tempting to just grab the cheapest one you find online. But taking a few extra minutes to do some research can save you a lot of headaches. Start by reading recent customer reviews, paying close attention to comments about software installation and compatibility with your specific operating system, whether it's a Mac or PC. Also, double-check what’s included in the box. Does it come with the necessary RCA cables, or will you need to buy those separately? A little due diligence now prevents frustration later. If sorting through reviews and tech specs feels overwhelming, remember that a professional video transfer service handles all the technical details for you, guaranteeing a high-quality result without the guesswork.
Your Three Main Options for Converting VHS Tapes
When you decide it's time to bring your old home movies into the digital age, you have a few paths you can take. The right choice for you really comes down to how much time, effort, and technical know-how you want to invest. Broadly, your options fall into two camps: doing it yourself or handing it off to the pros. Each has its own set of benefits, whether you're looking for a hands-on project or a simple, worry-free solution. Let's walk through the three main ways you can get those precious memories off your tapes and onto your computer.
Option 1: Do It Yourself with a Converter
If you enjoy a good project and want to manage the process from start to finish, a DIY conversion kit is a great option. These kits bundle the necessary hardware and software to connect your VCR to your computer. You can find popular equipment like the Elgato Video Capture or Diamond VC500 online, which act as a bridge between your analog tapes and a digital file. This method is often cost-effective and gives you total control over the pace of your project. You can digitize tapes on your own schedule, making it a flexible choice for anyone comfortable with setting up a little bit of tech.
Option 2: Hire a Professional Digitizing Service
For those who want beautiful results without the technical hassle, professional digitizing services are the perfect solution. Companies like YesVideo handle the entire process for you, from start to finish. You simply send in your tapes, and their technicians use professional-grade equipment to create high-quality digital copies. This is the most straightforward and reliable way to preserve your memories, especially if your tapes are old or you're not confident in your tech skills. You’ll receive your videos back as digital downloads, on a USB drive, or on DVDs, ready to be shared and enjoyed for years to come, all without you having to touch a single cable.
Option 3: Connect a VCR Directly to Your Computer
This is the classic do-it-yourself approach. It involves sourcing the components separately: a working VCR and a video capture device. If you don't have your old VCR anymore, you can often find one on platforms like eBay or at local thrift stores. The video capture device is the key piece of hardware that connects the VCR's analog output to your computer's USB port, converting the signal into a digital file. This method requires a bit more legwork than a pre-packaged kit, but it gives you the freedom to mix and match components to fit your specific needs and budget.
Option 3: Use Alternative DIY Methods
Beyond the standard converter kits, there are a few other creative ways to digitize your tapes, especially if you have other old electronics collecting dust or want to keep your budget as low as possible. These methods can be just as effective, though some require specific pieces of equipment you may or may not have on hand. They’re great alternatives for those who like to tinker with technology or are looking for a free or low-cost solution. Think of these as the resourceful routes to saving your home movies, each with its own unique setup and process that can get the job done without a traditional converter.
VCR/DVD Recorder Combos
If you can find one, a VCR/DVD recorder combo unit offers a very direct way to convert tapes. The process is as simple as it gets: put your VHS tape in one slot, a blank DVD in the other, and press a button to dub the video from the tape to the disc. This method is straightforward and doesn't require a computer for the initial transfer. However, the video quality is usually just fair, and you'll still need a computer with a DVD drive to "rip" the video file from the DVD for easy sharing and storage. It’s a solid, self-contained solution, but it adds an extra step to get a true digital file.
Standalone Recorders
Standalone video recorders are small devices that completely remove the computer from the recording process. You connect your VCR directly to the recorder using RCA cables, plug in a USB flash drive or a memory card, and hit record. Many of these gadgets have a small built-in screen so you can monitor the recording as it happens. This is a wonderfully simple option for anyone who feels intimidated by computer software. The main drawback is that the quality can vary significantly between different models, so it’s worth reading reviews before you buy one to ensure it meets your standards.
Using Old Camcorders
This is a more niche solution, but if you happen to have a digital camcorder from the early 2000s (like a MiniDV or Digital8 model), you might be in luck. Some of these cameras have an "analog pass-through" feature that allows them to function as a converter. You connect your VCR to the camcorder’s AV input, and then connect the camcorder to your computer, often with a Firewire cable. This method can produce excellent quality, but it depends on having the right camera and a computer with a compatible Firewire port, which is rare on modern machines, making this a highly specific setup.
Check Your Local Library
Many people are surprised to learn that their local public library may offer a free solution. A growing number of libraries have digitization stations equipped with VCRs, computers, and all the necessary software for converting VHS tapes. You can typically reserve a time slot to come in and work on your project. This is an amazing resource if you only have a few tapes to convert and don't want to invest in any equipment. Just be sure to bring your own external hard drive or USB drive to save your finished files before you leave.
Professional Service vs. DIY: Which Is Better?
When you decide to convert your VHS tapes, you’re standing at a fork in the road. One path leads to professional conversion services, where experts handle the entire process for you. The other path leads to DIY hardware, where you take the reins and manage the conversion yourself. There’s no single right answer here—the best choice depends on your budget, how much time you have, and how comfortable you are with technology.
Think of it this way: are you the type of person who prefers to hand their car over to a mechanic for an oil change, or do you enjoy rolling up your sleeves and doing it yourself? A professional service offers convenience and peace of mind, ensuring your irreplaceable memories are handled with care and expertise. This is a great option if you have just a few tapes or feel anxious about damaging them. The DIY route, on the other hand, can be more cost-effective if you have a large collection of tapes. It gives you complete control over the process, from setup to the final file format, but it does require a bit of a time commitment and a willingness to learn some new tech. Let's explore what each option entails so you can find the perfect fit.
A Look at Professional Conversion Services
Opting for a professional service is the most hands-off way to digitize your home movies. You simply pack up your tapes, send them to a company, and wait for your new digital files to arrive. These services are built for this exact task, using high-grade equipment that often produces better quality than consumer-grade converters. It’s an excellent choice if the thought of hooking up cables and troubleshooting software feels overwhelming. You’re not just paying for the conversion; you’re paying for the convenience, the expertise, and the security of knowing your memories are in good hands. Most services offer tracking and regular updates, so you’re never left wondering where your precious tapes are.
What to Expect from a Professional Service
When you choose a professional service, the process is refreshingly simple. You’ll typically receive a welcome kit with a sturdy box and instructions for packing your tapes. Once you send them off, the company’s technicians take over. They use specialized, high-end equipment to carefully capture the video from each tape, often cleaning and repairing minor issues along the way. This professional gear usually produces a much clearer and more stable digital file than you could get with a consumer-grade converter. After the transfer is complete, you’ll receive your original tapes back along with your new digital memories, which can be delivered as a digital download, on a USB drive, or even on DVDs.
Safety and Tracking Features
It’s completely normal to feel a little nervous about sending your one-of-a-kind home movies through the mail. Reputable companies understand this and have built their process around safety and transparency. Most services, including YesVideo, provide a trackable shipping label so you can follow your package’s journey to their facility. Once your order arrives, it’s barcoded and tracked throughout the entire digitization process. You’ll often receive email updates at key milestones, like when your tapes are received and when the transfer is complete. This system ensures you’re never left wondering where your precious memories are, giving you peace of mind from start to finish.
Turnaround Time and Rush Options
The time it takes to get your digital files back can vary depending on the service and how many tapes you have. Most companies provide an estimated turnaround time on their website, which can range from a few weeks to a couple of months. This timeline accounts for the careful, hands-on work required to digitize each tape properly. If you need your memories back for a specific event, like an anniversary or a family reunion, many services offer rush processing for an additional fee. It’s always a good idea to check the current processing times before you order, especially during busy holiday seasons.
Understanding Pricing Structures
Pricing for professional services is usually straightforward but can vary based on a few factors. The cost is often determined by the number of tapes you’re converting, the type of media—whether it’s VHS, film reels, or even photo albums—and the output format you choose. For example, a digital download might be the standard option, while a custom USB drive could add to the cost. Before you commit, take a moment to review the company’s pricing page. This will help you understand the total cost and ensure there are no surprises, allowing you to choose the package that best fits your budget and preservation goals.
YesVideo
As a leader in the industry, YesVideo has a long-standing reputation for quality and trust. We handle every order by hand right here in the USA, so you can be sure your memories are treated with personal care. We specialize in a wide range of formats beyond just VHS and provide you with a secure online account to view and share your videos, plus the option for a USB or DVD. Our video transfer service includes a 60-day online backup, giving you plenty of time to download and save your files.
Costco Photo Center
If you’re a Costco member, their photo center offers a straightforward and convenient digitizing service. You can drop off your tapes in-store, making it an easy addition to your regular shopping trip. They partner with YesVideo to process the orders, so you get the same trusted quality with the convenience of using a retailer you already know. They convert your tapes to DVD or provide a digital copy via Google Photos, making sharing with family simple.
Walmart Photo
Similar to Costco, Walmart Photo provides an accessible and affordable option for VHS conversion. With thousands of locations, it’s one of the most convenient drop-off services available. They also work with YesVideo to fulfill their orders, ensuring a professional touch on your home movies. This is a practical choice for anyone looking for a simple, no-fuss way to preserve their tapes without having to mail them out themselves.
Legacybox
Legacybox is another popular mail-in service known for its signature, crush-proof "Legacybox" that they send for you to fill with your media. They digitize not only VHS tapes but also film reels, photos, and audio cassettes. The all-in-one box makes it easy to round up different types of media from around your house and get them all converted in one go. They provide status updates throughout the process and deliver your digital files on a thumb drive, a DVD set, or through a cloud download.
Top-Rated DIY VHS to Digital Converters
If you’re feeling adventurous or have a large library of tapes to convert, the DIY approach might be for you. This route involves purchasing a video capture device that connects your VCR to your computer. While it requires more effort, doing it yourself gives you total control over the final product. You can choose the file format, tweak the quality settings, and edit the videos as you see fit. It can also be more economical if you have dozens of tapes, as you only have to buy the hardware once. Just be prepared to invest some time in the setup and recording process for each tape.
Elgato Video Capture
The Elgato Video Capture is widely praised for its simplicity and reliable performance. It’s a favorite for beginners because its software guides you through the connection and recording process step-by-step. The device is compatible with both Mac and PC and is known for producing high-quality digital files from your old tapes. If you want a user-friendly experience without a steep learning curve, the Elgato is an excellent starting point.
Diamond VC500
For those looking for a capable converter that won’t break the bank, the Diamond VC500 is a fantastic budget-friendly option. It comes with software that allows you to capture video and even burn it directly to a DVD. While the setup might be slightly more involved than with premium models, it delivers solid results for a fraction of the price. It’s a great choice if you’re on a tight budget or just want to test the DIY waters.
ClearClick Video to Digital Converter 2.0
What makes the ClearClick device stand out is its ability to work without a computer. You can connect it directly to your VCR or camcorder and record onto a USB flash drive or SD card. It even has a small built-in screen so you can see what’s being recorded in real-time. This feature makes it one of the simplest and most portable DIY options available, perfect for anyone who isn’t comfortable with installing computer software.
Roxio Easy VHS to DVD
Roxio has been a trusted name in media software for years, and its Easy VHS to DVD kit is a popular all-in-one solution. The package includes both the capture hardware and robust software that lets you convert your tapes, make simple edits like trimming unwanted footage, and create DVDs with custom menus. It’s a reliable choice that offers a bit more creative control than some of the more basic converters.
How to Set Up Your VHS to Digital Converter
Ready to roll up your sleeves and tackle that stack of VHS tapes? Setting up your own conversion station at home is a rewarding project that puts you in complete control of preserving your family’s history. It requires a few key pieces of equipment and a bit of patience, but seeing those old home movies come to life on your computer screen is well worth the effort. You’ll essentially be creating a bridge between your old VCR and your modern computer to transfer the video from one to the other.
The process involves connecting the hardware, configuring the software, and recording your tapes in real-time. While it’s a fantastic way to handle your video transfer yourself, it’s also a significant time investment. If you find the technical steps a bit daunting or simply don’t have the time, remember that professional services are always an option to get the job done for you. But if you’re excited to get started, let’s walk through exactly what you’ll need and how to connect it all.
Everything You'll Need: A Checklist
First things first, let's gather your tools. Having everything ready before you start will make the process much smoother. Here’s a quick checklist of what you’ll need to digitize your tapes:
- A VCR: Dust off your old VHS player. The most important thing is that it’s in good working condition with clean heads to avoid damaging your precious tapes.
- A Video Capture Device: This small but mighty gadget is the key. It connects your VCR to your computer and converts the analog video signal into a digital file. Popular options include the Elgato or Roxio devices.
- The Right Cables: You'll typically need a set of RCA cables (the ones with red, white, and yellow plugs) to link your VCR to the capture device.
- A Computer with Storage: Make sure your computer has a free USB port and plenty of hard drive space. Video files are large, so you might want an external hard drive handy.
- Capture Software: Some capture devices come with their own software. If not, free programs like OBS Studio are powerful alternatives that let you record and manage your settings.
Connecting Your VCR to Your Computer, Step-by-Step
Once you have all your gear, it’s time to get everything connected. It might look like a tangle of wires at first, but it’s pretty straightforward. Just follow these steps:
- Link the VCR and Capture Device: Plug the RCA cables into the "Output" jacks on the back of your VCR. Connect the other end to the "Input" jacks on your video capture device, matching the colors (yellow to yellow, red to red, etc.).
- Connect the Capture Device to Your Computer: Plug the USB end of your capture device into an open USB port on your computer. Your computer should recognize the new hardware and may install the necessary drivers automatically.
- Launch Your Software: Open your video capture software. In the settings, you’ll need to select your USB capture device as the video and audio source so the program knows where to pull the feed from.
A Simple Guide to the Recording Process
With everything hooked up, you’re ready for the main event: recording. This part happens in real-time, meaning a two-hour tape will take two hours to record onto your computer. Here’s how to do it:
- Load Your Tape: Pop a VHS tape into your VCR. It’s a good idea to rewind it to the very beginning before you start.
- Check Your Software: Before you hit record, look for a preview window in your software. You should see the live video feed from your VCR playing on your computer screen. This confirms everything is connected correctly.
- Press Play and Record: Start the tape in your VCR, and then immediately click the "Record" button in your software. Now, just let it run. Once the tape is finished, stop the recording in the software and save your new digital file.
MP4, MOV, or Something Else? Choosing a File Format
After your software has captured the video, it will ask you to save it as a digital file. You’ll see a few different file format options, but for home movies, one stands out above the rest.
MP4 is generally the best choice. Think of it as the universal language for video files. It strikes the perfect balance between maintaining good video quality and keeping the file size manageable. An MP4 file will play on almost any device—your computer, smartphone, tablet, or smart TV—without any trouble. This makes it incredibly easy to create a lasting digital library of your most important moments, from home movies to cherished photos, and share them with family and friends.
Simple Tips for the Best Conversion Quality
You’re going through all this effort, so you want your final videos to look as good as possible. While old VHS tapes will never look like modern HD video, a few simple tricks can significantly improve the quality of your transfer.
Before you begin, clean the heads on your VCR to remove any dust or residue that could cause a fuzzy picture. As the tape is playing, you can also try adjusting the tracking settings on your VCR to reduce static and improve clarity. Most importantly, once you have your digital files, back them up immediately. Save copies in at least two different places, like an external hard drive and a cloud storage service. This ensures your newly digitized memories are safe from hard drive failures or accidents, which is one of the best VHS converter options for long-term peace of mind.
Understanding Recording Modes
Before you start converting, it’s helpful to understand that not all VHS recordings are created equal. The quality of your final digital file is heavily dependent on the quality of the original tape. Back in the day, most VCRs offered different recording speeds to let you fit more footage onto a single cassette. The most common modes were SP (Standard Play), LP (Long Play), and EP/SLP (Extended Play/Super Long Play). SP offered the best quality but the shortest recording time, while EP/SLP squeezed the most hours onto a tape at the cost of video clarity. If your tapes were recorded in that "economy" EP/SLP mode, don't expect miracles from the conversion. The digital version will inherit that same softer, grainier look.
Advanced Setups for Higher Quality
For those who are tech-savvy and aiming for the absolute best DIY quality, a simple USB converter might not be enough. An advanced setup can produce noticeably better results, but it requires more specialized equipment, patience, and a bigger budget. This pro-level approach usually involves sourcing a high-quality S-VHS VCR, which provides a cleaner video signal than a standard model. Many enthusiasts also use a piece of hardware called a Time Base Corrector (TBC), which stabilizes the shaky, jittery picture common with old tapes. This setup can be frustrating for beginners, but it's the path to the best possible home conversion. It’s also the standard for professional services like YesVideo, where we use this type of equipment to ensure every video transfer is stable and clear, saving you the time and expense of building a complex rig yourself.
Troubleshooting Common DIY Conversion Problems
Taking on a DIY digitization project is a wonderful way to connect with your family’s history, but it’s not always a smooth ride. It’s completely normal to hit a few snags when you’re working with older technology. Knowing the common challenges ahead of time can save you a lot of frustration. From fuzzy playback to software that just won’t cooperate, most issues have a solution.
The key is patience and a bit of troubleshooting. Before you get overwhelmed, let’s walk through some of the most frequent problems you might encounter and what you can do about them. And remember, if a tape is especially precious or seems damaged, a professional service is always the safest bet for preserving those irreplaceable moments. For most other issues, a simple fix might be all you need to get back on track.
How to Fix Grainy Video and Muffled Audio
One of the most common frustrations is ending up with a digital file that’s blurry, distorted, or has missing audio. First, remember that the digital copy will only be as good as the original tape. A worn-out, degraded VHS will result in a lower-quality digital video. However, you can control the quality of the transfer itself. Double-check all your connections and software settings before you hit record. A quick test run can reveal issues with blurry video or sound problems. If the quality is still poor, your equipment might be the culprit, but often it’s the tape itself showing its age. For tapes that hold your most cherished memories, a professional video transfer can ensure the best possible outcome.
What If Your Equipment Isn't Compatible?
Getting your VCR, computer, and converter to talk to each other can feel like a puzzle. If your computer isn’t recognizing the video capture device, make sure you’ve installed the correct drivers and software that came with it. Sometimes a simple restart is all it takes. Also, inspect your RCA cables for any visible damage like frayed wires or bent pins, and test them on a TV to confirm they work. If you’re still having trouble, the issue might be the capture device itself. Not all converters are compatible with all operating systems, so check the manufacturer’s specifications to ensure it works with your computer.
What to Do With Damaged Tapes
Opening a box of old tapes can sometimes reveal some unpleasant surprises, like mold, moisture damage, or a snapped ribbon. If you find a tape that is visibly moldy or broken, stop right there. Do not put a moldy tape into your VCR. The mold spores can spread inside the machine and contaminate other tapes you play later. A broken tape requires careful splicing with special equipment. These situations are best left to experts who have the tools and experience to safely clean and repair delicate media. Entrusting damaged tapes to a professional digitizing service is the best way to salvage the footage without risking your equipment or other memories.
Solving Common Software and Driver Issues
Even with all the right gear, technical glitches can bring your project to a halt. You might see issues like dropped frames (where the video jumps or stutters), audio that doesn’t sync with the video, or software that repeatedly freezes or crashes. These problems often stem from your computer’s processing power or a conflict with the capture software. Try closing all other applications while you’re recording to free up system resources. If frames are still dropping, you may need to lower the recording quality in the software settings. These technical challenges require patience, and it’s easy to get discouraged if you’re not familiar with video editing software.
Fixing Audio Sync and Jumpy Video
It’s incredibly frustrating to spend an hour recording a tape, only to find the video stutters or the audio is a few seconds off. This usually happens because your computer is struggling to process the incoming video in real-time, causing it to drop frames or let the audio fall out of sync. The best first step is to close every other application running on your computer to free up system resources. If the video still looks jumpy, try lowering the recording quality slightly in your capture software’s settings. It’s a small trade-off that can make a huge difference. Before you commit to a full tape, always do a quick two-minute test run to check for these issues and make sure everything looks and sounds right.
How Much Time Does This Really Take?
Digitizing tapes isn’t a quick task—it happens in real time. That means a two-hour tape will take two hours to capture, and that doesn’t include the time for setup, troubleshooting, or editing the final video file. If you have a large collection of tapes, the hours can add up quickly, turning your weekend project into a month-long commitment. Be realistic about the time you can dedicate to the process. While it’s a labor of love, you have to set aside a significant, uninterrupted block of time for each and every tape you want to convert.
How to Organize and Protect Your Newly Digitized Videos
Congratulations! You’ve successfully converted your VHS tapes and saved your precious memories from fading away. Now comes the fun part: making sure those digital videos are safe, organized, and ready to be enjoyed for years to come. It might seem like a chore, but putting a simple system in place now will save you from the headache of searching through messy folders or, even worse, losing your files to a computer crash.
Think of this as building a digital home for your memories. Just like a physical photo album, you want it to be neat and easy to flip through. A good organization and backup plan ensures your videos are protected from accidental deletion, hardware failure, or file corruption. It also makes it incredibly easy to find that one specific clip of your toddler’s first steps or that hilarious moment from a family reunion decades ago. Taking these next steps turns a folder of video files into a living archive that you and your family can easily access and share.
The Best Way to Back Up Your Videos
The best way to protect your new digital files is to have them in more than one place. I recommend following a simple rule of thumb: keep at least three copies of your videos on two different types of storage, with one of those copies stored offsite. For example, you could keep one copy on your computer’s internal hard drive, a second copy on an external hard drive, and a third copy in a cloud storage service. This strategy covers all your bases. If your computer fails, you have the external drive. If something happens to your home, your offsite cloud copy is safe and sound.
Applying the "3-2-1 Rule" for Safety
Let's break down how this looks in practice. Your first copy can live on your computer’s main hard drive—that’s your go-to for easy access. For your second copy, grab an external hard drive. This is crucial because it separates your files from your computer, protecting them if your laptop ever crashes. Finally, your third copy should be offsite, and the easiest way to do this is with a cloud storage service like Google Drive, Dropbox, or iCloud. This offsite backup is your ultimate safety net, ensuring your memories are safe even if something were to happen to your home. Following this simple plan means you've created a secure system to preserve your home movies for good, giving you total peace of mind.
Cloud vs. Hard Drive: Where to Store Your Videos
Video files, especially high-quality ones from your home movies, can be quite large. A single digitized tape can take up several gigabytes of space, so your computer’s hard drive might fill up quickly. An external hard drive is a great investment for giving your files a dedicated home. For your offsite backup, a cloud storage service like Google Drive, Dropbox, or the MemoryCloud that comes with your YesVideo digital media transfer is perfect. Cloud storage not only keeps your files safe elsewhere but also makes it simple to share videos with family and friends with just a link. A mix of both physical and cloud storage is the most secure approach.
How to Create a Simple File Organization System
To avoid a digital shoebox full of randomly named files, create a clear folder and naming system from the start. I suggest creating one main folder called “Family Videos.” Inside that, make subfolders for each year (e.g., “1990,” “1991,” “1992”). Then, give each video file a descriptive name. Instead of “MOV_001.mp4,” try something like “1992_Moms_40th_Birthday.mp4” or “1995_Family_Vacation_Grand_Canyon.mp4.” Using a consistent format like Year-Event helps keep everything chronological and makes searching for a specific memory a breeze. It’s a small step that makes a huge difference.
Quick Tips for Managing Your Video Files
Once your videos are organized, a little ongoing maintenance will keep them in great shape. You can use free video editing software, like iMovie on Mac or Photos on Windows, to trim out any unwanted parts, like when the camera was accidentally left recording the floor. It’s also a good practice to check on your files every few years. As technology changes, you may want to move your archive to newer storage devices. This is also a great time to make sure your backups are current. And don’t forget to share! The whole point of preserving these memories, whether from video, photo albums, or a film transfer, is to relive them with the people you love.
Considering File Size and Storage Space
One thing you'll notice right away is that video files are big. A single digitized tape can easily take up several gigabytes of space, which means your computer’s hard drive can fill up much faster than you’d expect. That’s why an external hard drive is such a smart investment; it gives your new digital archive a dedicated home, separate from your everyday computer files. For your offsite backup, a cloud storage service is the perfect partner to your physical drive. Services like Google Drive, Dropbox, or the MemoryCloud that comes with your YesVideo digital media transfer keep your files safe and accessible from anywhere.
Creating a Long-Term Storage Strategy
The single best way to protect your newly digitized memories is to make sure they exist in more than one place. I always recommend a simple but powerful strategy: keep at least three copies of your files, on two different types of storage, with one of those copies stored somewhere else entirely (offsite). This approach covers all your bases. If your computer’s hard drive suddenly dies, you still have your copy on the external drive. And if something were to happen to your home, like a fire or flood, your offsite copy in the cloud is completely safe and sound. It might sound like a lot, but this simple system gives you true peace of mind, knowing your family’s story is secure no matter what.
DIY vs. Professional Service: Which Is Right for You?
Deciding how to convert your VHS tapes is a big step. On one hand, you have the do-it-yourself (DIY) route, which gives you full control. On the other, you have professional services that handle everything for you. There’s no single right answer—it really comes down to what you value most. Are you looking for a weekend project and enjoy tinkering with technology? Or is your main goal to get high-quality digital copies of your memories with the least amount of hassle?
Think about your budget, how much free time you have, your comfort level with tech, and how important the final video quality is to you. Answering these questions will help you choose the path that makes the most sense for your family’s precious videos. Let’s walk through each of these factors so you can feel confident in your decision.
Let's Talk Money: A Cost Comparison
At first glance, the DIY approach seems like the more budget-friendly option. You buy the equipment once and can convert as many tapes as you want. However, the costs can add up. A reliable converter can set you back over $150, and that’s assuming you already have a working VCR. If you don’t, you’ll need to find one. Professional services have a clear per-tape or per-hour cost. While the upfront price might be higher, you’re paying for convenience, expertise, and professional-grade equipment. It’s an investment in getting the job done right without any hidden costs or the need to buy your own gear.
Considering the Time Commitment
Your time is valuable, and converting tapes yourself requires a lot of it. You’ll need to set up the equipment, install software, and then digitize each tape in real time—a two-hour tape takes two hours to record onto your computer. That doesn’t include the time spent troubleshooting or editing the final files. If you have a large collection, this can easily turn into a project that spans weeks or months. A professional video transfer service saves you all that time and effort. You simply pack up your tapes, send them in, and wait for your digital memories to arrive.
How Tech-Savvy Do You Need to Be?
Let’s be honest: the DIY route requires a bit of technical know-how. You’ll need to be comfortable connecting cables, installing drivers, and working with video capture software. Sometimes the equipment doesn’t cooperate, and you might find yourself searching through online forums for solutions. If you’re not a fan of troubleshooting tech, it can quickly become a frustrating experience. If you’d rather avoid any potential headaches, a professional service is the way to go. The technicians have the experience and specialized equipment to handle the entire film transfer process smoothly.
Comparing the Final Video Quality
The quality of your digital video will always depend on the condition of the original VHS tape. However, the equipment you use plays a huge role. Cheaper DIY converters can produce fuzzy or washed-out videos, which might not be the result you were hoping for. Professional services use high-end equipment that is maintained and calibrated to get the best possible picture and sound from your tapes. They can often correct minor issues and produce a clearer, more stable video than most home setups can achieve. When you’re preserving priceless memories, that extra quality makes all the difference.
Related Articles
- Convert VHS to Digital: The Ultimate 2024 Guide
- Best VHS Video to Digital Converters: Top Picks
- VHS to DVD: Top Transfer Services & DIY Guide
Frequently Asked Questions
How long do I really have before my VHS tapes go bad? Think of your tapes as having a general lifespan of about 15 to 20 years before the magnetic tape starts to seriously degrade. It’s not a hard deadline, but the longer you wait, the more you risk faded colors, distorted sound, and permanent data loss. The bigger issue is that with each passing year, working VCRs become harder to find. You’re essentially in a race against both the physical decay of the tape and the obsolescence of the technology needed to play it.
Is a professional service worth the cost compared to a DIY kit? This really comes down to what you value more: your time or your budget. A DIY kit can be more cost-effective if you have a large collection of tapes and enjoy a hands-on project. However, you have to be prepared for the time commitment and potential technical troubleshooting. A professional service is an investment in convenience and peace of mind. You’re paying for experts to use high-end equipment to get the best possible quality from your tapes, letting you skip the work and get straight to enjoying your memories.
What should I do if I find a tape that looks damaged or moldy? If you see a tape with visible mold or a snapped ribbon, do not put it in your VCR. Mold can permanently damage your player and spread to other tapes you play afterward. Broken tape requires special tools and a delicate touch to splice back together. In these situations, your best and safest option is to trust a professional service. They have the right equipment and expertise to safely clean and repair damaged media, giving you the best chance of saving those precious memories.
Will my digitized videos look like modern HD videos? It’s important to have realistic expectations about the final quality. The digitization process creates a perfect digital copy of the video as it exists on the tape today; it can’t add detail that was never there. Your final files will have the same standard-definition look and feel of the original home movies. The goal is to faithfully preserve that nostalgic quality and stop any further degradation, not to transform it into a modern HD production.
Once my videos are digital, what’s the best way to make sure I don’t lose them? The safest approach is to have multiple copies in different locations. A great rule to follow is to keep one copy on a physical device, like an external hard drive, and another copy in a secure cloud storage service. This protects your memories from a single point of failure, like a computer crash or a lost drive. Taking this final step ensures your family’s digital archive is truly safe and accessible for generations to come.